
Activity
Overview
The core building blocks for the Staff Kiosk Assessment programs are Activities.
An Activity is defined as ‘a task for students to complete'. Activities can be non-assessable tasks like Homework or assessable tasks with Learning Objectives and Assessment Criteria contributing to final grades.
Staff Kiosk has several programs that allow you to create Activities:
Staff Kiosk Home Page > My Timetable. Use the Hamburger menu and select 'Create Activity'.
Staff Kiosk Home Page > My Timetable. Use the Hamburger menu and select 'Create Homework' (this would only be used for Homework Activities that are non-assessable).
Rollcall > Class Rollcall. Use the Hamburger menu and select 'Create Activity'.
Assessment > Learning Objects (Maintain & Assign). Use the 'Create Learning Object' button and select 'Activity'.
Assessment > Markbook > Activity Setup. Use the ‘New Activity’ button to create a new Activity.
Activities added using these programs can:
Optionally require students to submit a file online.
Be added into the school's Central Repository.
Allow for digital Resources to be attached.
Be assigned to a Subject class.
Be assessable (using Assessment Criteria Objectives) or be non-assessable.
Several ‘Assessment Methods’ are available for Activities:
Not assessable (e.g. Homework).
Using Objectives with Assessment Criteria and Calculation Rules to the calculate students' final grades. You can mark these types of Activities using Staff Kiosk Assessment > Markbook > Activity Assessment.
Using Objectives with Assessment Criteria that do not need to be calculated. You can mark these types of Activities using Staff Kiosk Assessment > Markbook > Enter Results and Comments.
The Objectives to be used and not used in calculations are defined by the ‘Progressive Assessment Type’ setup in TASS.web Student Admin > Academic Reporting > Setup Information > Assessment Setup on the 'Result Formats' tab.
An alternative Activity option is ‘Standalone’. Generally, Activity (Standalone) is used for Activities that are assessed using your own marking criteria and do not get transferred into Markbook. The Activity (Standalone) program uses the old-style multi-step program. From here you can include an Online Test, use 'Standalone' assessment, assign to a custom group (using student-based searching to create a new group or using an existing group created through 'My Groups). For more information, see the Activity (Standalone)Activity (Standalone)article on Knowledge Base.
Create an Activity
The 'Create Activity' program is designed as a rapid entry screen, allowing you to create an Activity and automatically assign it to a subject class.
Staff Kiosk will also automatically save the Activity that is created in the Learning Object Repository under the 'Subject Area' and 'Year Level' that this subject class belongs to.
The ‘Reporting Period’ that they Activity sits within is determined by the ‘Year’ and ‘Semester’ setup in Staff Kiosk Assessment > Parameters (Setup). To create an Activity for a different 'Reporting Period’ you must change this parameter to reflect the ‘Reporting Period’ that the Activity will be assessed in.
Check out the ▶️ Create and Assign Assessment Activities in Staff Kiosk video for more information on creating and assigning assessable activities that will appear in Markbook.
Subject Class | If you are creating this Activity using Staff Kiosk Home Page > Timetable or Rollcall using the Hamburger menu, then this field will display the subject you selected. If you are creating this Activity using Staff Kiosk Assessment > Learning Objects (Maintain & Assign), then you will need to select the subject from the drop-down list. Teachers can see their own classes in the drop-down list. H.O.D.'s and Department Administrators can see all subjects within their assigned departments. | |||||||||||||||
Activity Name | For example, 'Book Review on Captain Corelli's Mandolin'. The 'Activity Name' will appear in the Learning Objects Repository under:
Important! If this Activity will be displayed on Academic Reports, care should be taken when entering an 'Activity Name'. The text entered here will be displayed as an 'Objective' when using TASS.web Student Admin > Academic Reporting > Report Processing > Generate Student Reports. | |||||||||||||||
add to My Learning Objects or add to Central Repository | This field determines the first/top level folder in the Learning Object Repository that this Learning Object will be filed under. 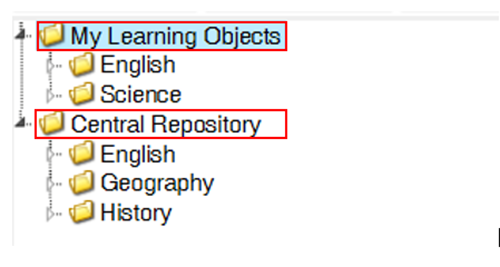 This Learning Object Repository is best described as a filing cabinet for Learning Objects. Every Learning Object that you create by using either Staff Kiosk Assessment will be filed in this repository. The repository is divided into:
Add to My Learning Objects By selecting this option, this Learning Object will be added to your personal 'My Learning Objects' repository. It will not be added to the school's Central Repository for sharing with other teachers. Add to Central Repository By selecting this option, this Learning Object will be added to the school's Central Repository under the Subject Area you have chosen. This Learning Object will be visible to all teachers in Staff Kiosk Assessment > Learning Objects (Maintain & Assign). Where this field is disabled, the following message will display “Central Repository has not been set up for the Subject Area that you have chosen”. Administrator Note: You can determine the availability and default for this button by using TASS.web Student Admin > Student Records > Setup Information > Student Records Setup on the 'Subjects Areas' tab. This field will be the default option where a Central Repository has been set up for the Subject Area that the teacher has chosen and the school has indicated that content created for this Subject Area, should be added to the Central Repository. | |||||||||||||||
Topic or Enter a New Topic | This is important as it will determine the fourth level in the Learning Object Repository that this Learning Object will be filed under. 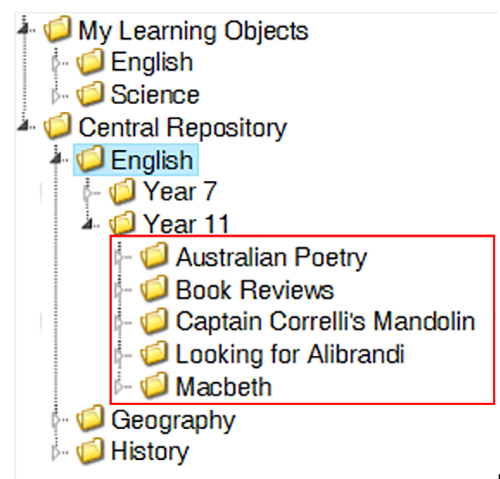 A topic is best described as a unit of work. For example in English, students may be studying a topic of Poetry. If you have chosen to add this Learning Object in the Central Repository, this field will provide a list of Topics that already exist in the Central Repository for the Subject Area you have selected. Where you have chosen to file this Learning Object in 'My Learning Objects', this field will provide a list of Topics that you have previously created. Choose from an existing Topic or alternatively, create a new Topic using the 'Enter a New Topic' field. Your school may not allow new Topics to be created in the Central Repository using this screen. If this is the case, and you require a new Topic, please see your Administrator. There is an option to ‘Allow Central Repository Topic creation in Learning Objects’ in Staff Kiosk Assessment > Parameters (Setup). | |||||||||||||||
Please Enter the outline or instructions for this Activity: | Enter the instructions for this Activity here. The rich text editor can be used to format the appearance of the text you enter. For example, bold, italicise and underline. If you are using a tablet device (i.e. iPad), write your outline or instructions first, then highlight/select the text you have entered. The formatting tools will then become available. | |||||||||||||||
Attach Existing Resources | There are two methods available to attach existing Resource(s) from the Learning Object Repository to this Activity:
Click the 'document' icon to view or download each Resource you have attached. | |||||||||||||||
Attach New Resource | This tool allows you to attach a file such as a Word® Document, PDF etc. to this Activity. Attachments will also be saved as Resources in the Learning Objects Repository under the 'Subject Area' and the 'Year Group' for this subject class and the 'Topic' you select above. Two options are available to attach a file to this Activity:
| |||||||||||||||
Attach Existing Rubric | Use this field to attach a rubric to this Activity. Important! The rubric must be in PDF format. The rubric attached here will be displayed as a Resource against the Activity when viewed by students in Student Café. The rubric can then be annotated on (marked) and provided back to the student as a 'Final – Assessed Rubric' file. Rubrics are created and stored as a Resource in the Learning Object Repository. There are 2 methods available to attach an existing rubric Resource from the Learning Object Repository to this Activity:
Click the 'document' icon to view or download each rubric you have attached. | |||||||||||||||
Attach New Rubric | This tool allows you to attach a new rubric to this Activity. New rubric attachments will be saved as a Resource in the Learning Objects Repository under the 'Subject Area' and the 'Year Group' for this subject class and the 'Topic' you select above. Two options are available to attach a rubric to this Activity:
| |||||||||||||||
Will you be assessing this Activity? | Select 'Yes' if students will be marked on their completed work using Objectives. The current Objectives (setup for this subject in TASS.web Result Formats) will display below in the 'Assessment Criteria' section. Select 'No' if this Activity does not need to be marked. If there are no Reporting Periods available to you, please see your system administrator or refer to 'Why are there no Reporting Periods available for my Activity?'. | |||||||||||||||
Select the Reporting Period from which the Objectives will be derived | This field is only active when ‘Will you be assessing this Activity?' is set to ‘Yes' and there are multiple reporting periods open for the same 'Year’ and 'Semester’. Ensure that the Activity you are creating is applied to the correct reporting period. The current ‘Term’ and ‘Semester' is set in Staff Kiosk Assessment > Parameters (Setup). | |||||||||||||||
Are students required to submit a file? | Select 'Yes' if students will be required to submit a digital file of their completed work through Student Café. Students' submitted files are accessed using Staff Kiosk Assessment > Activity Planner > Activity Assessment Screen. | |||||||||||||||
Allow Late Submissions | This field is only active when the 'Are students required to submit a file' is set to 'Yes' for the Activity. By default, this will be ticked, and students will be allowed to submit this Activity in Student Café past the designated due date and time. Untick this to disallow late submissions of this Activity by students. Students will receive the following message when they submit their work late: 'The Due date has passed, and your work will be flagged as Late.' When you access the student's Activity via Staff Kiosk Assessment > Activity Planner on the 'Activity Assessment' screen and click the 'Assess' button in the 'Action' column, a 'red alert' symbol will be displayed indicating that the student file was submitted late. When a parent accesses the student's Activity via Parent Lounge Student Details > Curricular Activities and click the active link on the 'Activity Name', a 'red alert' symbol will be displayed indicating that the student file was submitted late. | |||||||||||||||
Display in Parent Lounge | Use this field to indicate if parents will be able to see this Activity in Parent Lounge program Student Details > Curricular Activities. The ‘Display in Parent Lounge’ checkbox only controls the visibility of the Activity in Parent Lounge Student Details > Curricular Activities program. When the ‘Display in Parent Lounge’ checkbox is unticked, the Activity information will still be available in the 'My Assessments' Calendar Feed within the Parent Lounge Calendar > eDiary program. | |||||||||||||||
Display on Academic Report | Use this field to indicate if this Activity will be displayed when generating student Academic Reports using TASS.web Student Admin > Academic Reports > Report Processing > Generate Student Reports. The following Activity details can be printed:
Only assessable Activities can be displayed; therefore, this field will be disabled if the 'Will you be Assessing this Activity' option above is set to 'No'. | |||||||||||||||
Calculate Activity Total Score | Tick this option to include an 'Activity Total Score' for this Activity. Once this Activity has been assigned and marking has been completed, a 'Calculate' tool will allow you to automatically calculate the overall (total) result for this Activity. An example of a typical calculation might be:
The 'Activity Total Score' can then be viewed and calculated in Staff Kiosk programs:
| |||||||||||||||
Assign to all Subject Classes (View Classes Link) | Tick this field to automatically assign this Activity to all classes for this subject. For example, English Year 11 comprises of three classes; A, B and C. Ticking this field will assign the Activity to all three classes. To view a list of subject classes that the Activity will be assigned to, click the 'View Classes' link. If you tick this checkbox, you can nominate different 'Draft' and 'Due Dates' below for the various classes. | |||||||||||||||
Assessment Criteria | This section of the screen becomes active when 'Will you be assessing this Activity?' above, is set to 'Yes'. The Assessment Criteria section displays the Objectives your Academic Reporting Administrator has defined as the ‘Result Format’ for the Subject Class, Reporting Period and Report Type, in TASS.web program Student Admin > Academic Reporting > Setup Information > Assessment Setup on the ‘Result Formats’ tab. The 'Assessment Range' and 'Max Score' fields display the allowable results that can be entered when marking each Objective. For example, A+ to E– or a score out of 100. Your school may have set up some Objectives that are not used in calculations. These Objectives will be appended with an asterisk (*). Use in Activity Select the Objectives that you would like to use for this Activity by ticking the corresponding 'Use in Activity' checkbox. Click the 'grid with a tick' icon to tick all Objectives displayed. Overwrite Max. Result If you have selected an Objective that uses a numeric 'Range' (for example a score out of 100), a box will be displayed in this column with the 'Max Score' value. You can change the maximum score for this Objective by changing the value in this field. For example, you want to mark an Objective out of 80 instead of the original 'Max Score' of 100. Weighting If you intend to use the ‘Calculate Results’ (automatic calculation tool) in Staff Kiosk Assessment > Markbook > Activity Assessment to calculate results, this field is important. For each Activity you can nominate:
The 'Final Results' calculation tool uses:
….to calculate a final result for this Objective. It is much simpler to set up the subject so that the total of the 'Weightings' for each Objective equals 100%. If however, the total does not equal 100%, then the calculation will still correctly calculate the 'Final Results' for each Objective by apportioning the individual percentages to equal a total of 100% (apply an adjusted weighting). This only applies if you intend to use the Calculation Rules. There is also an option in Staff Kiosk Assessment > Markbook > Activity Assessment that allows you to export your raw scores to an Excel® sheet to perform more complex calculations. If this is your preferred way of working, the 'Weighting' that you enter here is for reference purposes only. If the weighting is to be the same for all Objectives in this Activity, enter the first one and use the 'down arrow' icon. These weightings for each Objective can also be adjusted in Staff Kiosk Assessment > Markbook > Activity Assessment in the ‘hamburger’ menu for each Objective. | |||||||||||||||
Preview Date and Time | This is the date and time that basic details relating to this Activity will be displayed to students in Student Café and (optionally) parents in Parent Lounge. From this date and time until the 'Start Date' and 'Start Time' (that you enter directly below), the following Activity details will be available to students and (optionally) parents:
Basic details for this Activity will also be visible to students in their eDiary (Student Café) on the date and time you enter here. | |||||||||||||||
Start Date and Time | This is the date and time that the full Activity details will be displayed to students in Student Café and (optionally) parents in Parent Lounge. If this is a 'File Submission' Activity, students can use Student Café to submit a file after this date and time. A full record for this Activity will also be visible to students in their eDiary (Student Café) on the date and time you enter here. | |||||||||||||||
Draft Required | Tick this checkbox if you require students to submit a draft for this Activity. | |||||||||||||||
Draft Date and Time | If you ticked the 'Draft Required' checkbox directly above, you must enter the date and time that students must submit a draft copy for this Activity. | |||||||||||||||
OR select Draft Date by timetable lesson | An alternative to entering a draft date and time (above) is to have the system calculate them based on an upcoming lesson. Use the drop-down list to select the lesson by which the students must complete the draft for this Activity, and the program will automatically calculate the date and time. | |||||||||||||||
Due Date and Time | This is the date and time that students must submit a final copy of this Activity. If this is a 'File Submission' Activity, students will not be able to use Student Café to submit a file after this date and time (unless late submissions have been allowed). An 'Activity Due' reminder will also be visible to students in their eDiary (Student Café) on the date and time you enter here. | |||||||||||||||
OR select Due Date by timetable lesson | An alternative to entering a due date and time (above) is to have the system calculate them based on an upcoming lesson. Use the drop-down list to select the lesson by which the students must complete the Activity, and the program will automatically calculate the date and time. | |||||||||||||||
Delay Results | By default, at the time that you enter results and comments against each student's completed work, they will be visible to students in Student Café and (optionally) parents in Parent Lounge. Use this field to nominate the same delayed date and time that all students in the class will be able to see their results and comments for this Activity. For example, the Activity is due on Tuesday, and the results will be available on Friday, giving you a few days to complete marking for the entire class. | |||||||||||||||
Delay Date and Time | This is the date and time that results and comments for this Activity will be visible to students in Student Café and (optionally) parents in Parent Lounge. | |||||||||||||||
Save | Click the 'Save' button to create the Activity and assign it to this subject class. Once you have saved the record, you can ‘Edit', 'Assess' or mark the students as having completed the Activity using Staff Kiosk Assessment > Activity Planner on 'Activity Assessment’ screen. Check out the ▶️ View and Maintain Assessment Activities in Staff Kiosk and ▶️ Assess and Enter Results for Assessment Activities in Staff Kiosk videos to see the features available in Staff Kiosk after clicking Save! |
