
My Classes [Subject Class] Screen
Overview
The ‘subject class screen’ in Staff Kiosk Assessment > My Classes offers several key functionalities for managing class activities and resources.
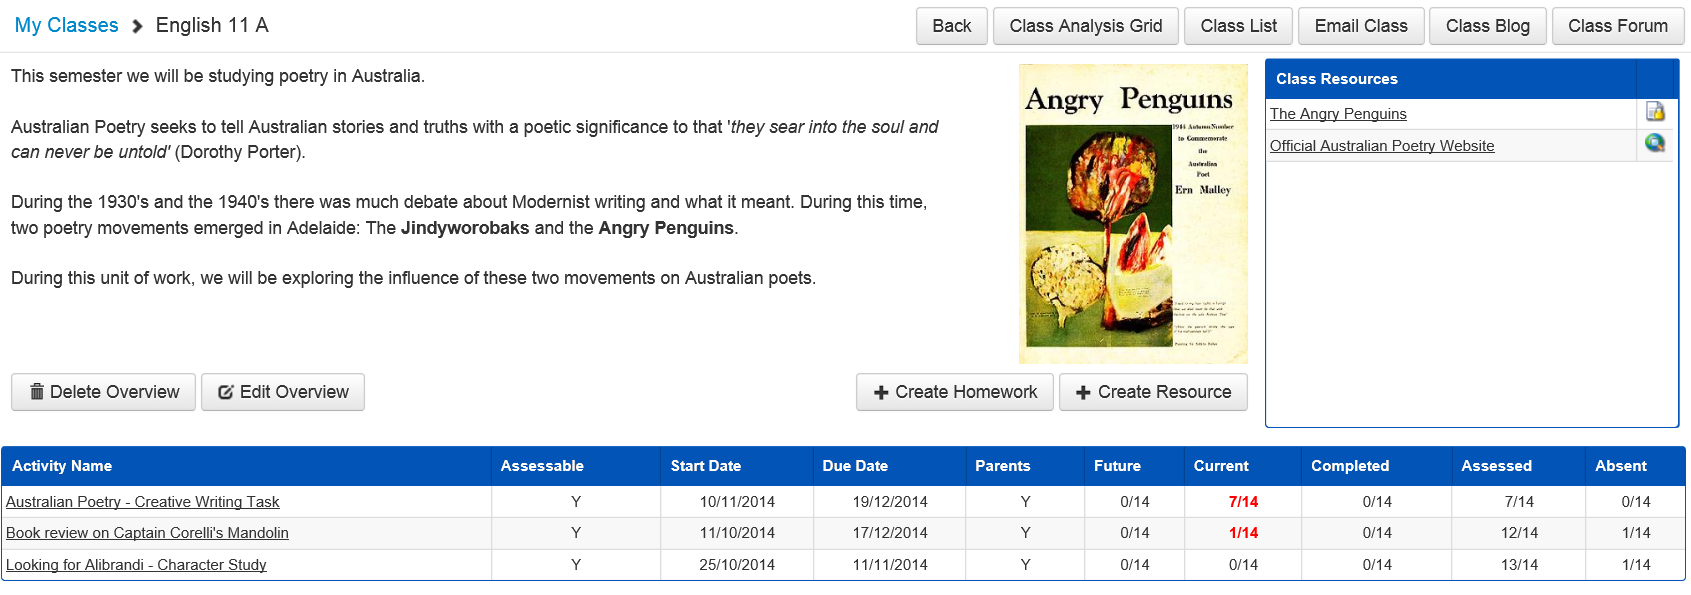
This is an example of the ‘My Classes [Subject Class]' screen, also known as the 'Class Homepage Screen’:
Subject Class Overview
The text and images that you enter here are visible to students in Student Café in the My Classes > Current Classes and My History > Classes menus.
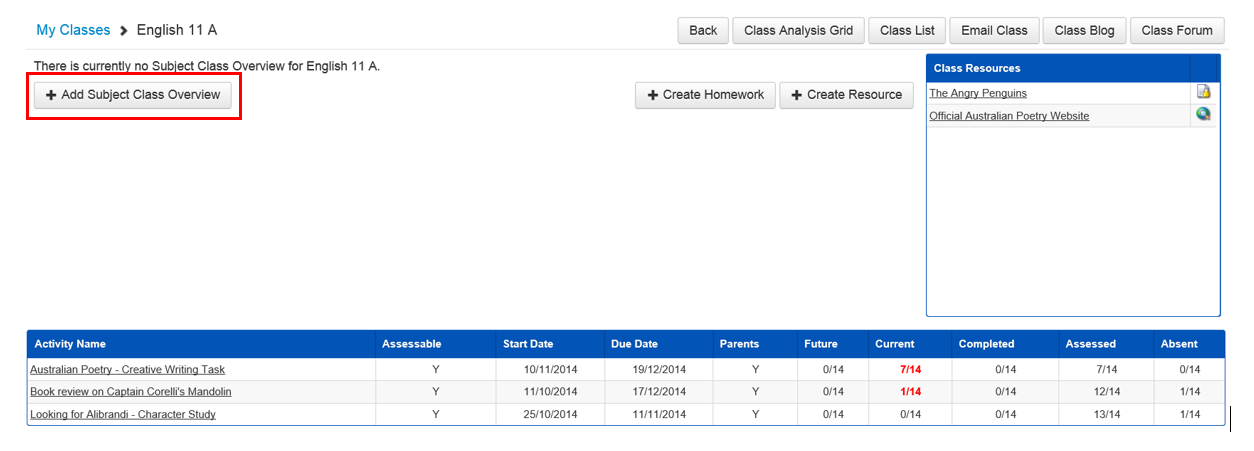
Click the 'Add Subject Class Overview' button to create a new overview for this class.
Subject Class Overview Text
Enter the subject overview text that will display in the students' class homepage in Student Café.
The rich text editor can be used to format the appearance of the text you enter.
For example: bold, italicise and underline.
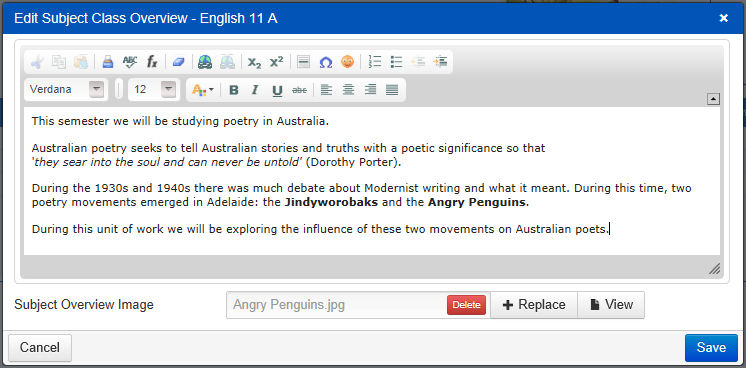
Subject Class Overview Image
If there is no image currently loaded for this subject class, click on the 'Choose' button next to the 'Subject Overview Image' field and navigate to select the image you want to upload.

This program and Student Café will resize the image to fit within the subject class homepage if the image is higher than 250 Pixels.
Images that you attach here should be of a low-resolution type. If you attach a high-resolution image (which will have a large file size) the Subject Class page will load slowly.
Once a file has been selected, you can click on the 'View' button to check the image.
If there is an image already loaded for this subject class overview you can click the 'Delete' button to remove it or the 'Replace' button to change it to another image.
Click the 'Save' button when you have entered your text and/or image.
Click the 'Edit Overview' button to change the overview text or embedded image.
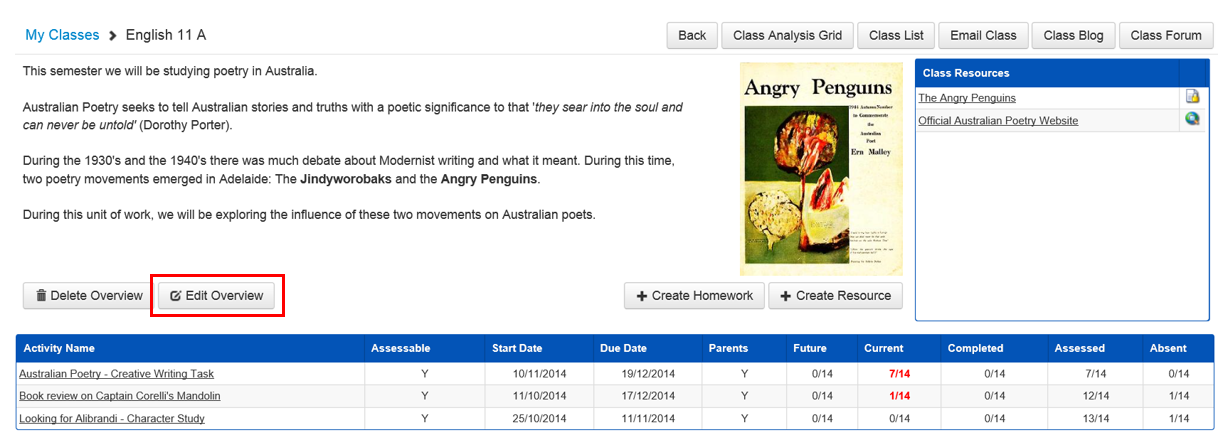
Click the 'Delete Overview' button to remove the overview from the students view in Student Café.
Class Homework
You can add homework for this class by clicking on the 'Create Homework' button. When you use this facility to create a homework, it will automatically be assigned to the class as a non-assessable Activity.
Staff Kiosk will also automatically save homework that is created in this class homepage as an Activity in the Learning Object Repository under the 'Subject Area' and 'Year Level' that this subject belongs to.
This is designed to be a rapid entry program. It is possible to enter information into all of the fields below, however, information is only mandatory for the fields indicated below.
Field Name | Details | Field Type |
|---|---|---|
Activity Name | For example, Tuesday night's homework. The homework 'Activity Name' will appear in the Learning Objects Repository under:
| Mandatory. |
add to My Learning Objects or add to Central Repository | This field determines the first/top level folder in the Learning Object Repository that this Learning Object will be filed under. 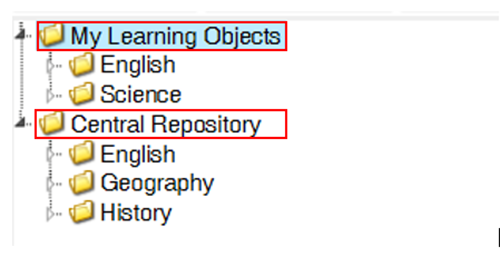 This Learning Object Repository is best described as a filing cabinet for Learning Objects. Every Learning Object that you create by using either Staff Kiosk Assessment will be filed in this repository. The repository is divided into:
Add to My Learning Objects By selecting this option, this Learning Object will be added to your personal 'My Learning Objects' repository. It will not be added to the school's Central Repository for sharing with other teachers. Add to Central Repository By selecting this option, this Learning Object will be added to the school's Central Repository under the Subject Area you have chosen. This Learning Object will be visible to all teachers in Staff Kiosk Assessment > Learning Objects (Maintain & Assign). Where this field is disabled, the following message will display “Central Repository has not been set up for the Subject Area that you have chosen”. Administrator Note: You can determine the availability and default for this button by using TASS.web Student Admin > Student Records > Setup Information > Student Records Setup on the 'Subjects Areas' tab. This field will be the default option where a Central Repository has been set up for the Subject Area that the teacher has chosen and the school has indicated that content created for this Subject Area, should be added to the Central Repository. | |
Topic | This is important as it will determine the fourth level in the Learning Object Repository that this Learning Object will be filed under. 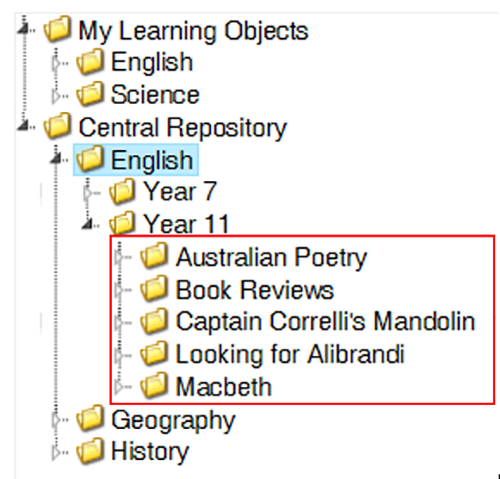 A topic is best described as a unit of work. For example in English, students may be studying a topic of Poetry. If you have chosen to add this Learning Object in the Central Repository, this field will provide a list of Topics that already exist in the Central Repository for the Subject Area you have selected. Where you have chosen to file this Learning Object in 'My Learning Objects', this field will provide a list of Topics that you have previously created. Choose from an existing Topic or alternatively, create a new Topic using the 'Enter a New Topic' field. Your school may not allow new Topics to be created in the Central Repository using this screen. If this is the case, and you require a new Topic, please see your Administrator. There is an option to ‘Allow Central Repository Topic creation in Learning Objects’ in Staff Kiosk Assessment > Parameters (Setup). | Mandatory. |
Please enter the outline or instructions for this homework activity | Enter the instructions for the students for this homework Activity here. The rich text editor can be used to format the appearance of the text you enter. For example, bold, italicise and underline. | Mandatory. |
Are students required to submit a file Yes/No | Select 'Yes' if students will be required to submit a digital file of their completed work through Student Café. Students' submitted files are accessed using Staff Kiosk Assessment > Activity Planner > Activity Assessment Screen. | |
Allow Late Submissions | This field is only active when 'Are students required to submit a file' is set to 'Yes'. By default, this will be ticked and students will be allowed to submit this homework in Student Café past the designated due date and time. Untick this to disallow late submissions of this homework by students. Students will receive the following message when they submit their work late 'The Due date has passed and your work will be flagged as Late.' When you access the student's homework via Staff Kiosk Assessment > Activity Planner > Activity Assessment Screen and click 'Assess' in the 'Action' column, a 'red warning; icon will be displayed indicating that the student file was submitted late. When a parent accesses the student's homework via Parent Lounge Student Details > Homework and clicks the active link on the ‘Activity Name', a ‘red warning’ icon will be displayed indicating that the student file was submitted late. | |
Attach Existing Resource | There are 2 methods available to attach existing Resource(s) from the Learning Object Repository to this homework:
 From the list provided, click on the Resource that you want to attach to this homework. Click the 'document' icon to view or download each resource you have attached. | |
Attach New Resource | This tool allows you to attach a file such as a Word® Document, PDF etc to this homework Activity. Attachments will also be saved as Resources in the Learning Objects Repository under:
Two options are available to attach a file to this homework Activity:
| |
Preview Date and Time | This is the date and time that basic details relating to this homework Activity will be displayed to students in Student Café and (optionally) parents in Parent Lounge. From this date and time until the 'Start Date' and 'Start Time' (that you enter directly below), the following homework Activity details will be available to students and (optionally) parents:
Basic details for this homework Activity will also be visible to students in their eDiary (Student Café) on the date and time you enter here. | Mandatory. However, you don't have to change this unless the homework is not to be immediately available for students and parents to preview. |
Start Date and Time | This is the date and time that the full homework Activity details will be displayed to students in Student Café and (optionally) parents in Parent Lounge. If students are required to submit a file for this homework Activity they can use Student Café to do so after this date and time. A full record for this homework Activity will also be visible to students in their eDiary (Student Café) on the date and time you enter here. | Mandatory. However, you don't have to change this unless the homework is not to be immediately available for students and parents. |
Due Date and Time | This is the date and time by which students must complete this homework Activity. If students are required to submit a file for this homework Activity they will not be able to use Student Café to submit a file after this date and time. An 'Activity Due' reminder will also be visible to students in their eDiary (Student Café) on the date and time you enter here. | Mandatory. |
OR select Due Date by timetabled lesson | An alternative to entering a due date and time (above) is to have the system calculate them based on an upcoming lesson. Use the drop-down list to select the lesson by which the students must complete the homework Activity and the program will automatically calculate the date and time. | |
Display in Parent Lounge | Use this field to indicate if parents will be able to see this Homework Activity in Parent Lounge Student Details > Curricular Activities. The ‘Display in Parent Lounge’ checkbox only controls the visibility of the Activity in Parent Lounge Student Details > Curricular Activities program. When the ‘Display in Parent Lounge’ checkbox is unticked, the Activity information will still be available in the 'My Assessments' Calendar Feed within the Parent Lounge Calendar > eDiary program. | |
Save | Click the 'Save' button to create the homework Activity and assign it to this class. Once you have saved the record, you can 'Edit' or mark the students as having completed the homework Activity using Staff Kiosk Assessment > Activity Planner > Activity Assessment Screen. |
Class Resources
Resources that are currently assigned to this subject class will be displayed on the right-hand side of the 'My Classes > [Subject Class]' screen.
These Resources will display in the students' class homepage in Student Café.
Use the 'Create Resource(s)' button to create and assign new Resources to this class.
Use the 'Unassign All Class Resources' button to quickly remove all resources currently available students in Student Café.
You would use this where students are about to start a new unit of work and no longer need access to the previous unit's resources.
Create Resource(s)
This is designed to be a rapid entry program allowing you to create a single or multiple Resources and automatically assign them to a subject class.
Staff Kiosk will also automatically save the Resource(s) created in the Learning Object Repository under the 'Subject Area' and 'Year Level' that this subject class belongs to.
If you are creating more than one Resource, ensure that all of the files that you are uploading have a meaningful name before you start. This is important because the file name will become the name of the Resource.
For example, a document called 'Story of Banjo Paterson.docx' will have a 'Resource Name' of 'Story of Banjo Paterson' after it has been uploaded.
Subject Class | This field will display the subject class you selected when using:
This is the subject class to which the resource(s) you create in this screen will be assigned. |
add to My Learning Objects or add to Central Repository | |
Assign to all Subject Classes | Tick this field to automatically assign the Resource(s) created to all classes for this subject. For example, English Year 11 comprises of three classes; A, B and C. Ticking this field will assign the Resource(s) to all three classes. To view a list of subject classes that the Resource(s) will be assigned to, click the 'View Classes' link. |
Topic | This is important as it will determine the fourth level in the Learning Object Repository that this Learning Object will be filed under. A topic is best described as a unit of work. For example in English, students may be studying a topic of Poetry. If you have chosen to add this Learning Object in the Central Repository, this field will provide a list of Topics that already exist in the Central Repository for the Subject Area you have selected. Where you have chosen to file this Learning Object in 'My Learning Objects', this field will provide a list of Topics that you have previously created. Choose from an existing Topic or alternatively, create a new Topic using the 'Enter a New Topic' field. Your school may not allow new Topics to be created in the Central Repository using this screen. If this is the case, and you require a new Topic, please see your Administrator. There is an option to ‘Allow Central Repository Topic creation in Learning Objects’ in Staff Kiosk Assessment > Parameters (Setup). |
Source | |
Resource Name | If you are creating a single Resource, enter the name of your Resource, e.g. Book Review Rubric. The 'Resource Name' will appear in the Learning Objects Repository under the 'Subject Area', 'Year Group' and 'Topic' you have selected above. If you are creating multiple Resources, you do not need to enter a 'Resource Name'. This is because the name of each file you attach and upload will become the name of each Resource. For example, a document called ' |
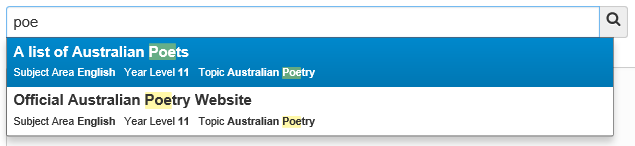
Description | Enter an optional description for the Resource(s). Although the description is optional, we recommend that it be populated. The text that you enter here can be used as search criteria when looking for Resources in Staff Kiosk Assessment > Learning Objects (Maintain & Assign). |
URL | To create a resource that links students to an external website, enter a website address into the 'URL' field. Websites must be prefixed with one of the following:
The program will automatically prefix your URL with You can only create one URL type Resource at a time. |
Upload Files | Two options are available when choosing the files that will be uploaded:
|
Attach from the Cloud | If your school is using Google Drive or Microsoft OneDrive and have set up the 'Cloud Drives' API Gateway, then you can use the 'Browse' button to locate and attach your file(s). |
Click the 'Save' button to create and assign the Resource(s) to the subject class(es) nominated.
Class Activities
Activities that are currently assigned to this subject class will be displayed at the bottom of the 'My Classes > [Subject Class]' screen.
Click on a column name in one of the first five columns to sort your list of Activities.
Watch these videos for demonstrations on managing class activities that can be assessed in Markbook and Activity Planner:
Columns that require further explanation | |
|---|---|
Activity Name | You can click on this to display the Staff Kiosk Assessment > Activity Planner > Activity Assessment Screen. |
Assessable | Three assessment types are possible:
For details on setting up an Activity with different assessment types click here. This column references ‘webBook’. The webBook program was decommissioned from v01.060.01.200, and features previously offered by this program are now available in Staff Kiosk Assessment. Please note that although fields are labelled ‘webBook Objectives’, these features also work in Staff Kiosk Assessment. |
Start Date/Due Date | These are taken from the Activity record. A quick way to change these dates is to click on the Activity name to display the Staff Kiosk Assessment > Activity Planner on the ‘Activity Assessment Screen’ and then use the 'Change Dates' or 'Group Ext' buttons. |
Future | This displays the number of students who have access to this Activity in preview mode only (between the 'Preview Date/Time and the 'Start Date/Time'). |
Current | This displays the number of students who have access to this Activity (after the 'Start Date/Time', and who have not yet completed the work or submitted a file). If there are any students in this column who have not completed the Activity by the due date then this will be displayed in red. |
Completed | This displays the number of students who have completed this Activity but have not yet been marked. |
Assessed | This displays the number of students who have been marked. |
Absent | This displays the number of students who have been flagged as being absent (or not having to complete this Activity). |
To access the Staff Kiosk Assessment > Activity Planner on the ‘Activity Assessment Screen’ for an Activity, click on the 'Activity Name'.
My Classes > [Subject Class] Screen Buttons
This section gives an explanation of the buttons that are available at the top of the screen:
Class Analysis Grid.
Class List.
Email Class.
Class Blog.
Class Forum.
Class Analysis Grid
Use this button to produce a grid-style display or printout of students' statuses or final grades for all Activities that have been assigned to this subject class.
This is an example of the 'Class Analysis Grid' screen:
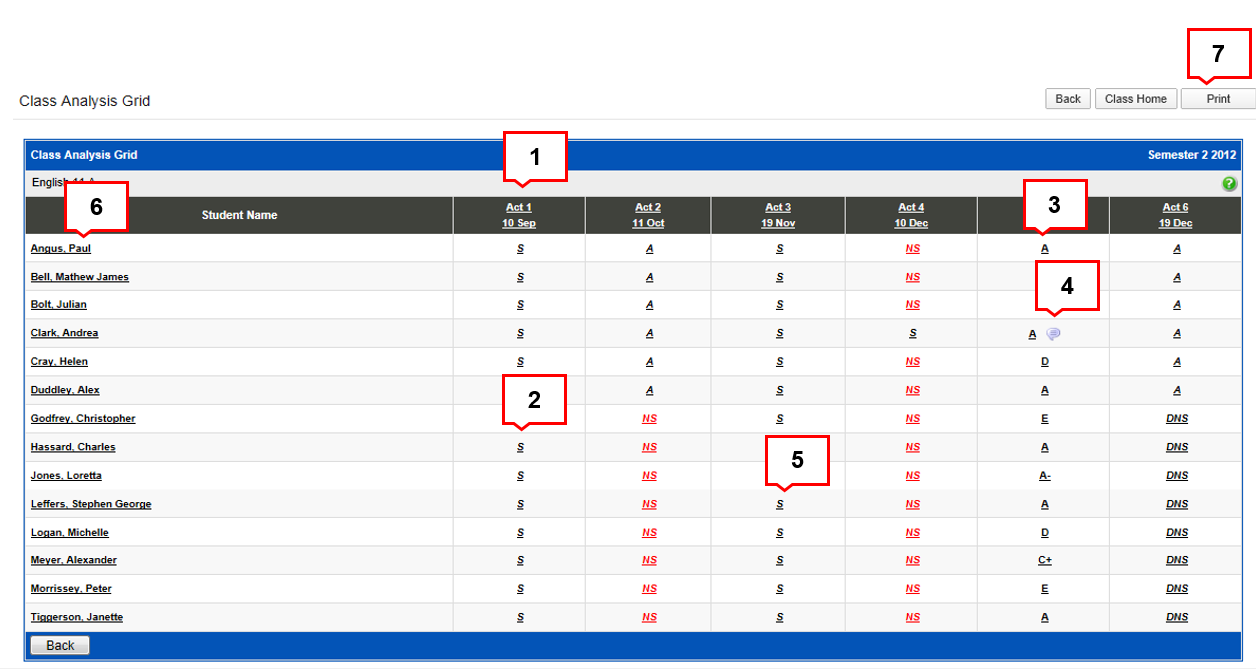
Options available to you from this screen:
Hover over 'Act #' for a description of the Activity, or click on the click on‘Act #’ to be redirected to the Staff Kiosk Assessment > Activity Planner > Activity Assessment Screen.
The codes indicating each student's status for an Activity are displayed in Italics. Hover over the code for the description of the status.
If a Final Grade Objective has been defined in Staff Kiosk Assessment > Parameters (Setup) and a result has been entered for this Objective for the Activity, the Final Grade will be displayed instead of the status.
If a Teacher Comment has been entered for a student on an Activity, a 'speech bubble' symbol will be displayed. Hover over this to read the comment.
Click on any status code or Final Grade to access the 'Assess Student' screen for that Activity.
Click on a student’s name to access a grid with only that student's Activities.
Click on the 'Print' button to produce a PDF, Excel® or Word® file containing details from your 'Analysis Grid'. The Excel® option allows you to include comments that were entered for the students.
Class List
You would use this button to:
View a list of students currently enrolled in the class.
Create and send an email to a single student in this class.
3. Check for students who do not have access to Student Café.
Email Class
You can use this button to create and send emails to this subject class or any of your other subject classes.
Class Blog
Use this button to access Blogs for the current year for this subject class.
By default the program will display Blogs for the subject class you are currently using, to select an alternative class (or all of your subject classes) use the 'My Classes' filter at the top of the screen.
Class Forum
Use this button to access Discussion Forums for the current year for your subject classes.