
Activity Builder - Step 3 of 3
This step can complete one of two functions, depending on the options that you selected in Step 1.
This step will allow you to:
Attach an Online Test to this Activity, or
Set up how the Activity will be assessed.
Attach an Online Test to this Activity
If the Activity is to contain an Online Test (where you have selected 'Yes' to 'Do you want to attach an ONLINE test to this Activity' in Step 1 of the 'Activity Builder') this step will allow you to attach one previously created Online Test to this Activity.
Example
An example of the 'Activity Builder' Step 3 in this mode:
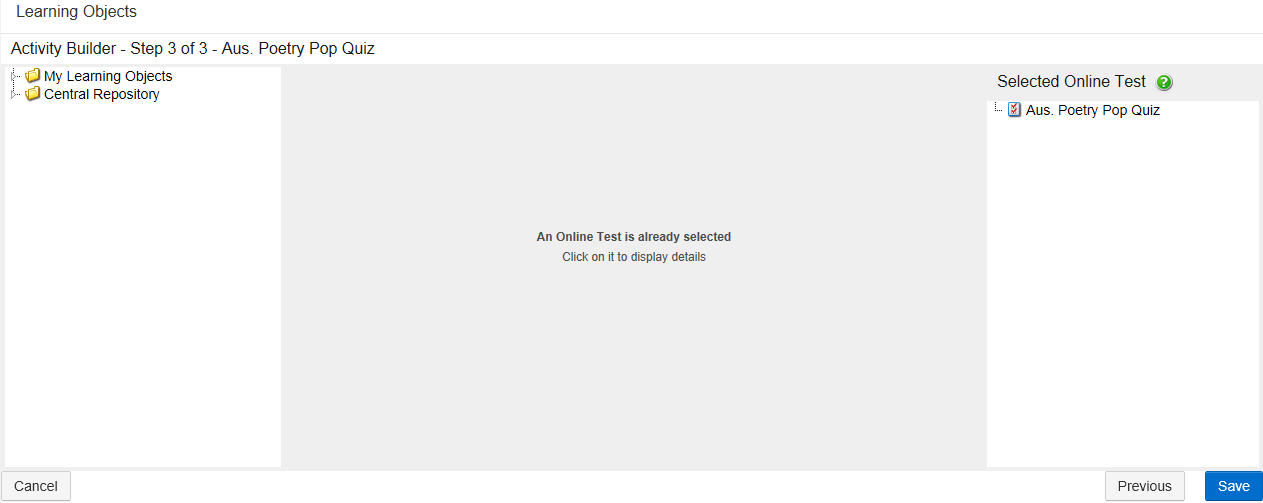
The program will display the Learning Object Repository with Online Tests only loaded.
Browse through the Learning Object Repository to locate the Online Test you would like to attach to your Activity.
After an Online Test has been selected from the Learning Object Repository, details of the Online Test will be displayed in the middle of the screen:
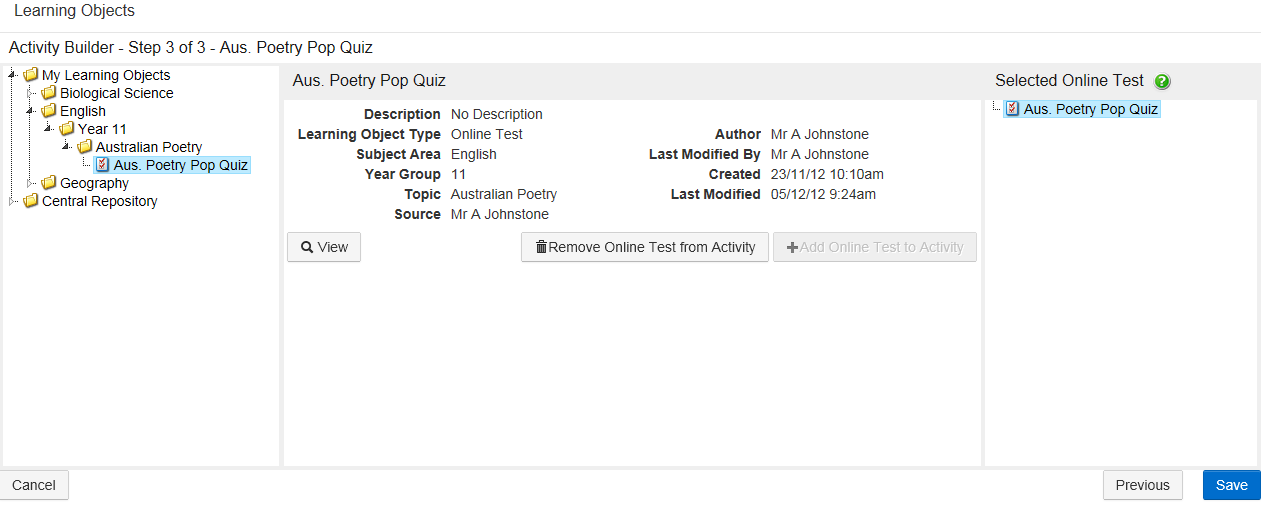
Click the 'View' button to view the 'Online Test Details' before attaching it to your Activity.
Click here for more information on the 'Online Test Details' screen'.
Click the 'Add Online Test to Activity' button to attach the selected Online Test to your Activity. You can only attach one Online Test per Activity.
The Online Test that has been added to the Activity will be displayed in the 'Selected Online Test' column.
You can also double-click an Online Test from the Learning Object Repository to add it to the 'Selected Online Tests' column (PC and MAC only).
To remove an Online Test, select the Online Test from the 'Selected Resources' column and click the 'Remove Online Test from Activity' button.
Click the 'Save' button to create your Activity and return to the 'Learning Objects' screen.
Set Up How the Activity Will Be Assessed
If this is an assessable Activity (you selected 'Yes' to 'Will you be Assessing this Activity' in Step 1 of the 'Activity Builder') this step will allow you to set up how the Activity will be assessed.
There are two methodologies available when assessing Activities:
Method 1 — Standalone. Activities that are assessed this way use your own marking criteria and do not get transferred to Staff Kiosk Assessment > Markbook on the ‘Activity Assessment’ screen.
Method 2 — webBook Objectives (also known as Assessment Criteria Objectives). Activities that are assessed this way will appear in Staff Kiosk Assessment > Markbook on the ‘Activity Assessment’ screen and can be used to calculate students' final grades. You can mark these types of Activities using Staff Kiosk Assessment > Activity Planner on the ‘Activity Assessment Screen’ or in Staff Kiosk Assessment > Markbook on the ‘Activity Assessment’ screen.
This program references ‘webBook’. The webBook program was decommissioned from v01.060.01.200, and features previously offered by this program are now available in Staff Kiosk Assessment. Please note that although fields are labelled ‘webBook Objectives’, these features also work in Staff Kiosk Assessment.
Method 1 — Standalone
To create your own marking criteria, select the option 'Will you be assessing this Activity using your own assessment criteria (standalone)?'
Example
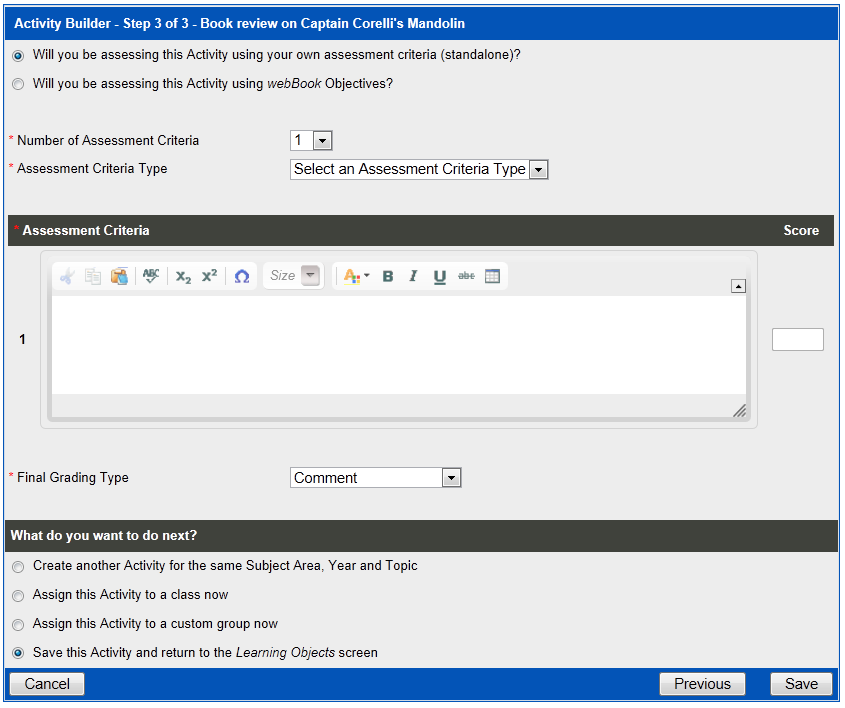
This is an example of Step 3, where you have chosen to create your own (standalone) criteria.
Fields that require further explanation | |
|---|---|
Number of Assessment Criteria | Use the drop-down list to nominate the number of assessment criteria you would like to create. For example, if you wanted to mark the students' completed work based on 'Effort', 'Content' and 'Research', you would select 3 from this field. The number of text fields displayed in the 'Assessment Criteria' section of this screen will dynamically change based on this. |
Assessment Criteria Type | Nominate the result format that will be used when marking students' work, e.g. A+ to E-. The available options have been set up by your school. |
Assessment Criteria

Fields that require further explanation | |
|---|---|
Assessment Criteria | Enter the criteria that you would like to use when marking students for the Activity. The number of fields available for you to enter your criteria can be changed by using the 'Number of Assessment Criteria' field. The rich text editor can be used to format the appearance of the text you enter. For example, bold, italicise and underline. |
Score | This field will only be available where you have chosen 'Numeric' as your 'Assessment Criteria Type' (above). Enter the numeric value for each assessment criteria here. |
Final Grading Type | Nominate the grading type that will be used when marking students overall performance for this Activity, e.g. A+ to E-. The available options have been set up by your school. If you do not want to enter a final result for this Activity, choose 'Comment'. |
Click here for information on the 'What do you want to do next?' section of this screen.
Method 2 — webBook Objectives
To use Assessment Criteria Objectives as your marking criteria, select the option 'Will you be assessing this Activity using webBook Objectives?'
This program references ‘webBook’. The webBook program was decommissioned from v01.060.01.200, and features previously offered by this program are now available in Staff Kiosk Assessment. Please note that although fields are labelled ‘webBook Objectives’, these features also work in Staff Kiosk Assessment.
Example
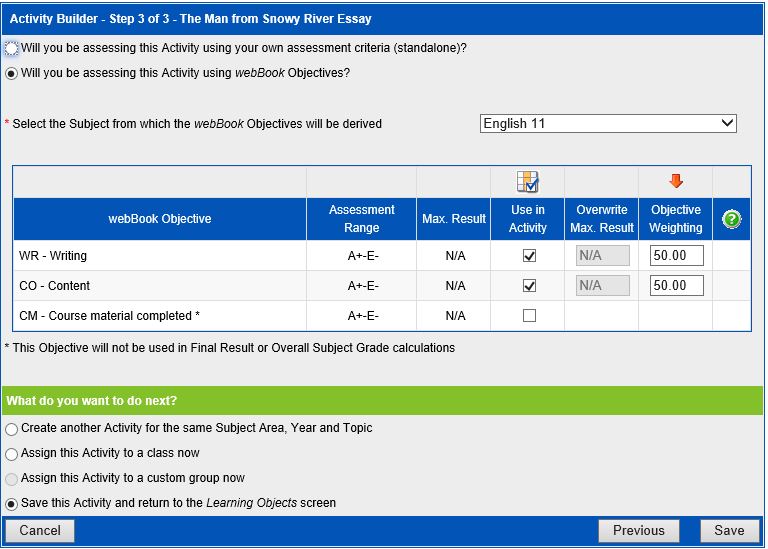
This is an example of Step 3, where you have chosen to use Objectives.
Fields that require further explanation | |
|---|---|
Select the Subject from which the webBook Objectives will be derived | This field will display a list of Subject Classes that you take for the current year and semester (or term). The Objectives that belong to the subject you select will then be displayed below in the 'Objectives' field. Important! It is essential that you use the subject class for which you intend to assign this Activity. When you assign this Activity, you will only be able to assign it to the subject class that you select in this field. A message will be displayed where no Objectives have been set up for the subject you have selected in the current reporting period. Department Classes If you have been set up as a 'Department HOD' or 'Department Administrator' you may also have a 'Department Classes' sub-heading in your drop-down list, e.g. English Department Classes. This will display any subject class that belongs to your department(s). This will allow you to create and assign Activities to Subject Classes that you do not actually teach. |
Reporting Period | This field will only be visible where more than one reporting period is available for the current year and semester. In most cases, there will only be one reporting period available, and you will not see this field. An example of where more than one reporting period is available could be where your school is made up of multiple school sections and a reporting period is set up for each section:
|
webBook Objectives | The Objectives that your school has set up for you to use, for the subject you selected above, will be displayed here. The 'Assessment Range' and 'Max Score' fields will display the allowable results that can be entered when marking each Objective. For example, A+ to E– or a score out of 100. Your school may have set up some Objectives that are not used in calculations in Staff Kiosk Assessment > Activity Planner on the ‘Activity Assessment Screen’ or in Staff Kiosk Assessment > Markbook on the ‘Activity Assessment’ screen. These Objectives will be appended with an asterisk (*). Use in Activity Select the Objectives you would like to use for this Activity by ticking the corresponding 'Use in Activity' checkbox. Click the ‘grid with a tick’ icon to tick all Objectives displayed. Overwrite Max. Result If you have selected an Objective that uses a numeric 'Range' (for example a score out of 100), a box will be displayed in this column with the 'Max Score' value. You can change the maximum score for this Objective by changing the value in this field. For example, you want to mark an Objective out of 80 instead of the original 'Max Score' of 100. |
Weighting
If you intend to use the automatic calculation tool in Staff Kiosk Assessment > Markbook on the ‘Activity Assessment’ screen to calculate 'Final Results', this field is important.
For each Activity, you can nominate:
A different 'weighting' for each Objective, or
The same 'weighting' for each Objective.
The 'Final Results' calculation tool uses:
The students' raw score for this Objective on each Activity.
The weighting for this Objective on each Activity.
The calculation rule for this Objective (set up in the 'Final Results' column of the Markbook).
…to calculate a final result for this Objective.
It is much simpler to set up the subject so that the total of the 'Weightings' for each Objective equals 100%.
If however, the total does not equal 100%, then the calculation will still correctly calculate the 'Final Results' for each Objective by apportioning the individual percentages to equal a total of 100% (apply an adjusted weighting).
This only applies if you intend to use the automatic calculation tool. There is also an option in Staff Kiosk Assessment > Markbook on the ‘Activity Assessment’ screen that allows you to export your Progressive Assessment raw scores to an Excel® sheet to perform more complex calculations.
If this is your preferred way of working, the 'Weighting' that you enter here is for reference purposes only.
If the weighting is to be the same for all Objectives in this Activity, enter the first one and use the ‘down arrow’ icon.
What do you want to do next?
Create another Activity for the same Subject Area, Year and Topic | Once your Activity has been saved, you will be redirected back to Step 1 of the 'Activity Builder'. The information you entered into the 'Subject Area', 'Year Group' and 'Topic' field for this Activity will be pre-populated into the fields in Step 1. |
Assign this Activity to a class now | Once your Activity has been saved, you will be redirected to the 'Assign Activity – Step 1' screen. |
Assign this Activity to a custom group now | This option is not available if your Activity contains Assessment Criteria Objectives. Once your Activity has been saved, you will be redirected to the 'Assign Activity – Step 1' screen. |
Save this Activity and return to the Learning Objects screen | Once your Activity has been saved, you will be redirected to the 'Learning Objects' screen. The Activity that you have just created will be selected in the Learning Object Repository. |