
How to Upload Timetable and Subject Data from TES Timetable via TXT files
This guide outlines the steps and options for exporting Timetable data from the TES Timetable (Edval) software and importing it into TASS.web.
Please read the Important Notes at the bottom of this page prior to beginning the Export/Import process.
For schools with a 'LISS Integration' licence, refer to the How to Upload Timetable and Subject Data from TES Timetable via LISS Sync guide.
Setup in TASS/TES Timetable
Step | TASS | TES Timetable | ✅ |
1 | TASS.web Student Admin > Timetable > Setup Information > Timetable Setup on the 'Timetable' tab. Enter / Check Timetable Parameters. 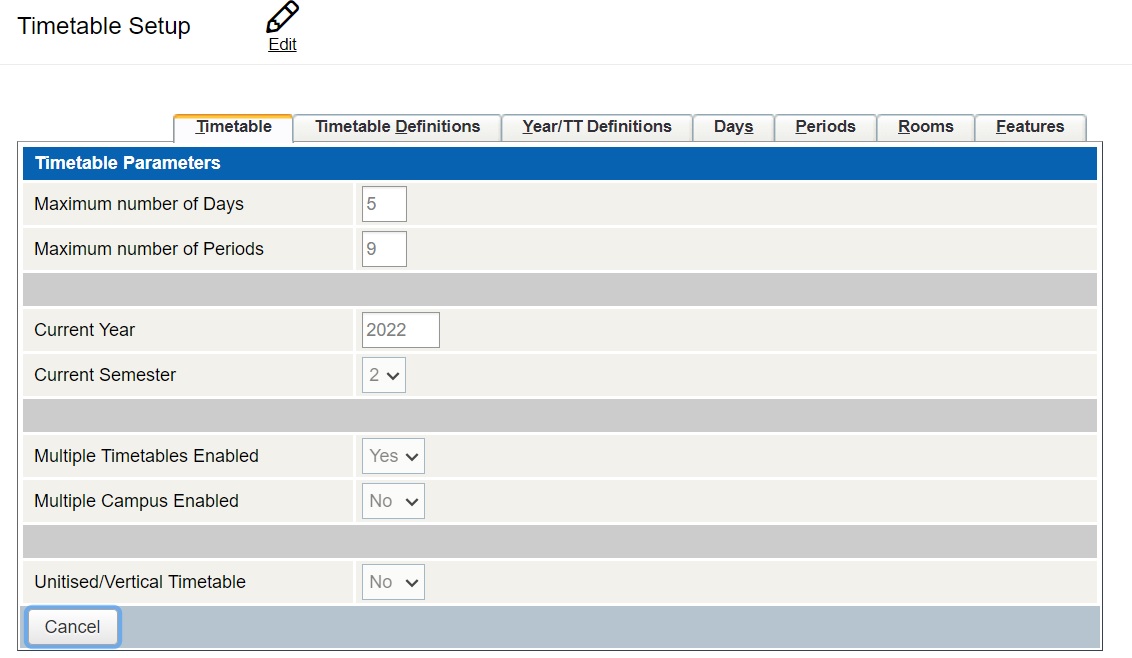 | These TASS parameters appear in the following TES Timetable screens:
| 🔲 |
2 | TASS.web Student Admin > Timetable > Setup Information > Timetable Setup on the ‘Timetable Definitions’ tab. If your school is not using multiple timetables, this tab will not be available for selection, therefore this section is not needed to complete your timetable setup. Add a Timetable Definition for each timetable period ('Rotation' in TES Timetable). The 'Clash Flag' may need to be 'Yes' if using TES Timetable's Duty Roster and Staff Meetings features, depending on how these have been set up in TES Timetable, or if you want to allow any teacher or room clashes in TES Timetable to be imported as they are. If set to 'No', TASS will import one instance of the clashing information, but not the other/s to avoid having room or teacher clashes. 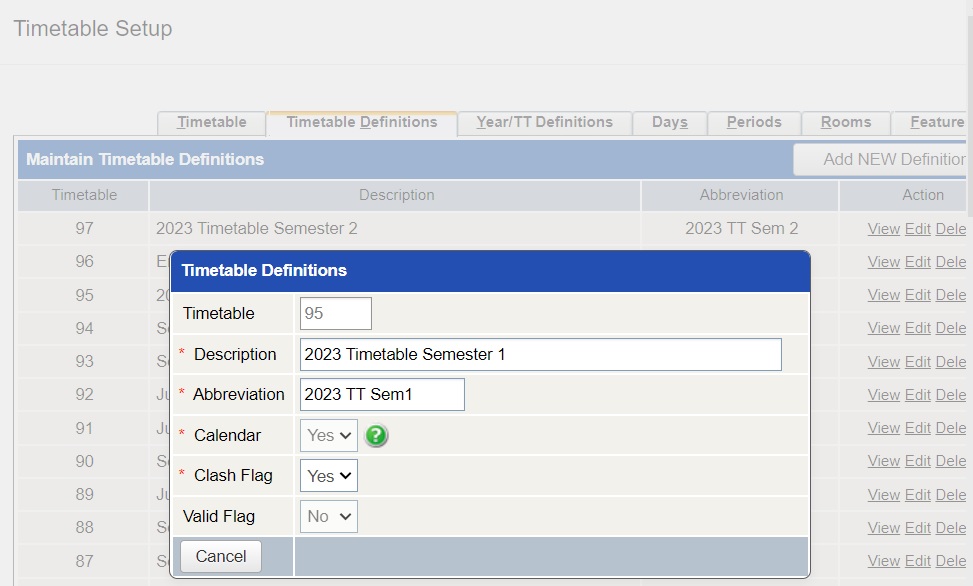 | N/A | 🔲 |
3 | TASS.web Student Admin > Timetable > Setup Information > Timetable Setup on the 'Year/TT Definitions' tab. Map each Year Group to the appropriate Timetable Definition. 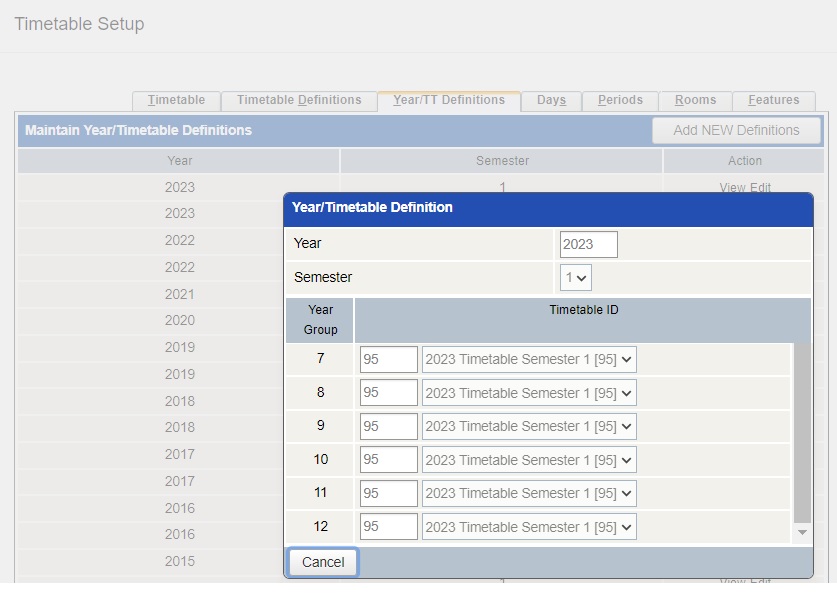 | N/A | 🔲 |
4 | TASS.web Student Admin > Timetable > Setup Information > Timetable Setup on the ‘Days’ tab. Enter/Check the Days and number of Periods in the timetable cycle. Clone a previous Day Definition, and add/edit Day Code, Description or Period Numbers if required. 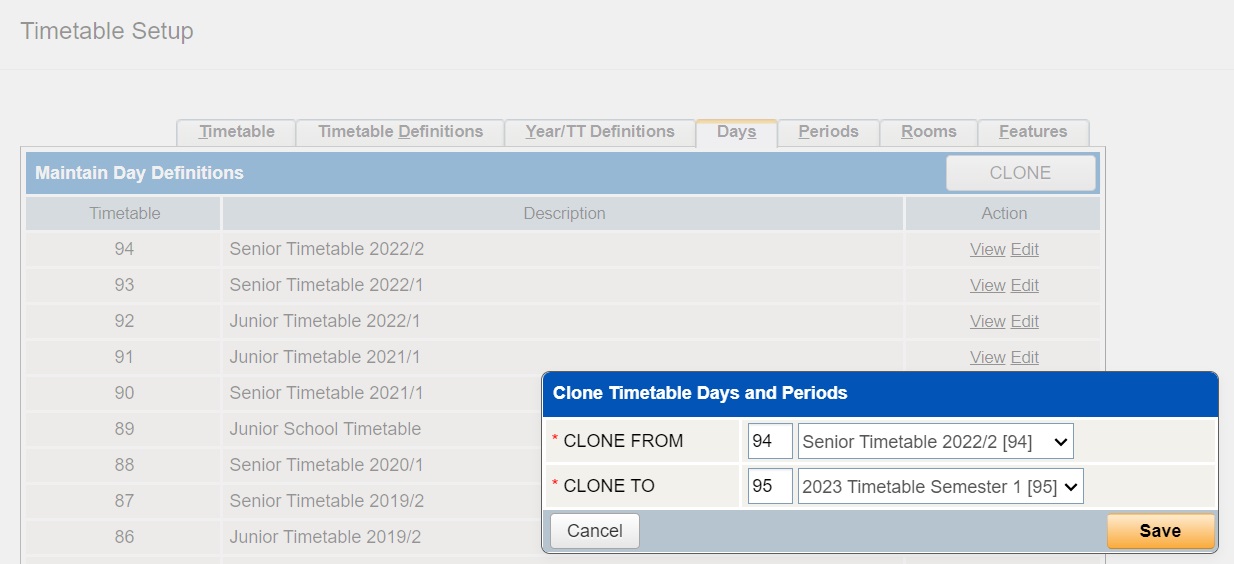 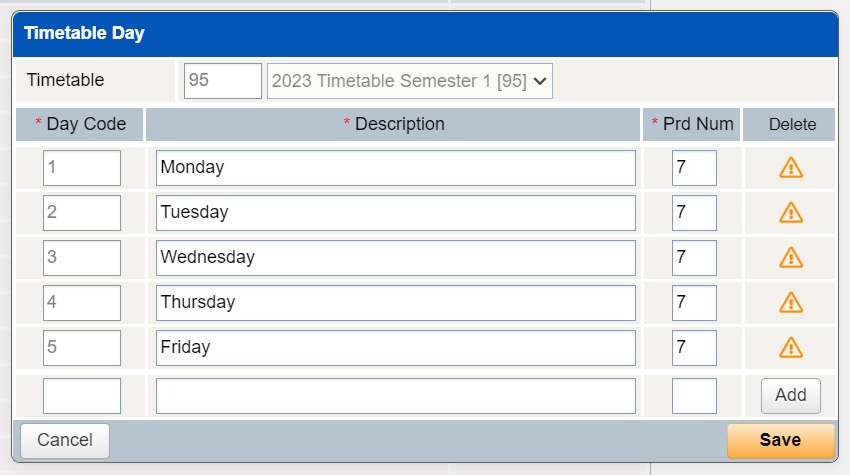 | Setup > Grid Structure
| 🔲 |
5 | TASS.web Student Admin > Timetable > Setup Information > Timetable Setup on the 'Periods' tab. Enter the Period times for the timetable definition. 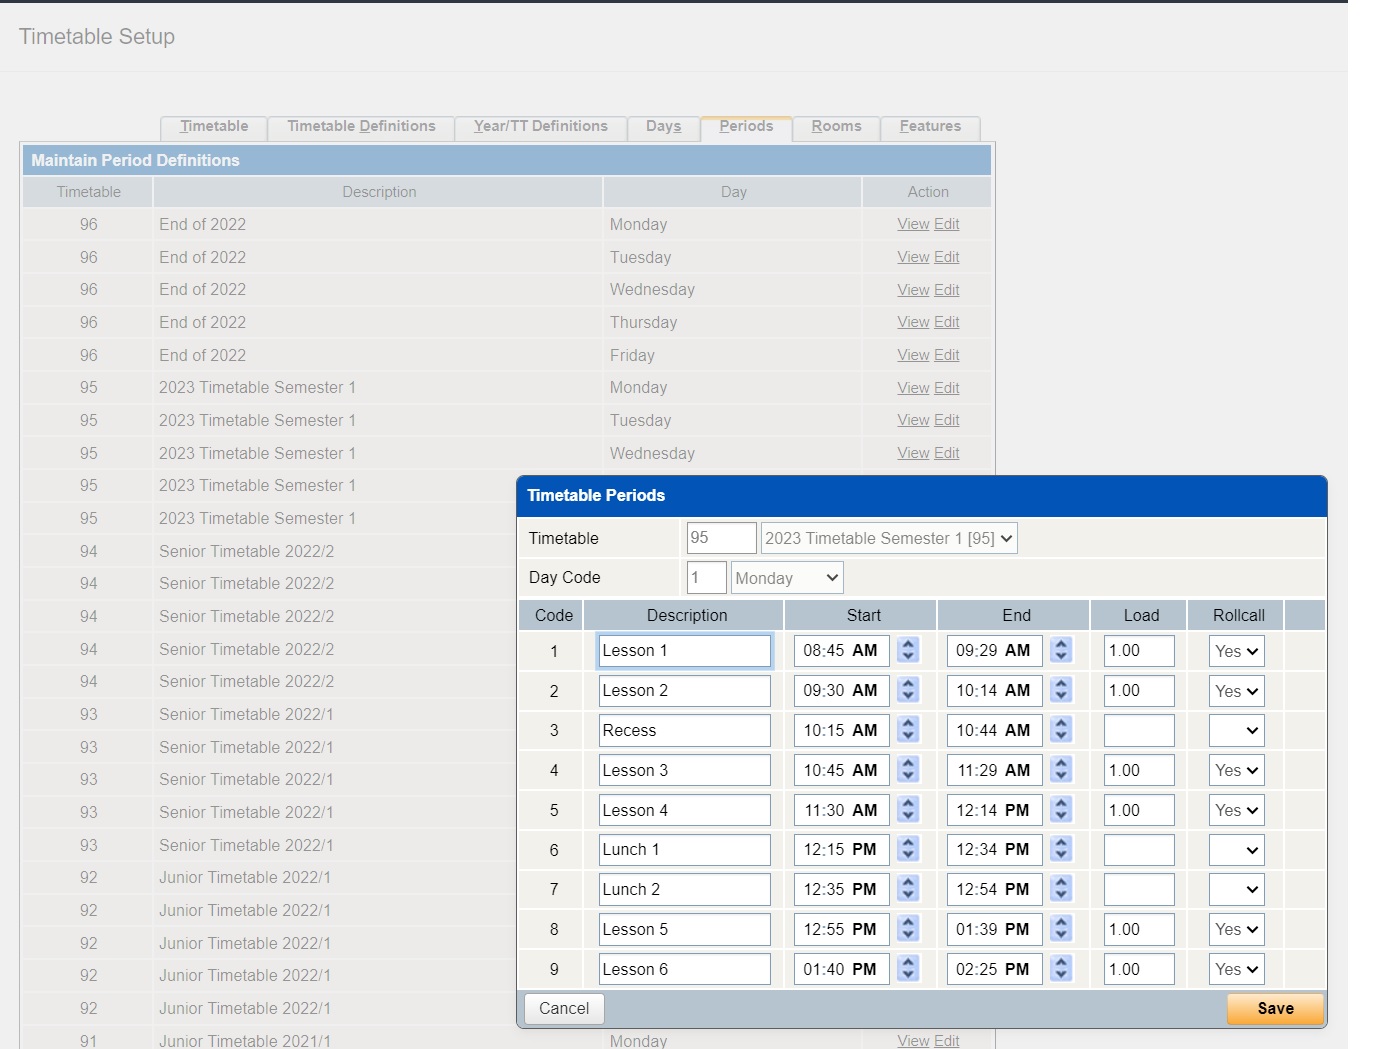 | Setup > Grid Structure
| 🔲 |
6 | TASS.web Student Admin > Timetable > Setup Information > Timetable Setup on the ‘Rooms’ tab. Check/Add Room details. 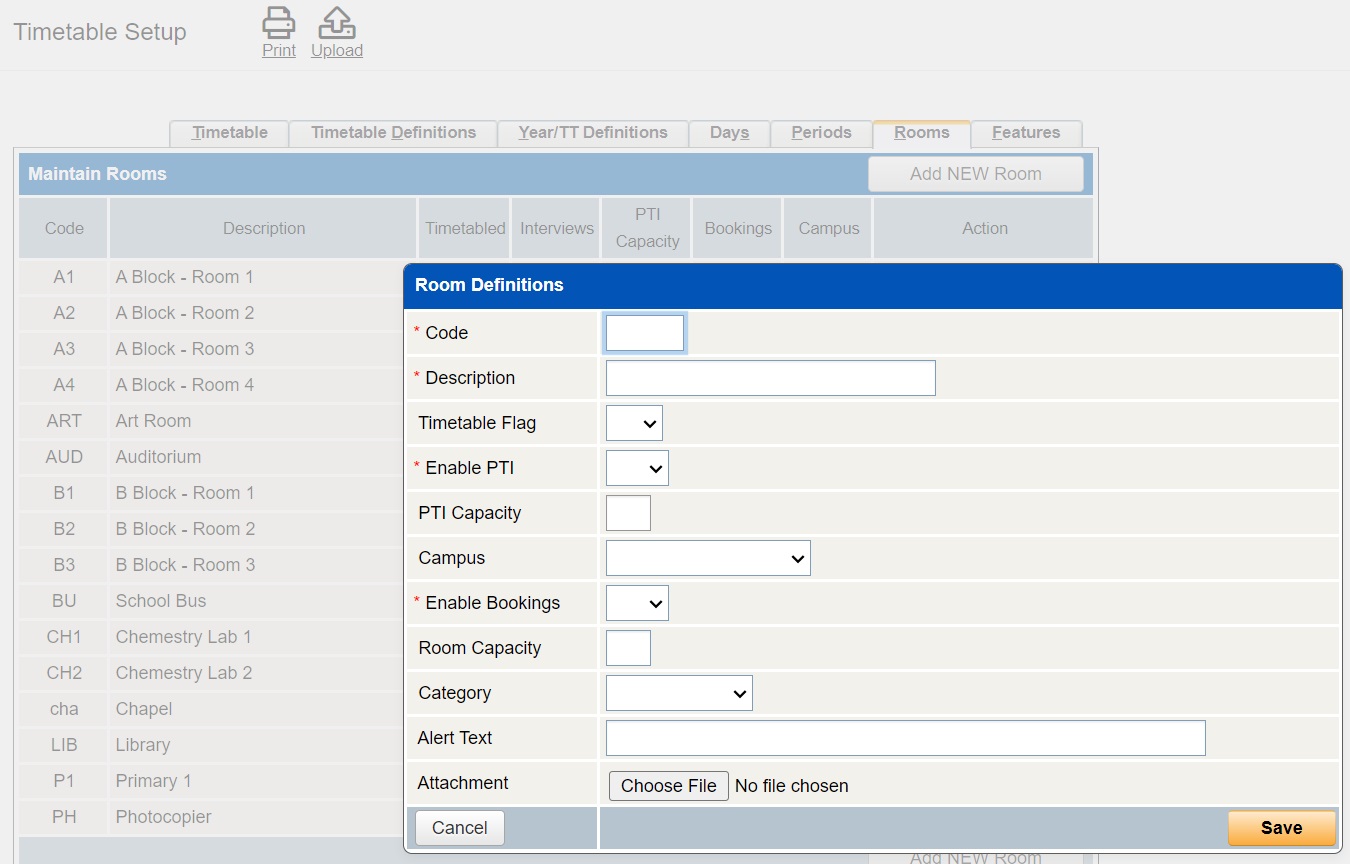 | Rooms > Room data The 'Admin ID' takes precedence during a sync where there is both a Room Code and an AdminID in TES Timetable. | 🔲 |
7 | TASS.web Student Admin > Timetable > Setup Information > Timetable Setup on the ‘Features’ tab. Add Features (Equipment) details (Optional) 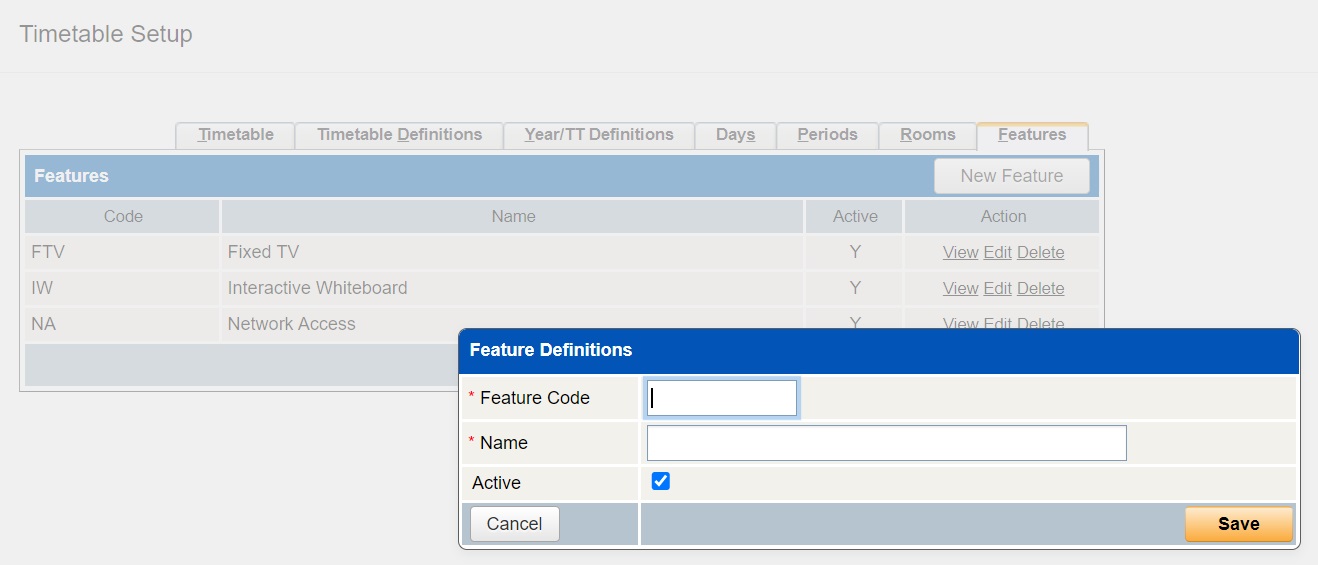 | Rooms > Equipment data This data is not synced from TES Timetable. | 🔲 |
8 | TASS.web Student Admin > Timetable > Setup Information > Timetable Calendar Setup. Set up a Calendar and map the Day Codes from within your timetable cycle to actual calendar dates. 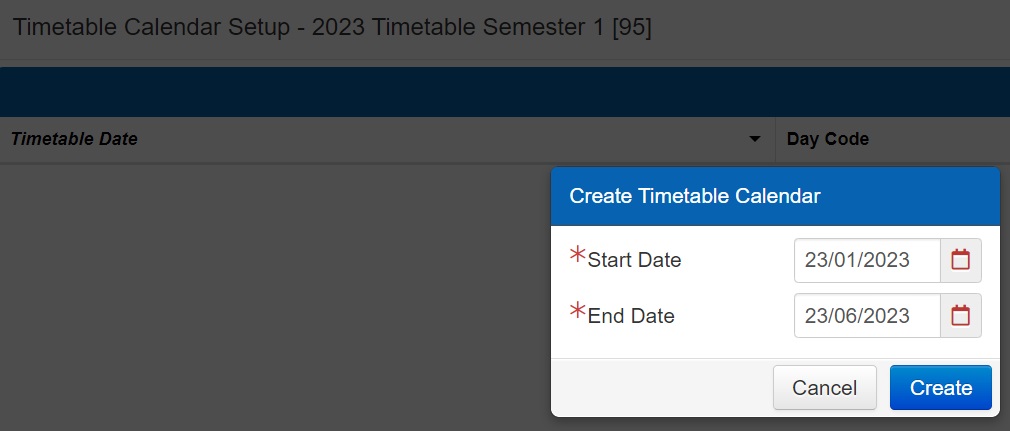 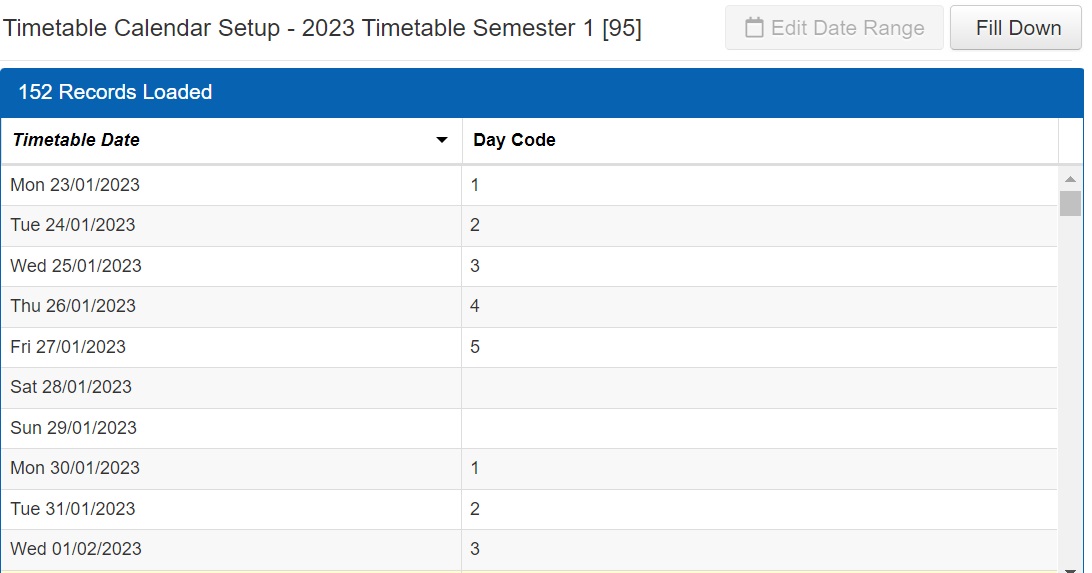 | N/A | 🔲 |
9 | TASS.web Student Admin > Teacher Records > Teacher Information > Teachers. Enter/Check/Add Teacher data. TASS is the source of truth for Teacher information. An error will occur during the timetable import if TES Timetable contains teachers that are not listed in TASS. | Teachers > Teacher Data The TASS 'Teacher Code' is usually entered into the 'Code' field in TES Timetable. 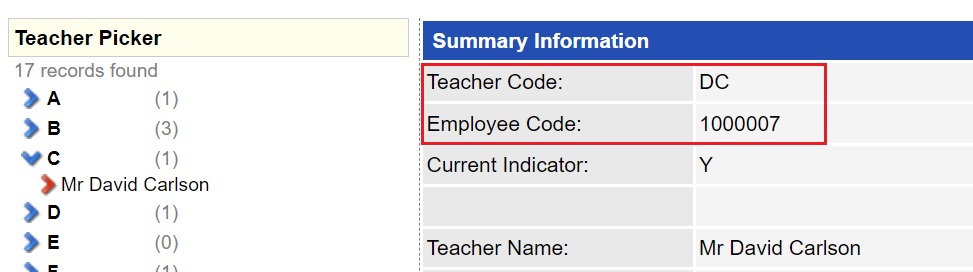 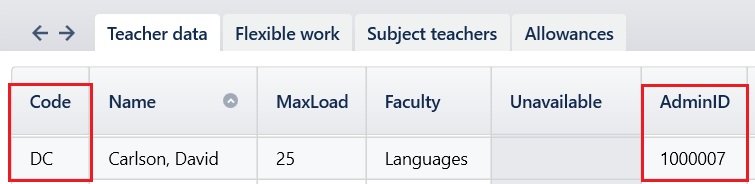 When exporting the timetable data from TES Timetable, you have the option to export either the Teacher Code or the Admin ID code. TASS.web can match on one or the other during the import process. | 🔲 |
10 | TASS.web Student Admin > Student Records > Student Information > Students. Enter/Check/Add Student data. TASS is the source of truth for Student information. An error will occur during the timetable import if TES Timetable contains students that are not listed in TASS. | Students > Student data | 🔲 |
11 | TASS.web Student Admin > Student Records > Setup Information > Student Records Setup on the 'Subjects' tab. Enter/Check that all Subjects exist in TASS. TASS is the source of truth for Subject information. An error will occur during the timetable import if TES Timetable contains subject classes that are not listed in TASS. | N/A | 🔲 |
12 | TASS.web Student Admin > Timetable > External Data Interface > Define Subject/Class Translations. Each incoming class from TES Timetable must be mapped to a Subject in TASS. Enter a translation for every class in TES Timetable. If using class separators in TES Timetable, eg full stops or dashes 9ENG.A, do not include these in the 'Ext Package Code' field. 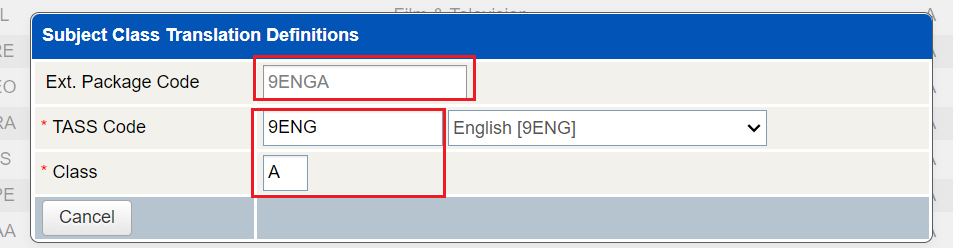 | Classes > Class data | 🔲 |
13 | File > Synchronise > Configure > Sync tab File > Synchronise > Configure > Connection tab
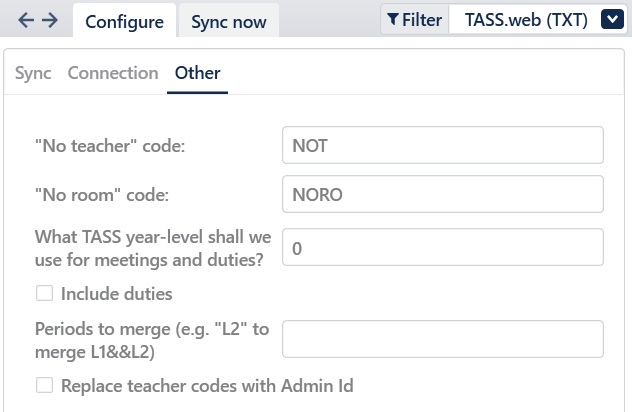 | 🔲 | |
14 | File > Synchronise > Sync Now
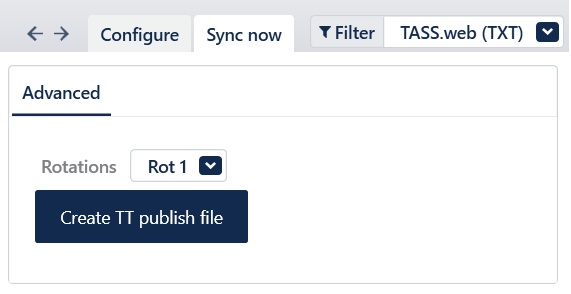 Five TXT files will have been created in the designated location. Only two files will be used during the timetable import process: 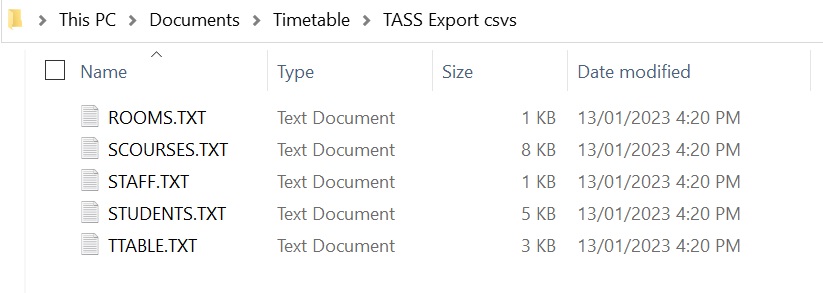 | 🔲 | |
15 | TASS.web Student Admin > Timetable > External Data Interface > Define Import Format. TES Timetable exports 9 columns of Timetable data in the following format: 1- DAY_CODE 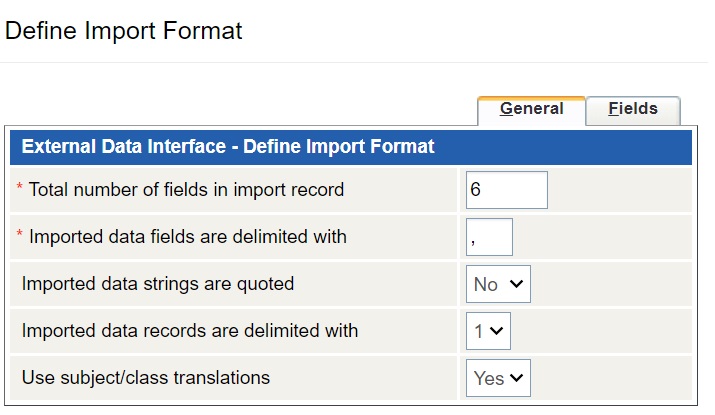 On the Fields tab, map the Field Number → Column.  |
The file exported from TES Timetable titled 'TTABLE.TXT' will be used for the TASS.web timetable import. The TXT file produced from TES Timetable may needs a little manipulation before it is ready to import into TASS.web, depending on the features you have used in the TES Timetable software.
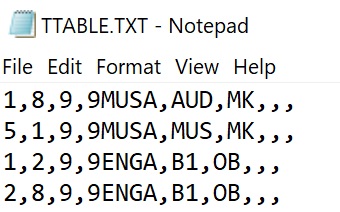 Proceed to the next step once the number of columns in the TXT file matches your TASS.web setting for 'Total number of fields in import record', and the fields are mapped correctly. | 🔲 |
17 | TASS.web Student Admin > Timetable > External Data Interface > Import Data. Enter the Timetable Definition relevant to the import, and select the TTABLE.TXT file from the computer/network location where it was saved. Leave the Campus field blank, even if your timetable file contains campus information, unless advised by TASS Support staff in unique situations. Select Go. 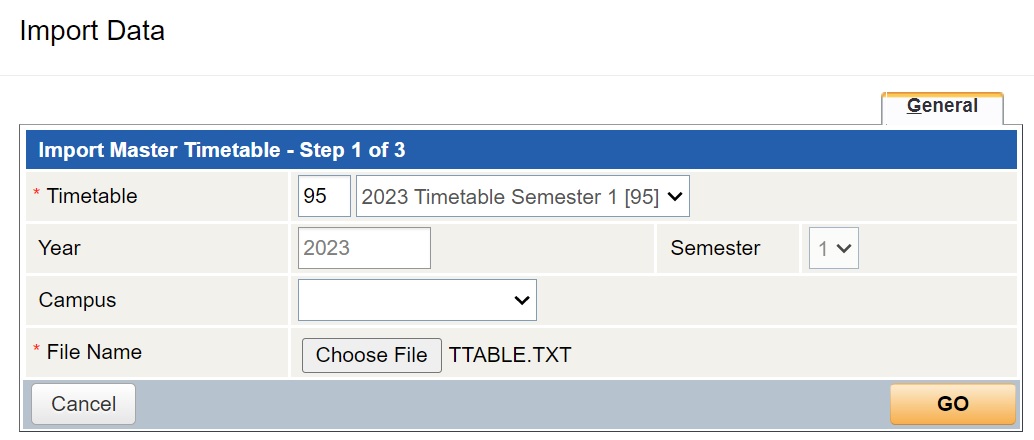 This program will check that there is data in each of the defined fields. | 🔲 | |
18 | TASS.web Student Admin > Timetable > External Data Interface > Validate Imported Data. Select the Timetable Definition, then OK from the pop up message. 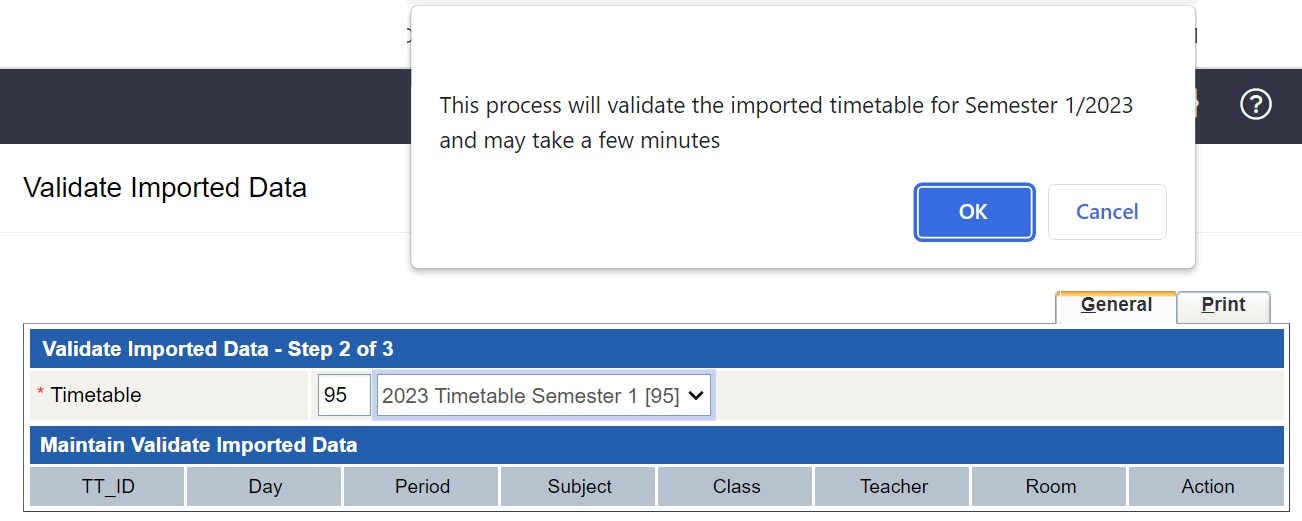 If validation errors are found, they should be corrected in TES Timetable so that the information is correct for future exports, and then the export/import process run again. Alternatively, edit directly in TASS.web, but also update in TES Timetable simultaneously. 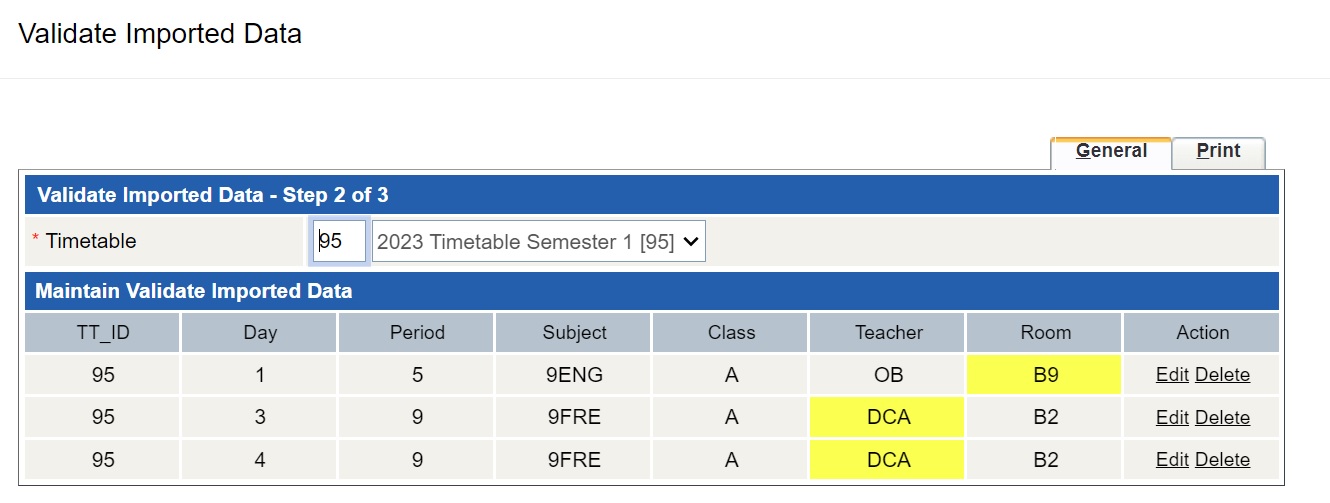 When validation is complete, you will be moved to the 'Generate Master Timetable' screen. | 🔲 | |
19 | TASS.web Student Admin > Timetable > External Data Interface > Generate Master Timetable. Select the Timetable Definition, then GO. 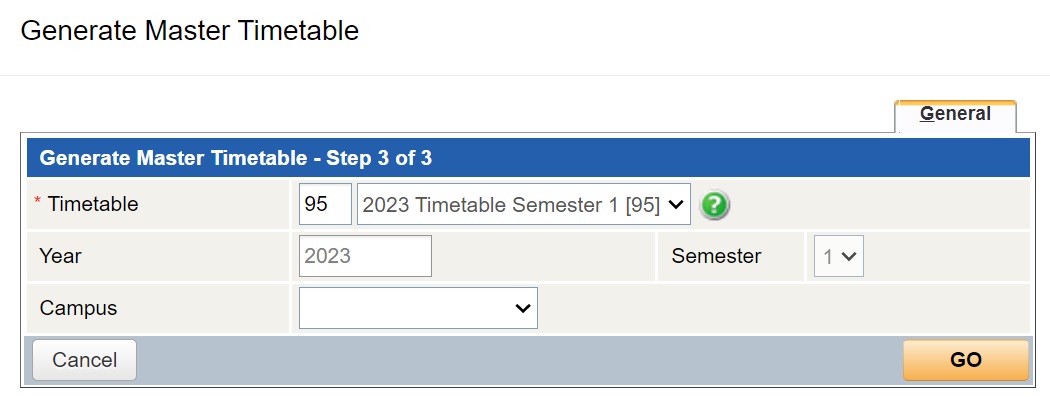 The timetable being generated will replace any previous timetable data for the Timetable Definition selected. i.e. The previous timetable data will be deleted. A success message will confirm that the timetable import has been successful.  | 🔲 | |
20 | Check some teacher timetables in TASS.web and Staff Kiosk to ensure the data looks correct. | 🔲 | |
21 | TASS.web Student Admin > Timetable > External Data Interface > Import Student Subject Data. TES Timetable exports 8 columns of Student Subject data in the following format: *1- STUDENT_CODE Field numbers 1 and 4 are required for the Student Subject upload. The other fields will likely contain data, but does not matter if they are blank.
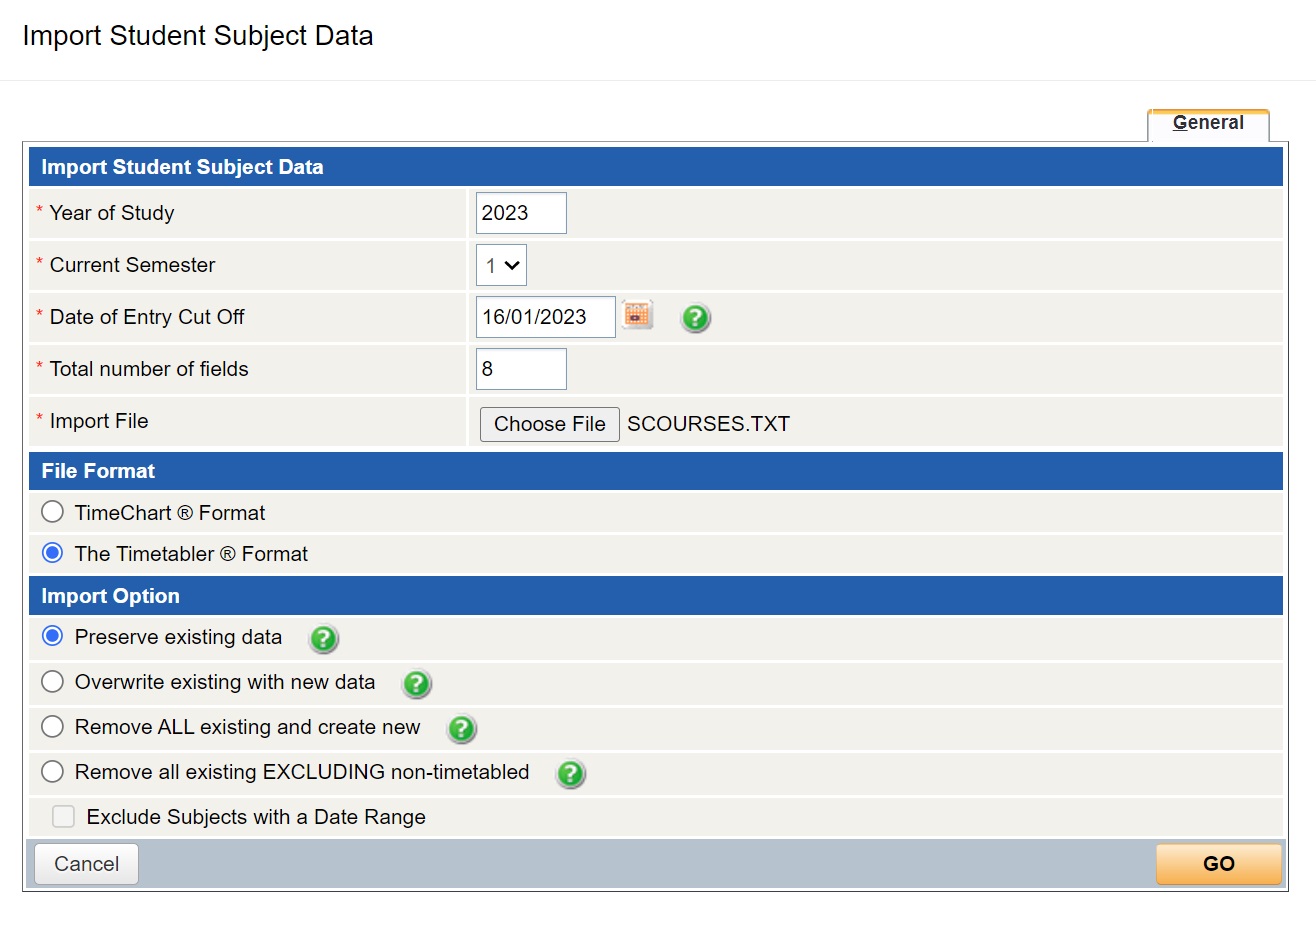 A message will highlight any issues, such as missing columns. Fix and repeat the upload. An Exception report will display if the SCOURSES.TXT file contained any class codes for which TASS.web does not recognise, such as Study classes. |
The TES Timetable export file titled 'SCOURSES.TXT' will be used for the TASS.web Student Subjects import.  | 🔲 |
21 | Check some student timetables in TASS.web and Staff Kiosk to ensure the data looks correct. | 🔲 |
Important Notes
When students are changed from one class to another in TES Timetable, and you upload the SCOURSES.TXT again into TASS.web, both classes will appear on the student's Subjects page and timetable, as there is no start and end date subject information transferred. You can manually enter the Date Range on a student's Subjects tab or via the Student Subject Grid Entry. Alternatively, the option you chose when importing the SCOURSES.TXT file will determine whether previous subject data is removed.
Every class must have a teacher and a room in TES Timetable for it to successfully import into TASS.
If more than one Timetable Definition is set up, for example to correspond with semester or terms, any 'year long' classes in TES Timetable will appear as separate Subjects on Student Records, one for each timetable definition.
TES Timetable's 'On-call roster' and 'RTO roster' do not sync to TASS. If using these functions in TES Timetable, remove this data from the TTABLE.TXT file prior to uploading it into TASS.web.
TES Timetable's Study Roster does not sync to TASS.web. Study classes can sync to TASS.web if they are set up manually in Class data and managed in the same way as other classes.
Duties:
Each Duty Code must be set up in TASS.web as a room.
For example: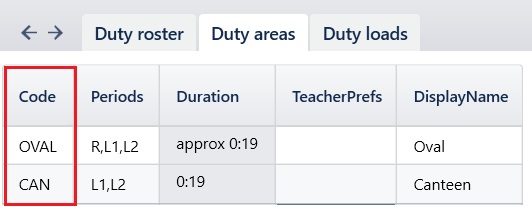

'Duty' must be set up as a Subject in TASS.web.
'Duty' must be set up in Define Subject/Class Translations.
Schools use the TES Timetable timetabling software in varied ways. Testing of common features and how the data transfers between the two systems has occurred, but if you have any questions about your particular set up, please seek advice from the appropriate party.