wB - Grid Entry
From v01.060.01.200, webBook is no longer accessible. The features previously offered by webBook are now available in Staff Kiosk Assessment > Markbook and Enter Results and Comments.
This area is used to:
Rapidly enter or maintain student results (using a grid-style display)
Maintain student results that have been entered using Progressive Assessment.
The results entered here will appear on Student Academic Reports.
Click on the 'Grid Entry' link for a subject class to view the 'Grid Entry Options' screen.
Grid Entry Options
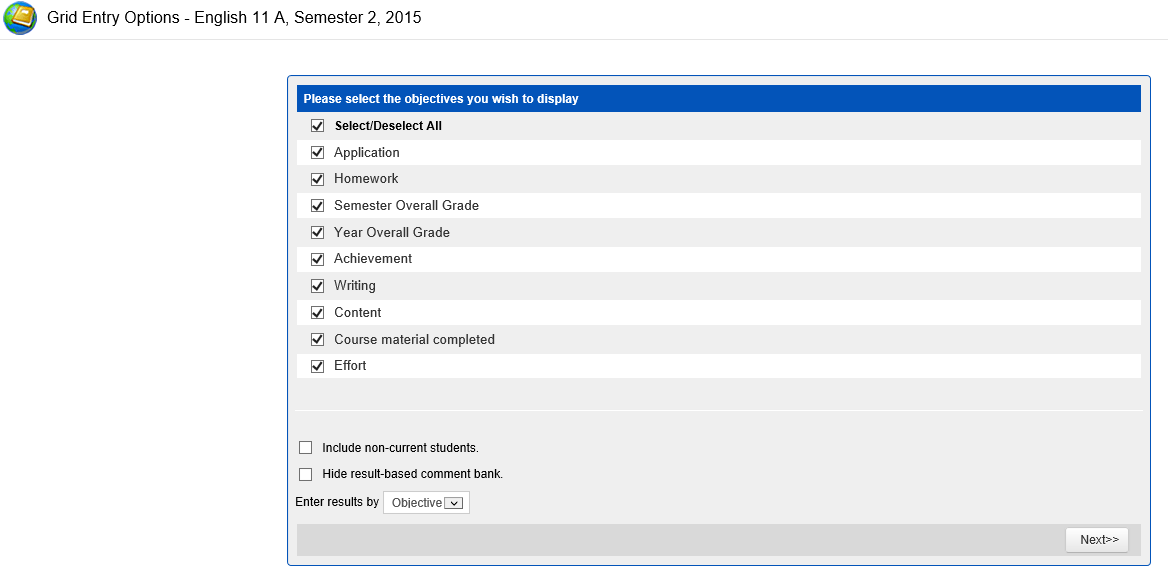
The 'Grid Entry Options' screen will display all of the webBook Objectives that have been set up for this subject class.
This is an example:

Use the tick boxes to choose the webBook Objectives to display in your grid.
Use the 'Select/Deselect All' tick box to select or deselect all webBook Objectives displayed.
Fields that require further explanation | |
|---|---|
Include non-current students | By default, only students that are currently at the school will be displayed. To display students who have left the school (non-current), tick this box. |
Hide result based comment bank | You can also nominate if you want to exclude/hide any result based comments icon ('Blue Book') on the result entry screen. |
Enter Results By | This will allow you to choose the direction of the cursor when using the 'Tab' key in your grid.
|
Click the 'Next' button to proceed to the 'Student Result Grid Entry' screen.
Student Result Grid Entry
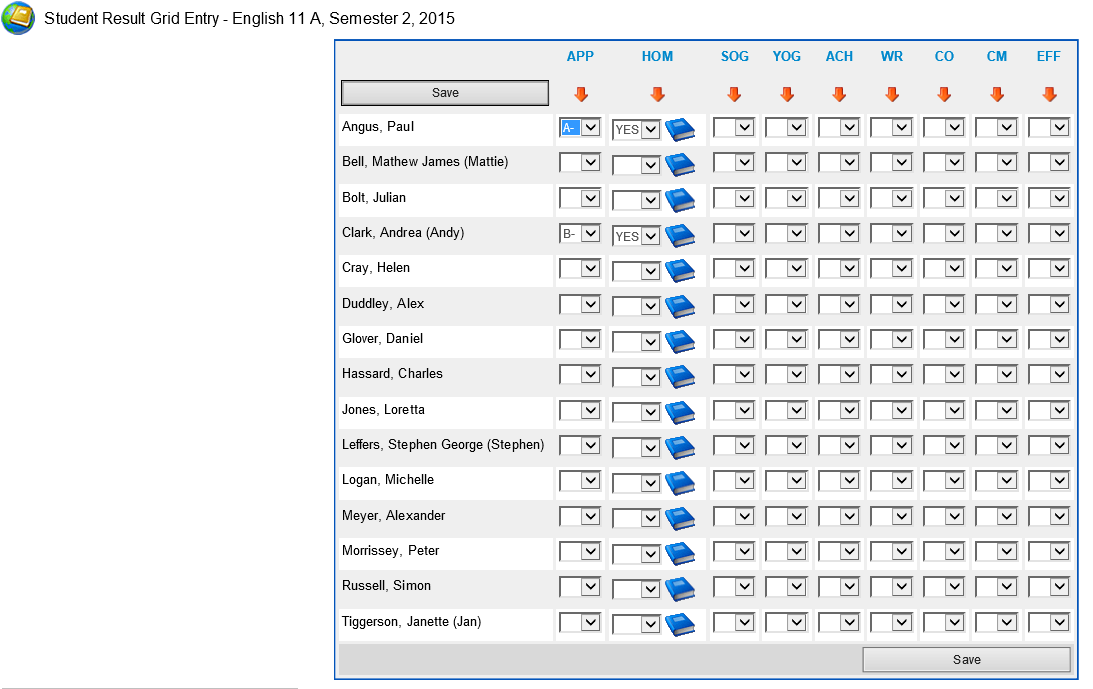
This screen will display:
Each student within the subject class (vertical).
The webBook Objectives that you chose on the previous screen (horizontal).
A cell to enter the students results.
This is an example:

If your school uses 'Result Related Comments', an icon will be available next to the dropdown list. Clicking this icon will display result based comments that have been setup by your school.
Within the grid, you can:
Key the result into the field.
Select the result from the dropdown list.
Click the 'Blue Book' icon and select an option from the list of valid results (where applicable).
If a Student has a Subject Date Range for the Subject, an 
Click the 'Save' button to commit the results you have entered into the database.
Important!
After 30 minutes on this screen without saving, the session will expire and any unsaved data will be lost. A warning will be displayed after 25 minutes to remind you to save the records. Therefore it is a good idea to save your changes regularly.
