
Bulk Resource Upload
Overview
The ‘Bulk Resource Upload’ program provides a tool to create and upload multiple Resources from a .zip file into the Learning Object Repository.
You would use this program instead of Staff Kiosk program Assesment > Learning Objects (Maintain & Assign > Create Learning Object (Resource) where there is a need to create more than one individual Resource.
If you are in the process of implementing the Staff Kiosk Assessment, this program will allow you to quickly get your schools content in.
Uploading Multiple Resources
The stepped process for uploading multiple Resources follows.
Step 1
This Step is done outside of Staff Kiosk.
Before the 'Bulk Resource Upload' program can be used, you must first prepare the files that you want to upload.
Ensure that all of the files that you are uploading have a meaningful name.
This is important because the file name will become the name of the Resource.
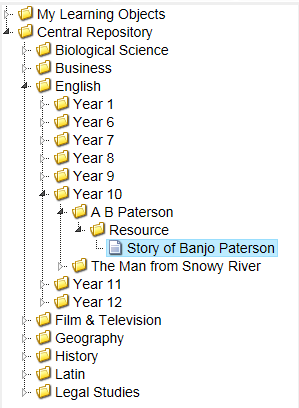
For example, a word processor document called Story of Banjo Paterson.docx will have a 'Resource Name' of 'Story of Banjo Paterson' after it has been uploaded.
Step 2
This Step is done outside of Staff Kiosk.
All Resources that you want to upload must be contained within a .zip file.
To do this, highlight the files to upload and right mouse-click on them.
Use the 'Send To > Compressed (zipped) folder' option.
If the 'Send to > Compressed (zipped)' option is not available, your school may use an alternative program for compressing documents in a .zip file. If this is the case, and you are not sure what to use, please see your Systems Administrator.
Important!
Do not zip a folder, also ensure that there are no sub-folders within your .zip file.
The .zip file can contain different types of files.
For example PDF, Word® doc, Excel®, image, audio and video type files.
Important!
On certain devices such as iPads, Adobe Flash files may not be supported.
Therefore if students are likely to access this type of Resource using one of these devices, then it is recommended to use an alternative file type.
Step 3
Use this program (Assessment > Bulk Resource Upload) to upload the files in your .zip file into the Learning Object Repository.
Fields that require further explanation:
Learning Object Details | |
|---|---|
Subject Area | All Resources in your The Subject Area is important as it will determine the second level in the Learning Object Repository that this Learning Object will be filed under. Example 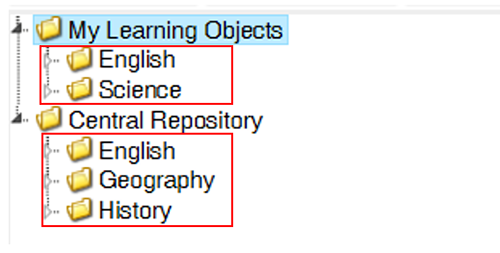 Subject Areas are set up in TASS.web Student Admin > Student Records > Setup Information > Student Records Setup on the 'Subject Areas' tab. |
Add to My Learning Objects OR | By selecting this option, all Resources in your This field determines the first/top level folder in the Learning Object Repository that this Learning Object will be filed under. Example 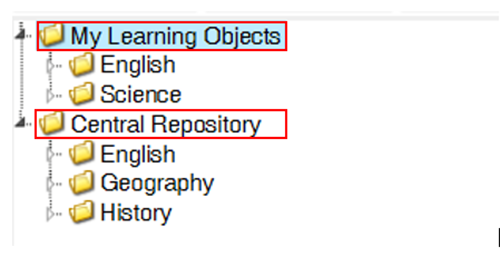 This Learning Object Repository is best described as a filing cabinet for Learning Objects. Every Learning Object that you create by using either Staff Kiosk Assessment will be filed in this repository. The repository is divided into:
Add to My Learning Objects By selecting this option, this Learning Object will be added to your personal 'My Learning Objects' repository. It will not be added to the school's Central Repository for sharing with other teachers. Add to Central Repository By selecting this option, this Learning Object will be added to the school's Central Repository under the Subject Area you have chosen. This Learning Object will be visible to all teachers in Staff Kiosk Assessment > Learning Objects (Maintain & Assign). Where this field is disabled, the following message will display “Central Repository has not been set up for the Subject Area that you have chosen”. Administrator Note: You can determine the availability and default for this button by using TASS.web Student Admin > Student Records > Setup Information > Student Records Setup on the 'Subjects Areas' tab. This field will be the default option where a Central Repository has been set up for the Subject Area that the teacher has chosen and the school has indicated that content created for this Subject Area, should be added to the Central Repository. |
Add to Central Repository | By selecting this option, all Resources in your This field determines the first/top level folder in the Learning Object Repository that this Learning Object will be filed under. Example This Learning Object Repository is best described as a filing cabinet for Learning Objects. Every Learning Object that you create by using either Staff Kiosk Assessment will be filed in this repository. The repository is divided into:
Add to My Learning Objects By selecting this option, this Learning Object will be added to your personal 'My Learning Objects' repository. It will not be added to the school's Central Repository for sharing with other teachers. Add to Central Repository By selecting this option, this Learning Object will be added to the school's Central Repository under the Subject Area you have chosen. This Learning Object will be visible to all teachers in Staff Kiosk Assessment > Learning Objects (Maintain & Assign). Where this field is disabled, the following message will display “Central Repository has not been set up for the Subject Area that you have chosen”. Administrator Note: You can determine the availability and default for this button by using TASS.web Student Admin > Student Records > Setup Information > Student Records Setup on the 'Subjects Areas' tab. This field will be the default option where a Central Repository has been set up for the Subject Area that the teacher has chosen and the school has indicated that content created for this Subject Area, should be added to the Central Repository. |
Year Group | All Resources in your This is important as it will determine the third level in the Learning Object Repository that this Learning Object will be filed under. Example 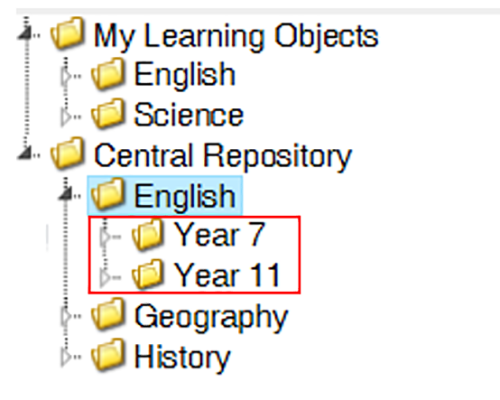 |
Topic | All Resources in your .zip file will be filed under the 'Topic' you select. This is important as it will determine the fourth level in the Learning Object Repository that this Learning Object will be filed under. Example 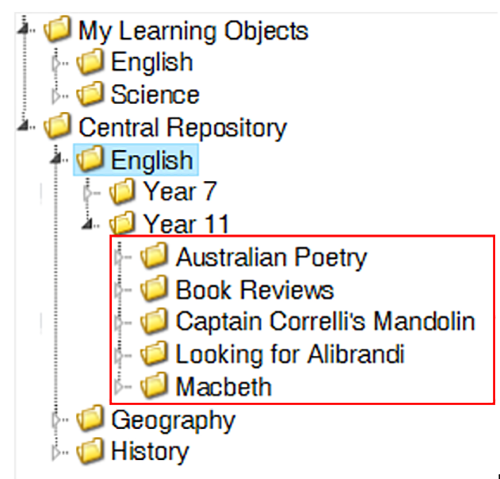 A topic is best described as a unit of work. For example in English, students may be studying a topic of Poetry. If you have chosen to add this Learning Object in the Central Repository, this field will provide a list of Topics that already exist in the Central Repository for the Subject Area you have selected. Where you have chosen to file this Learning Object in 'My Learning Objects', this field will provide a list of Topics that you have previously created. Choose from an existing Topic or alternatively, create a new Topic using the 'Enter a New Topic' field. Your school may not allow new Topics to be created in the Central Repository using this screen. If this is the case, and you require a new Topic, please see your Administrator. There is an option to ‘Allow Central Repository Topic creation in Learning Objects’ in Staff Kiosk Assessment > Parameters (Setup). |
OR Enter a New Topic | Use this field to create a new Topic; the text that you enter here will create a new folder in the Learning Object Repository under the Subject Area and Year Group you have selected above. The system will not duplicate a Topic if it already exists in the repository. |
Resource Details | |
Source | The 'Source' that you enter here will be applied to all Resources in your .zip file. |
Description | Enter a description for the Resources (optional). The 'Description' that you enter here will be applied to all Resources in your .zip file. Although the description is optional, we recommend that it be populated. The text that you enter here can be used as search criteria when looking for Resources in Staff Kiosk Assessment > Learning Objects (Maintain & Assign). |
Click the 'Browse' button in the 'Upload Multiple Resources' field and navigate to the .zip containing your Resources.
Only a .zip file can be selected.
Click 'Save'. The Resources in your .zip file will be uploaded and filed in the Learning Object Repository under the 'Subject Area', 'Year Group' and 'Topic' that you selected above.
The program will also produce a 'Resource Upload Report'. This will provide details of the Resources that were successfully uploaded. It will also provide details on Resources that were not able to be uploaded.