
wB - Exporting and Importing From Excel
From v01.060.01.200, webBook is no longer accessible. The features previously offered by webBook are now available in Staff Kiosk Assessment > Markbook and Enter Results and Comments.
Export to Existing Excel Spreadsheet
You would use this option to calculate 'Final Grades' where the 'Calculation Rules' in webBook do not meet your requirements.
If your Final Results calculations are straightforward you should check first if your school has created a webBook Calculation Rule that will work for you. It is a lot easier to use the Markbook calculation tool.
The Process
The process to make this work is:
Step 1
Create an Excel template and save it with a file name that clearly identifies it, e.g. English 11 Semester 2 template.
The template for your subject class may have been provided to you by your subject coordinator.
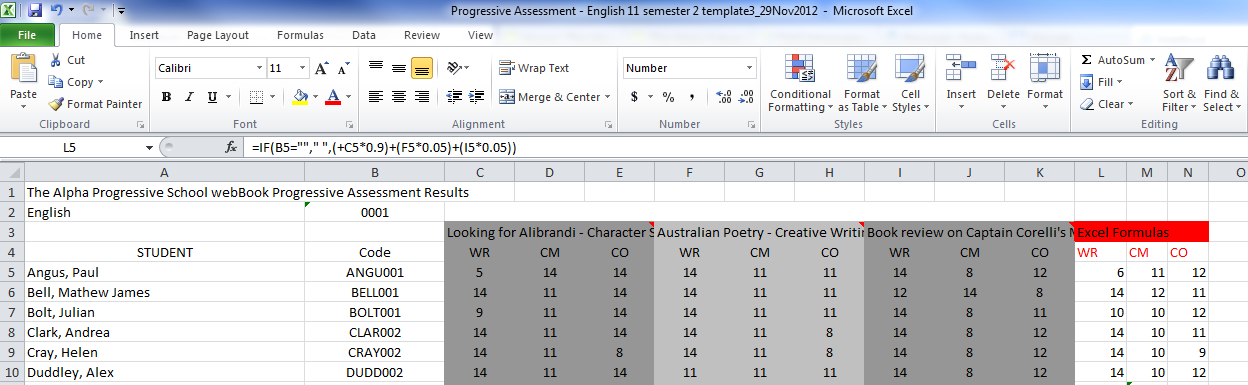
This is an example of a simple Excel template.
This template has formulas to calculate Final Grades based on Excel formulas (as opposed to webBook Activity weightings).
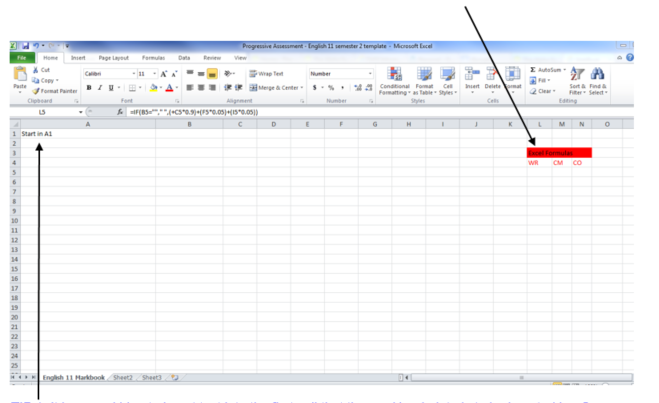
It is a good idea to insert text into the first cell that the Markbook data is to be inserted in. Go to Step 5 of this help to see how this becomes visible during the export process.
It is a good idea to label the worksheet where the data is to be exported. Go to Step 5 of this help to see how this becomes visible during the export process.
By directing the Markbook export function to insert data in cell A1, this is an example of how the Spreadsheet will look after the export:

Step 2
Enter your raw scores (grades) for each Activity into the Markbook. Use the 'Activity Assessment Options' screen and select 'Load Markbook on Screen'.

Enter raw scores (grades) and save your work.
Step 3
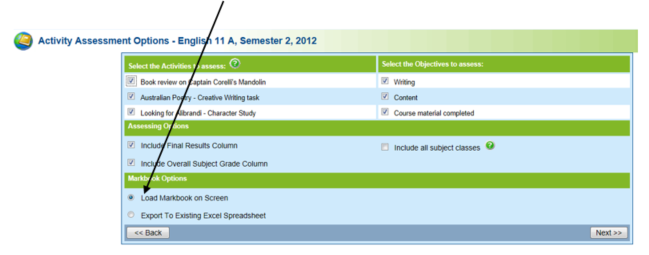
Return to the 'Activity Assessment Options' screen:
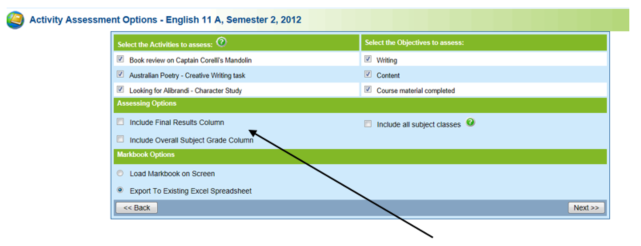
Based on exporting to the template example used in Step 1, you would untick the 'Include Final Results Column' and the 'Include Overall Subject Grade Column' boxes. This is because the Excel template is designed to calculate these so you don't need to include them in your export.
Click the 'Export to Existing Excel Spreadsheet' radio button and the 'Next' button to continue.
The 'Include all subject classes' tickbox is only available to HODs and Department Administrators.
Step 4
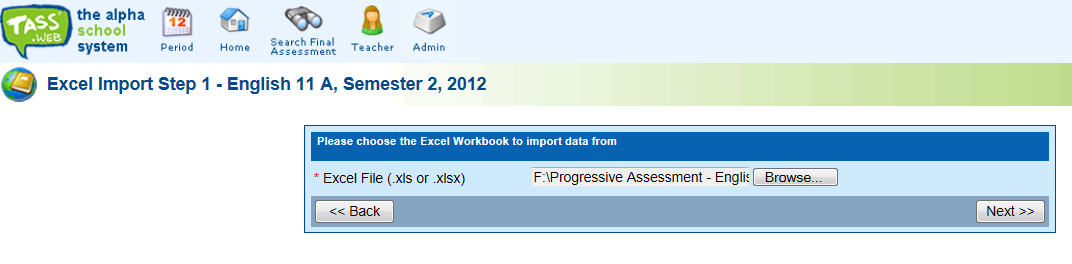
Browse to your Excel template spreadsheet (as detailed in Step 1).
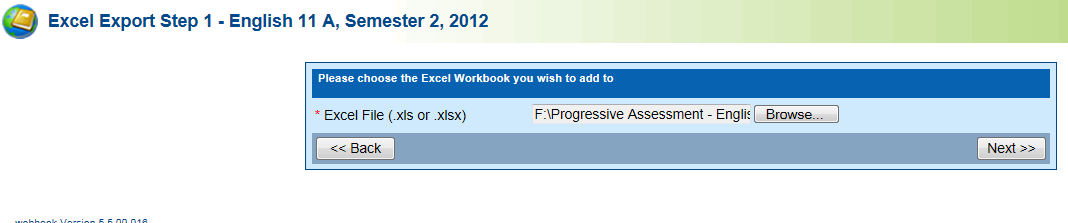
Click the 'Next' button.
Step 5
You need to complete the top section of this screen so that the program knows where to insert the Markbook data in your Excel template.
Worksheet | Select the worksheet that the Markbook data will be exported into, e.g. English 11 Markbook. |
Starting Column | Select the first column that the Markbook data will be exported into, e.g. Column A. |
Starting Row | Select the first row that the Markbook data will be exported into, e.g. Row 1. |
Include Translated Scores | This option will convert non-numeric grades into a numeric value. This makes it a lot easier to apply formulas in Excel. It uses the 'Calculation Rule' that is set up for each Objective. Important! This button will not be active if you have not assigned a 'Calculation Rule' to all Objectives for this subject that is included in this export. |
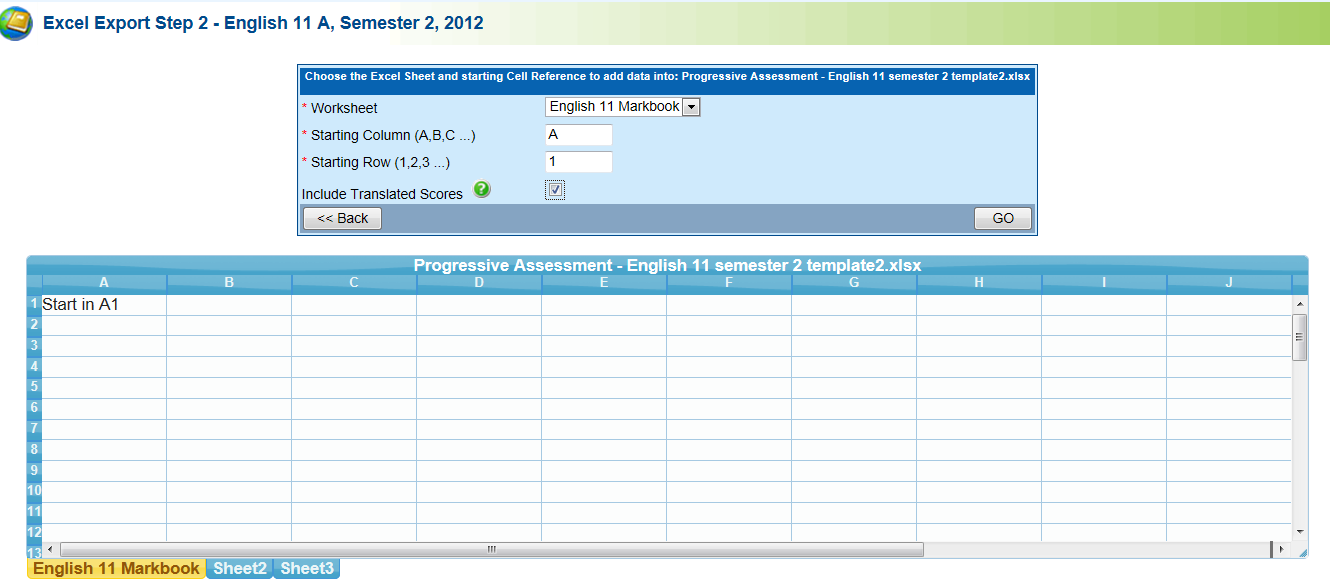
This section of the screen provides a 'view' of the Excel template that you selected in Step 4.
Text was inserted into the Excel template in this cell as a guide to assist with selecting the 'Starting Column' and 'Starting Row'.
The worksheet was labelled in the Excel template so that the description appears in the 'Worksheet' dropdown list.
Click the 'Go' button.
Step 6
The export program will create a new Excel spreadsheet (leaving the template untouched). The name of the file is the template name plus a suffix, e.g. English 11 Semester 2 template.1_29Nov2012.
An example of the spreadsheet with exported data:
You should now check the data and calculations in your spreadsheet and save it in preparation for importing the Final Results into your Markbook.
Very Important!
Do not delete the column containing student codes. These are required as part of the validation when importing the calculated final results.
If you delete a student row in your excel file then the student will not be included when importing back to the Markbook.
Uploading Final Results from an Excel SpreadSheet
This process should only be commenced after Step 6 of the 'Export to Existing Excel Spreadsheet' has been completed.
Step 7
Load your Markbook on the screen using the 'Activity Assessment Options screen'.
Click the 'Load Markbook on Screen' radio button and the 'Next' button to continue.
Step 8

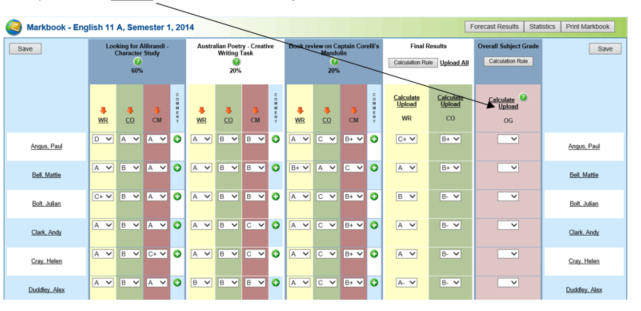
Click the 'Upload All' link in the 'Final Results' area to import the Final Results from your Excel Spreadsheet.
To upload raw scores for a single Objective for this subject click the 'Upload' link for that Objective.
Step 9
Browse to the Excel Spreadsheet that you saved as a result of Step 6 in the 'Export to Existing Excel Spreadsheet' process described above.
Important!
This spreadsheet should contain the raw scores that you originally exported from the Markbook and calculated Final Results.
Click the 'Next' button.
Step 10
An example of the spreadsheet with data that we will import:
Use the top part of the 'Excel Import Step 2' screen to provide some basic information so that the program knows where the data for importing is located in the Excel spreadsheet.
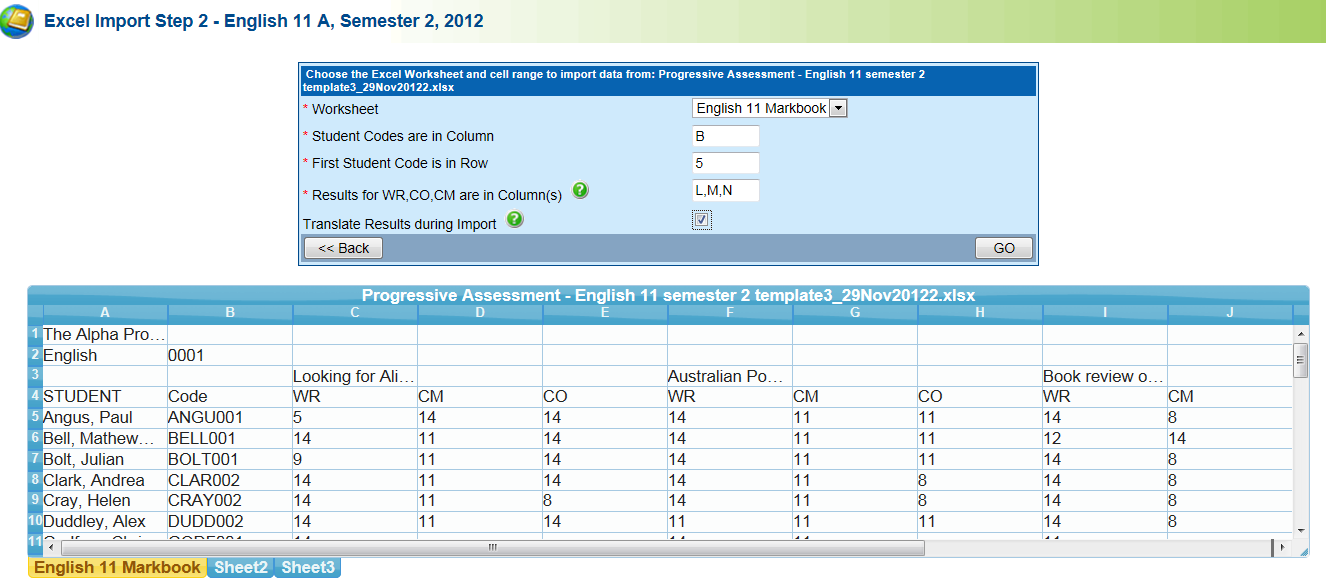
Worksheet | Select the worksheet that the Markbook data will be imported from, e.g. English 11 Markbook. |
Student Codes are in Column | Enter the column in your spreadsheet that contains the student codes, e.g. Referring to the example above this would be Column B. |
Objective Codes are in Row | Enter the column in your spreadsheet that contains the Objective Codes, e.g. Referring to the example above this would be Row 4. |
First Student Code is in Row | Enter the first row in your spreadsheet that contains the student codes, e.g. Referring to the example above this would be Row 5. |
Results for [Objectives in the Final Results column in your Markbook] are in Column(s) | This field will dynamically display the Objectives that are available in the Final Results column in the Markbook for this subject. You have to match these to the appropriate columns in your Excel worksheet, e.g. Referring to the example above this would be Rows L,M and N. If you are uploading multiple columns they should be entered with a comma separator, e.g. L,M,N. Important! Take care with this, as the data will be loaded from the columns that you indicate here. |
Include Translated Scores | This option will convert numeric values back into non-numeric grades. It uses the 'Calculation Rule' that is set up for each Objective. Important! This button will not be active if you have not assigned a 'Calculation Rule' to all Objectives loaded in your Markbook for this subject. |
The bottom section of the screen provides a 'view' of the Excel spreadsheet that you selected in Step 9.
Click the 'Go' button to continue.
If the import is successful the program will produce a 'Data Upload Report'.
If the import is unsuccessful, the program will produce an exception report. You will need to rectify the issues detailed in this report before attempting the import again.
Uploading Overall Subject Grade from an Excel Spreadsheet
The procedure for uploading the overall subject grade is similar to 'Uploading Final Grades from an Excel Spreadsheet' (follow Step 7 to 10).
In Step 8 use the 'Upload' link in the 'Overall Subject Grade' column.
Even if you have uploaded Final Results from an Excel spreadsheet, you can still use webBook Calculation for 'Overall Subject Grade'.