How to Setup Student Self Registration Portals
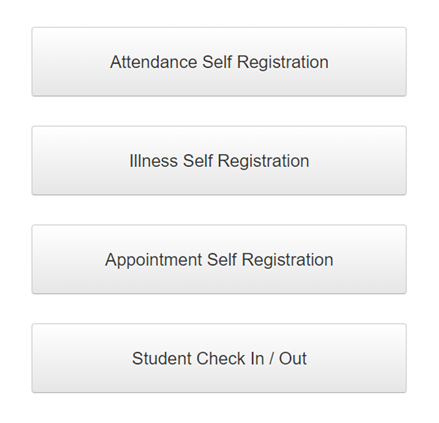
There are 4 Self Registration Portals for students that can be enabled:
Attendance Self Registration (ASR) to register Late for School, Early Departure or Absent Part Day.
For more information, see How to Setup the Attendance Self Registration Portal ASR).Illness Self Registration (ISR) to check in and out of Sickbay/Medical Centre which logs a record in the Student Illness/Daily Log.
For more information, see How to Setup the Illness Self Registration Portal (ISR).Appointment Self Registration (APPSR) to check in and out of an Appointment e.g. Counselling, Careers.
For more information, see How to Setup the Appointment Self Registration Portal (APPSR).Student Check In / Out (SCIO) for students to register their arrival on campus before their first rollcall period of the day or after their last rollcall period of the day.
For more information, see How to Setup Student Check In / Out (SCIO).

Step | Task | Details | ✅ |
1 | Configure Each Portal | Each portal has separate settings, refer to the following checklists: | 🔲 |
2 | Configure Docket Printers | Go to TASS.web System Admin > Utilities > Printer Definitions. Configure the docket printer/s that will be used for each portal to print:
You can configure multiple terminals and docket printers for each portal. | 🔲 |
3 | Add a Logo Image | Replace the default logo image file provided (default is the TASS.web logo) with your own school logo. The image file to be replaced is named schoollogo.gif and is located on the webserver in the folder:
The height of the image file should be 120 pixels. Separate images for the ASR, ISR, APPSR and SCIO can be configured. | 🔲 |
4 | Add a Background Image | Insert a background image to provide a custom background to the ASR system. The background image should be called bg.gif and should be placed on the webserver in the folder:
The maximum image size is 1420 x 644 pixels. Images that are smaller than this size will be tiled within the 1420 x 644 panel that is available within the ASR system. Separate images for the ASR, ISR and APPSR can be configured. | 🔲 |
5 | Install a Swipe Card Reader | Install a swipe card reader onto each of the machines being used. These must be configured for each portal, i.e. ASR, ISR, APPSR and SCIO. Student identification cards will need to use the 'Student Code' or 'Alternate ID' as the card value for each student. These will be configured for each portal i.e. ASR, ISR and APPSR | 🔲 |
6 | Review Screen Resolution | Review the screen resolution for the computers that will be used by the students with the SR system. The recommended screen resolution is 1440 x 900 pixels. | 🔲 |
7 | Test | Test the system by logging into the portal using the machines that will be used by the students. The URL to access the ASR, ISR, APPSR and SCIO portal is:
All portals will display, but each will only be functional once configured. Enter the Self Registration Password (separate for each portal) to access the portal. Once the page has loaded, press the F11 key to display the portal in full screen. This will also hide the URL and browser buttons. Important! If a live test is carried out using a real student record, then ensure the email confirmation option is disabled. If you are using LDAP mappings for student passwords, you must limit the size of the passwords to 18 characters. If passwords are longer than 18 characters, then students will not be able to log into ASR. Appointment log records cannot be deleted, do not create a dummy appointment records (you cannot delete them). | 🔲 |
