Creating a New Blog
Click the 'Create Blog' button to view the 'Create Blog Entry' screen.
Step 1: Enter Blog Details
This is where you set up the outline for a blog.
Below is an example of the 'Create Blog Entry' screen:
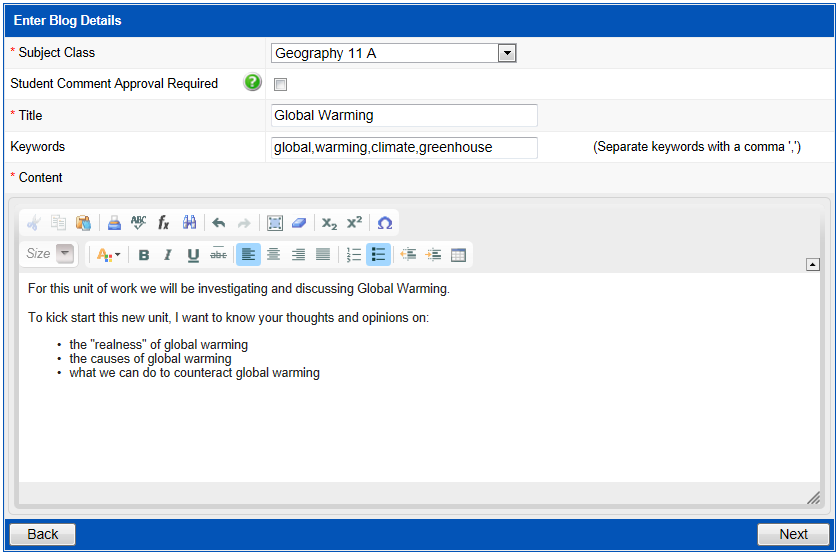
Subject Class | This field will display a list of your subject classes for the current year and semester (or term). Select the subject class you want to create this blog for. Each student within the subject class you select here will be able to access and participate in the blog through Student Café. |
Student Comment Approval Required | Tick this checkbox if you want to approve student comments before they become visible to other students in the class. Your school may have set this field as mandatory (therefore you may not be able to untick this). |
Title | Enter the name of your blog For example, Global Warming — Real or Not? |
Keywords | Keywords are used as search criteria. Once a blog has been created, you can use the 'Keywords' in the 'Filter Results' field on the 'Class blogs' screen. Students can also use these 'Keywords' to look for blogs in Student Café Collaborate > Class Blogs. |
Content | Enter the content of your blog here. The rich text editor can be used to format the appearance of the text you enter. For example, bold, italicise and underline. |
Click the 'Next' button to proceed to 'Step 2'.
Step 2: Attach Resources
This step allows you to attach one or more (up to 10) digital Resources for students to reference whilst participating in the blog.
It is not mandatory to attach a Resource to your blog. To proceed to 'Step 3' without attaching a Resource, click the 'Next' button.
To embed an image into your blog, you must attach an 'Image' type Resource to your blog here.
There are two options available to attach Resources to a blog:
Use an existing Resource from the Learning Objects Repository.
Create a new Resource on-the-fly.
Using an Existing Resource
When you first access the Learning Objects Repository in Step 2, it will look similar to the screen directly below. The program will display the Learning Object Repository, with Resources only loaded:
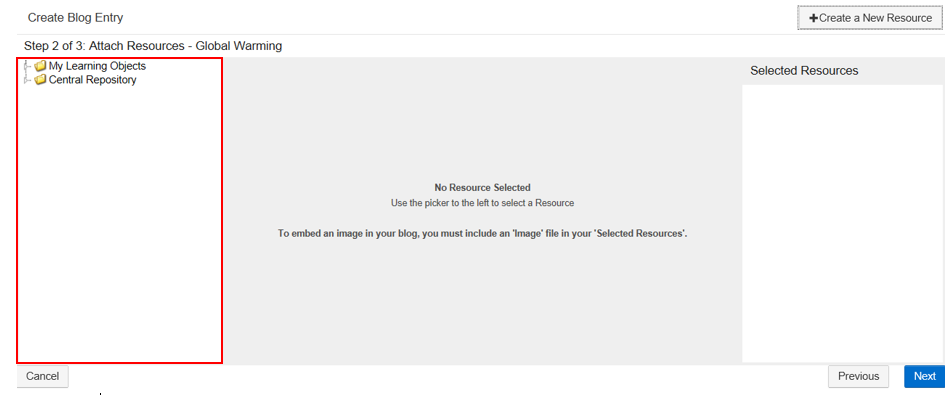
Browse through the Learning Object Repository to locate the Resource(s) you would like to attach to your blog.
After a Resource has been selected from the Learning Object Repository, details of the Resource will be displayed in the middle of the screen:
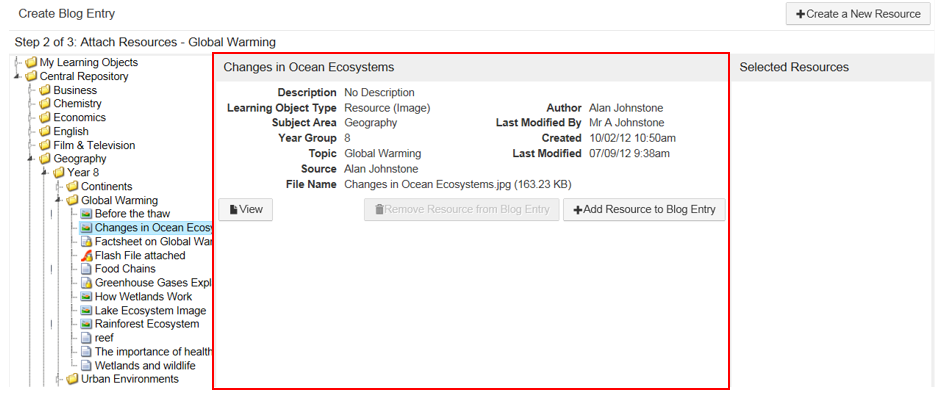
Click the 'View' button to look at the Resource before attaching it to your blog.
Click the 'Add Resource to Blog Entry' button to attach the selected Resource to your blog.
Resources that have been added to the blog will be displayed in the 'Selected Resources' column.
You can also double-click a Resource from the Learning Object Repository to add it to the 'Selected Resources' column (PC and MAC only).
To remove a Resource, select the Resource from the 'Selected Resources' column and click the 'Remove Resource from Blog Entry' button.
Adding a New Resource 'On the Fly'
Click the 'Create a New Resource' button to create and add a new Resource to this blog 'on the fly'.
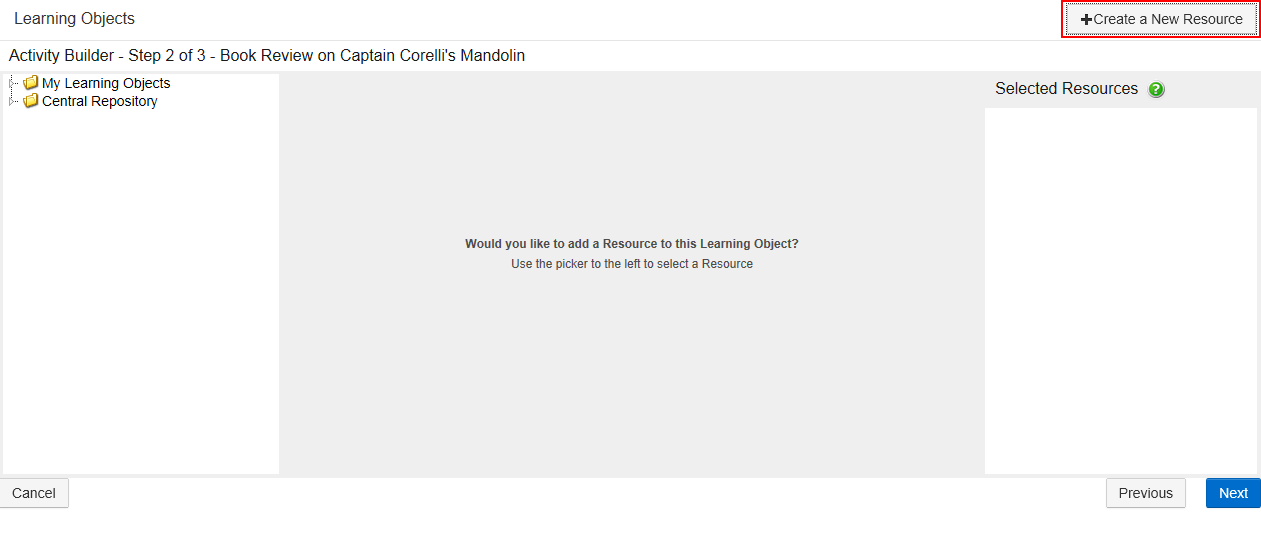
This will open the 'Resource Entry' screen.
Click the 'Save' button to create your Resource. This will also automatically add your Resource to the 'Selected Resources' column.
This Resource will also be available through Staff Kiosk Assessment > Learning Objects under the 'Subject Area', 'Year Group' and 'Topic' that you nominated when creating your Resource.
Click the 'Next' button to proceed to 'Step 3'.
If you attached a Resource that was an 'Image', you will be directed to 'Step 2a' first.
Step 2a: Embed Image in Blog
This step will only be displayed where you attached a Resource with an image file type in the previous step.
Example:
.jpeg.gif.png
Below is an example of the 'Create Blog Entry' screen:
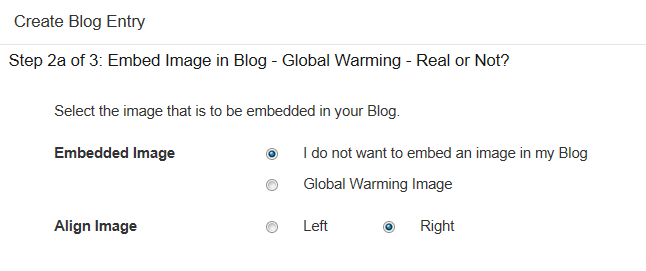
Embedded Image | Check the 'I do not want to embed an image in my blog' radio button if you do not want an image displayed alongside your blog content. Alternatively, check the Resource image you want to display. If you selected multiple Resources that contained image files in Step 2, they will be displayed here. You can only embed one in the blog content. All Resources will still be available to the students in the blog resources panel. |
Align Image | Use the 'Left' and 'Right' radio buttons to determine whether your image will be displayed on the left or right-hand side of the screen. |
Click the 'Next' button to proceed to 'Step 3'.
Step 3: Blog Preview
This step will display a preview of your blog as it will be displayed to students in Student Café.
Click the 'Save' button to finish creating your blog.
Students will be able to participate in your blog once the record has been saved.
