Staff Kiosk UI Maintenance
The Product UI Maintenance program controls the User Interface display in Staff Kiosk.
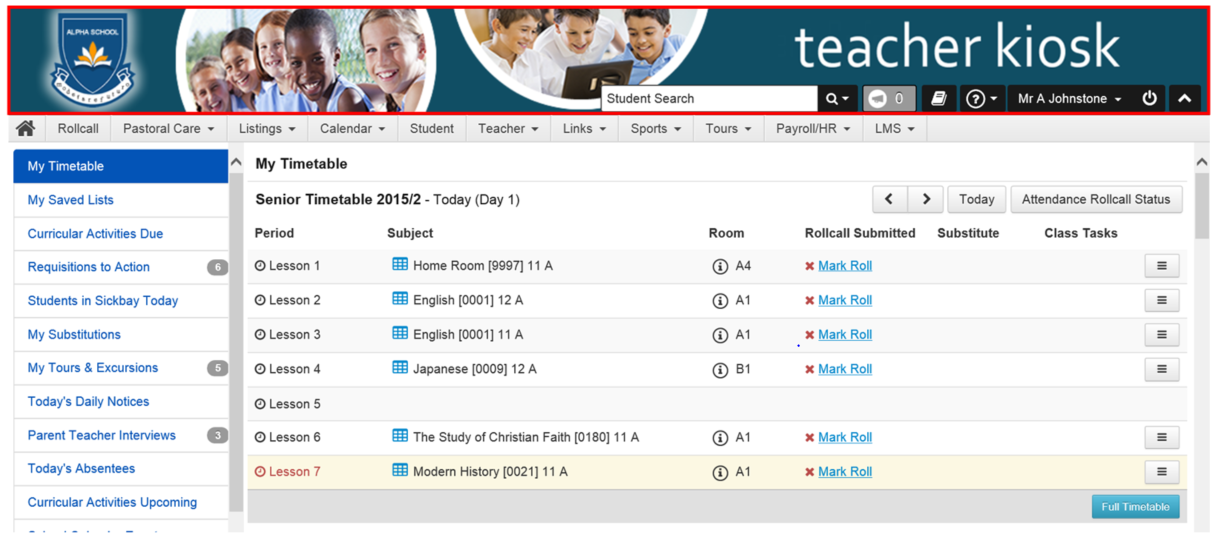
The top section of the Staff Kiosk screen is used to display your banner image.
A good design rule is to embed your logo on the left-hand side of your banner image. This will reduce the potential for it to be truncated when Staff Kiosk is used on devices with smaller screen sizes.

Step 1: Prepare Your Banner
If you intend to use a banner you will need to prepare an image file such as a jpeg, gif or png.
It is important to consider the file size of your images as the larger the image, the longer the Staff Kiosk home page will take to load for teachers.
The height of your banner image will depend on whether you want the banner to:
Option A - Fit above the toolbar and cover the toolbar (as background). In this case it should be no higher than 117 pixels. This is recommended.

To stop the toolbar overriding a section of your banner you will need to tick the 'Transparent' flag in the 'Toolbar' panel on the 'Styles' tab.
Option B - Fit above the toolbar. In this case it should be no higher than 83 pixels.

The width of your banner is dependent on the look you are trying to achieve and the screen resolution of devices you anticipate Staff Kiosk will run on. As a rough guide, a left justified image of 1300 pixels works well in most resolutions.
To make the transition from the banner to the background less obvious, set the 'Background Colour' on the 'Images' tab to the same hexadecimal code as you have in your banner image.
Step 2: Add Your Banner
Click on the 'Images' tab and the 'Add Image' button.
Complete the following setups:
TASS/Portal | Staff Kiosk (TIA) |
|---|---|
Image Type | Banner |
Image Number | This is a system allocated sequential number which will increment automatically. You would create multiple image numbers if you intend to change the banners for teachers regularly. As an example you may have a banner that you use during holiday periods or to promote certain events at the school. |
Enabled | This flag is used to determine if this banner image is the current one displayed in Staff Kiosk. Use this to turn banner images on and off. |
Image Upload | Use the 'Choose File' button to locate the file that you want to attach as the banner image (as setup in Step 1). |
Background Colour | Use the colour picker or enter a hexadecimal code. To make the transition from the banner to the background less obvious, set this colour to the same hexadecimal code that you have in your banner image background. |
Background Colour 2 | This option is not relevant when you have chosen the 'Banner Only' option. |
Transparent | This option is not relevant when you have chosen the 'Banner Only' option. |
Repeat Image | If your banner image is relatively small, you can elect to have it repeat across the top section of the Staff Kiosk screen. |
Horizontal Position | The banner will display from the left. This can't be changed. |
Vertical Position | The banner will display from the top. This can't be changed. |
Click the 'Save' button to commit your changes to the database.
Step 3: Add Your Styles
Click on the 'Styles' tab and the 'Add Product' button.
Choose 'Staff Kiosk' from the dropdown list and click the 'Next' button.
Follow A to C below:
A. Set the colour scheme for the menus in your school's Staff Kiosk.
This is the recommended way to set up Staff Kiosk colours.
Use the 'Theme Options' panel to choose your Staff Kiosk menu colour (using the colour picker or enter a hexadecimal code) for:
Auto Adjust Theme | Leave this ticked. There is rarely a need to adjust the colours in Staff Kiosk, beyond those that the 'Auto Adjust Theme' generates. |
|---|---|
Theme Toolbar Colour | Referring to the screenshot directly below. This is the area in red.In Step 1 (Option A) above we recommend that you make the toolbar transparent so that you banner covers this area. If you do this it doesn't matter what colour you choose for the 'Theme Toolbar Colour' as it won't be displayed to the teachers.To make the toolbar transparent, go to the 'Toolbar' panel and tick the 'Transparent' box.If you chose Step 1 (Option B) above then the colour that you choose in this field will be displayed. |
Theme Menu Colour | Referring to the screenshot directly below. This is the area in green.The program will set all other attributes for the Menu Bar, Menu (Mouse Over), Sub Menu Items and Sub Menu Items (Mouse Over) panels. |

B. Set the Staff Kiosk toolbar to be transparent
Use the 'Toolbar' panel and tick the 'Transparent' box.
C. Set the colours for panels
Use the 'UI Elements' panel to set:
Panel Header Background
Panel Header Text Colour.
Refer to the example of the Staff Kiosk homepage directly below to see where these attributes are used:

They are also used in various list screens:

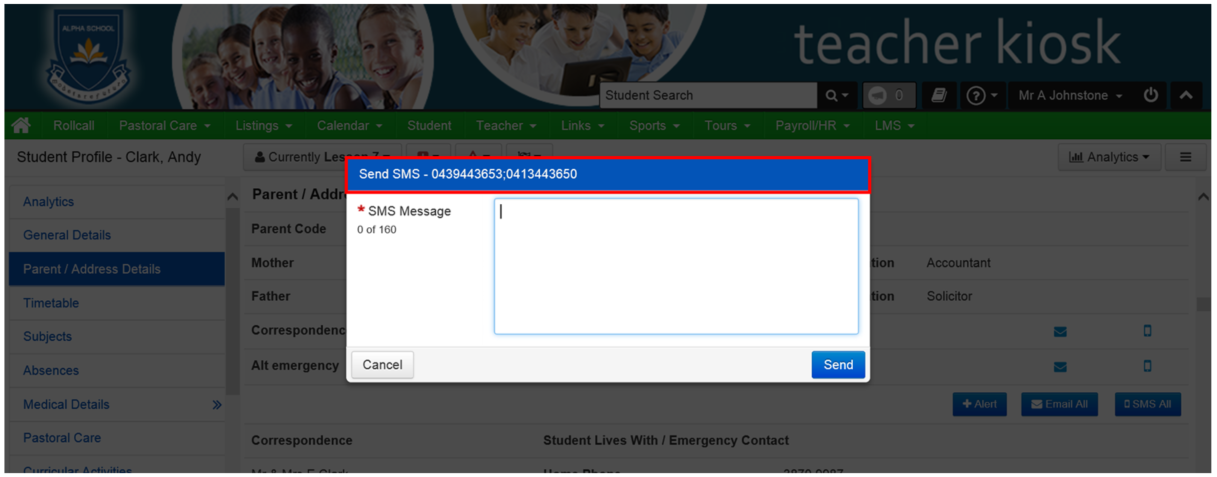
They are also used in some modal windows:

Step 4: Prepare and Add Your Login Image
If you are going to customise the image that is displayed as part of the login screen, you will need to prepare an image file such as a jpeg, gif or png.
As a rough guide, an image size of 300 pixels in width and 150 pixels in height works well.
Click on the 'Images' tab and the 'Add Image' button.
Complete the following setups:
TASS/Portal | Staff Kiosk |
|---|---|
Image Type | Login |
Image Number | This is an automatically allocated sequential number. It would be unlikely to have more than one login image. |
Enabled | This flag is used to determine if this login image is the current one displayed in Staff Kiosk. |
Image Upload | Use the 'Browse' button to locate the file that you want to attach as the login image. |
