
Student Cafe UI Maintenance
Overview
The ‘Product UI Maintenance’ program in TASS.web System Admin > Utilities manages the User Interface banners and colour themes displayed in the Student Café portal product.
Example
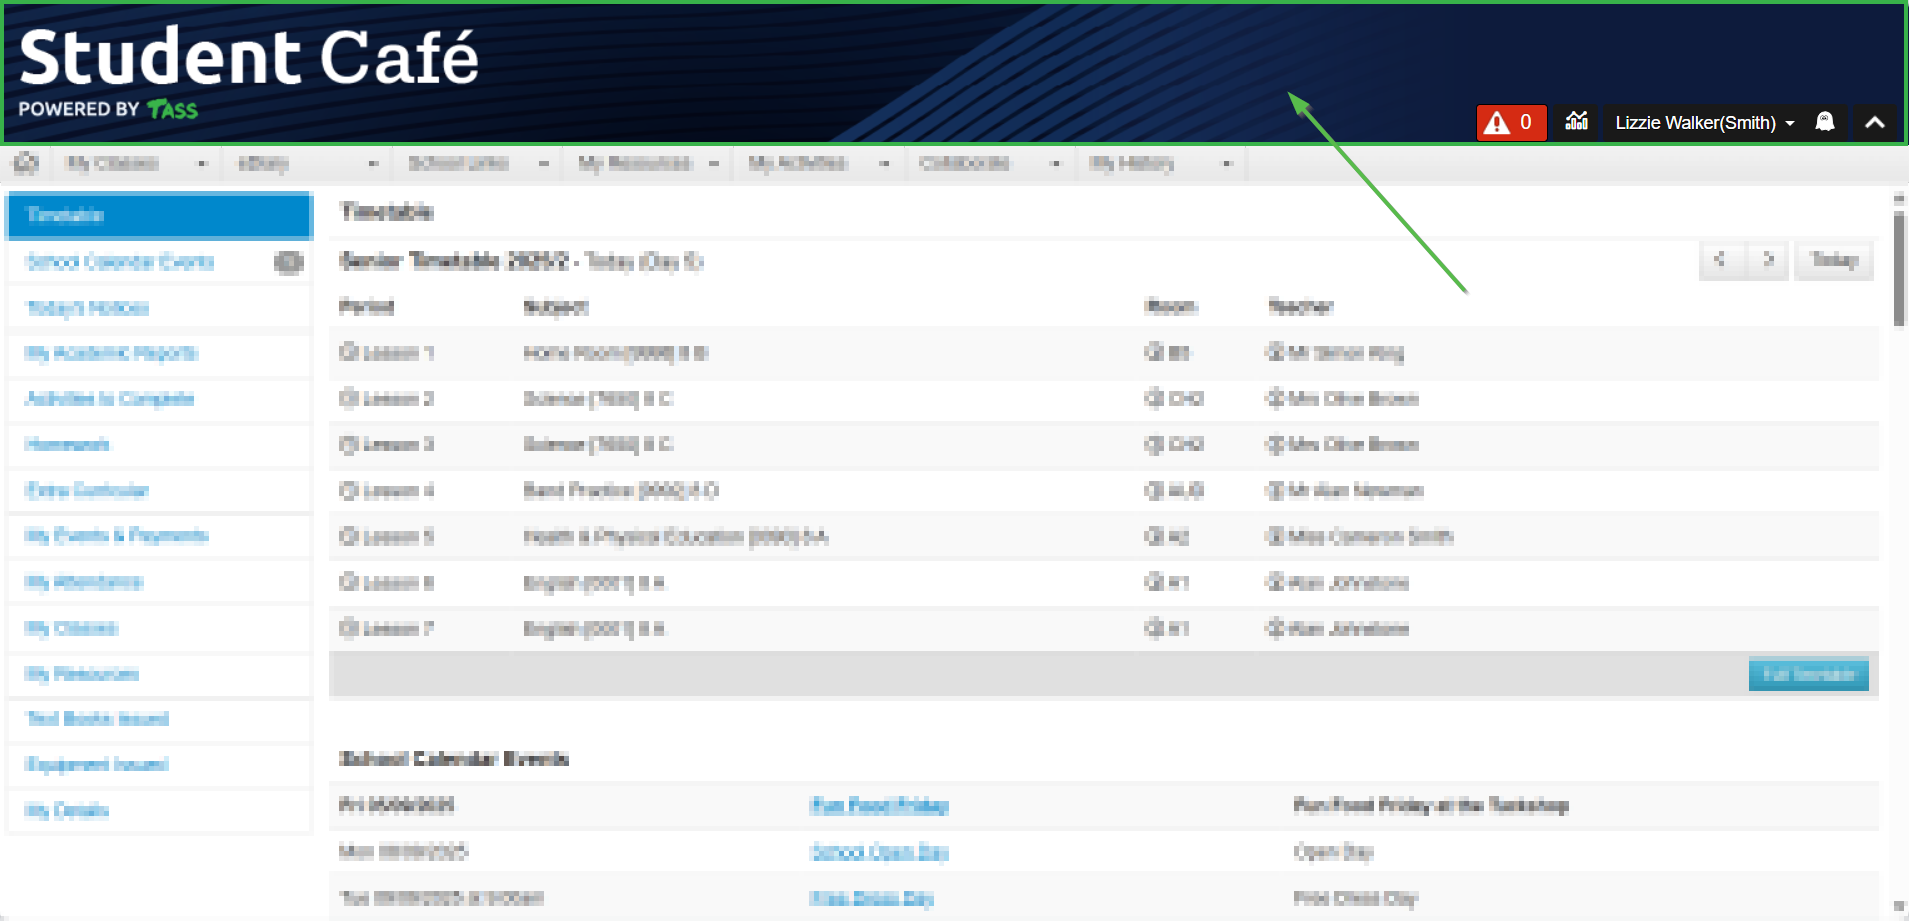
An example of a banner at the top of the page in Student Café:
The program provides several options for displaying logos and banners in Student Café:
Options | Description |
|---|---|
Banner Only | The simplest option is to include your logo in the banner image, eliminating the need for a separate logo image. Insert your logo on the left side of your banner. This placement reduces the risk of truncation when Student Café is viewed on smaller screens. |
Logo Only | This option will display your logo only. You need to override the default banner in Student Café with the transparent banner supplied with this help guide. Refer to Step 1 and 4 below for details on uploading a 'transparent' banner. |
Banner and Logo | You might use both if you intend to update Student Café regularly with new banner images and do not want to have to incorporate the school logo into your banner image each time. In this scenario, the logo image would remain constant, and the banner image would be changed regularly using this program. The logo will display over the top of the banner (normally on the left-hand side), so consider this when designing your banner image. |
For more information, check out the ▶️ Customising the Look and Feel of Student Cafe Video!
Follow the steps below to customise your school’s Student Café User Interface (UI).
Step 1 : Prepare Your Banner
If you intend to use the ‘Banner Only’ or ‘Logo and Banner’ options, you will need to prepare an image file such as a JPEG, GIF, or PNG.
If you plan to use the ‘Logo Only’ option without a banner, download the transparent banner file below to replace the default banner.
Click the image below to view it in full size.
Right-click the image and select ‘Save Image As’ to save it in your preferred location.

It is important to consider the file size of your images. The larger the image, the longer the Student Café home page will take to load for students.
The width of your banner depends on the look you are trying to achieve and the screen resolution of the devices on which Student Café will run. As a rough guide, a left-justified image of 1300 pixels works well in most resolutions.
The height of your banner image will depend on whether you want the banner to:
Fit above the toolbar and cover the toolbar (as background). See ‘Banner Option A’ below.
Fit above the toolbar. See ‘Banner Option B’ below.
A good design rule is to embed your logo on the left-hand side of your banner image. This will reduce the potential for truncation when Student Café is used on devices with smaller screen sizes.
Banner Option A |
This option will fit the banner above the toolbar and cover the toolbar (as background). In this case, the height should be no higher than 117 pixels. This is the recommended option. Important! To prevent the toolbar from overriding a section of your banner, you must tick the 'Transparent' flag in the 'Toolbar' panel on the 'Styles' tab. Example 1 A Student Café banner that fits above the toolbar and covers the toolbar (as background): 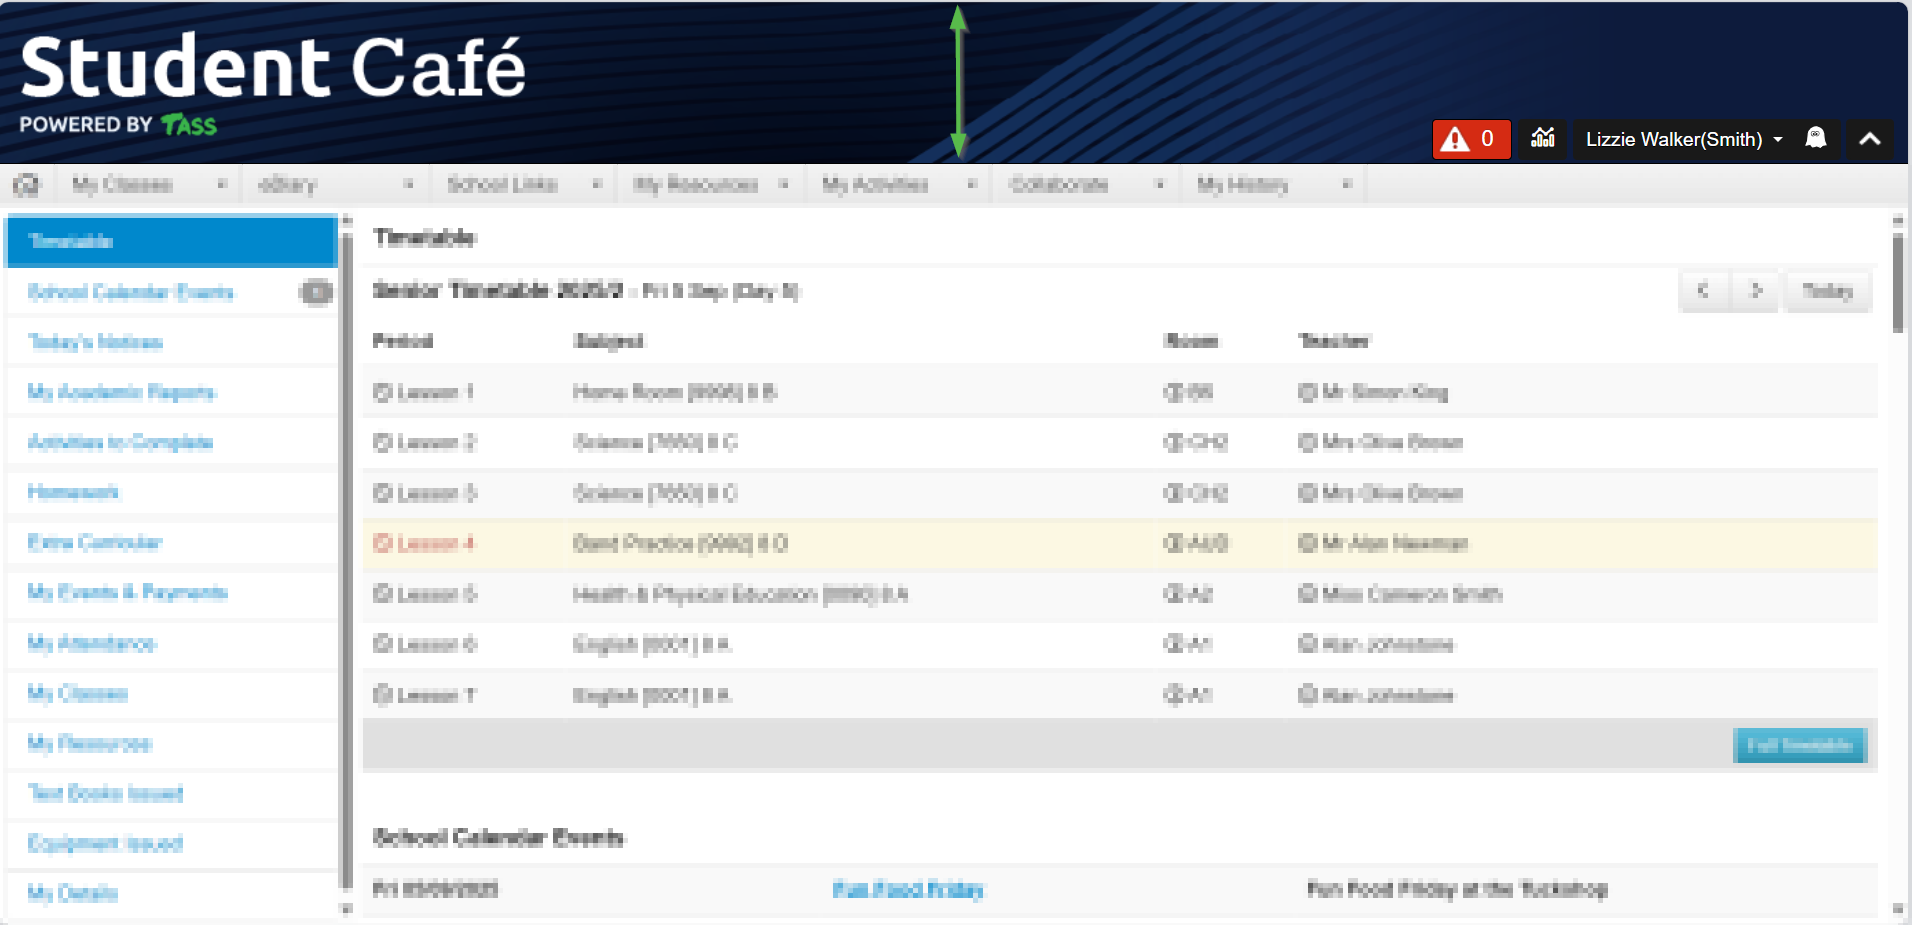 |
Banner Option B |
This option will fit the banner above the toolbar. In this case, the height should be no higher than 83 pixels. To make the transition from the banner to the background less obvious, set the 'Background Colour' on the 'Images' tab to the same hexadecimal code as you have in your banner image. Example 2 A Student Café banner that fits above the toolbar: 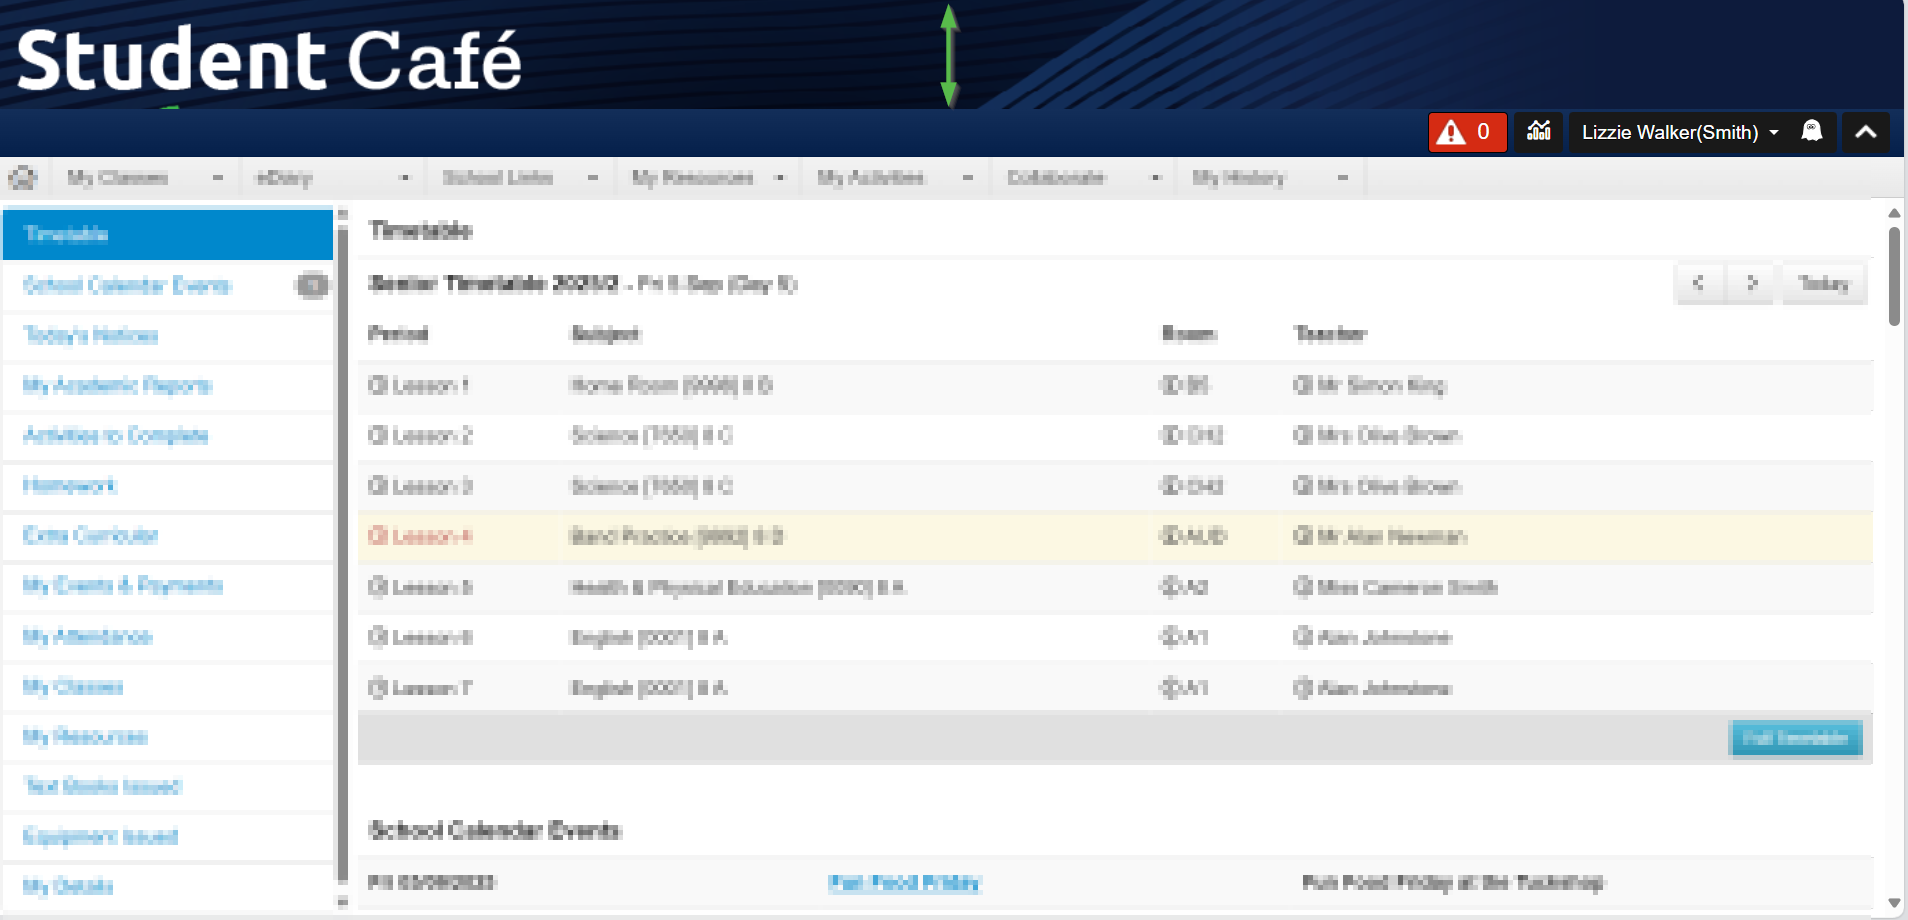 |
Step 2 : Prepare Your Logo
If you intend to use the ‘Logo Only' or ‘Logo and Banner’ options, you will need to prepare an image file such as a JPEG, GIF or PNG.
The logo should be no higher than 83 pixels.
If your logo is to appear over the top of a banner, it is a good idea to make the background of your logo transparent. This looks better.
Step 3 : Prepare Your Login Image
To customise the image displayed on the login screen, you must prepare an image file such as a JPEG, GIF, or PNG.
As a rough guide, an image size of 300 pixels in width and 150 pixels in height works well.
Example
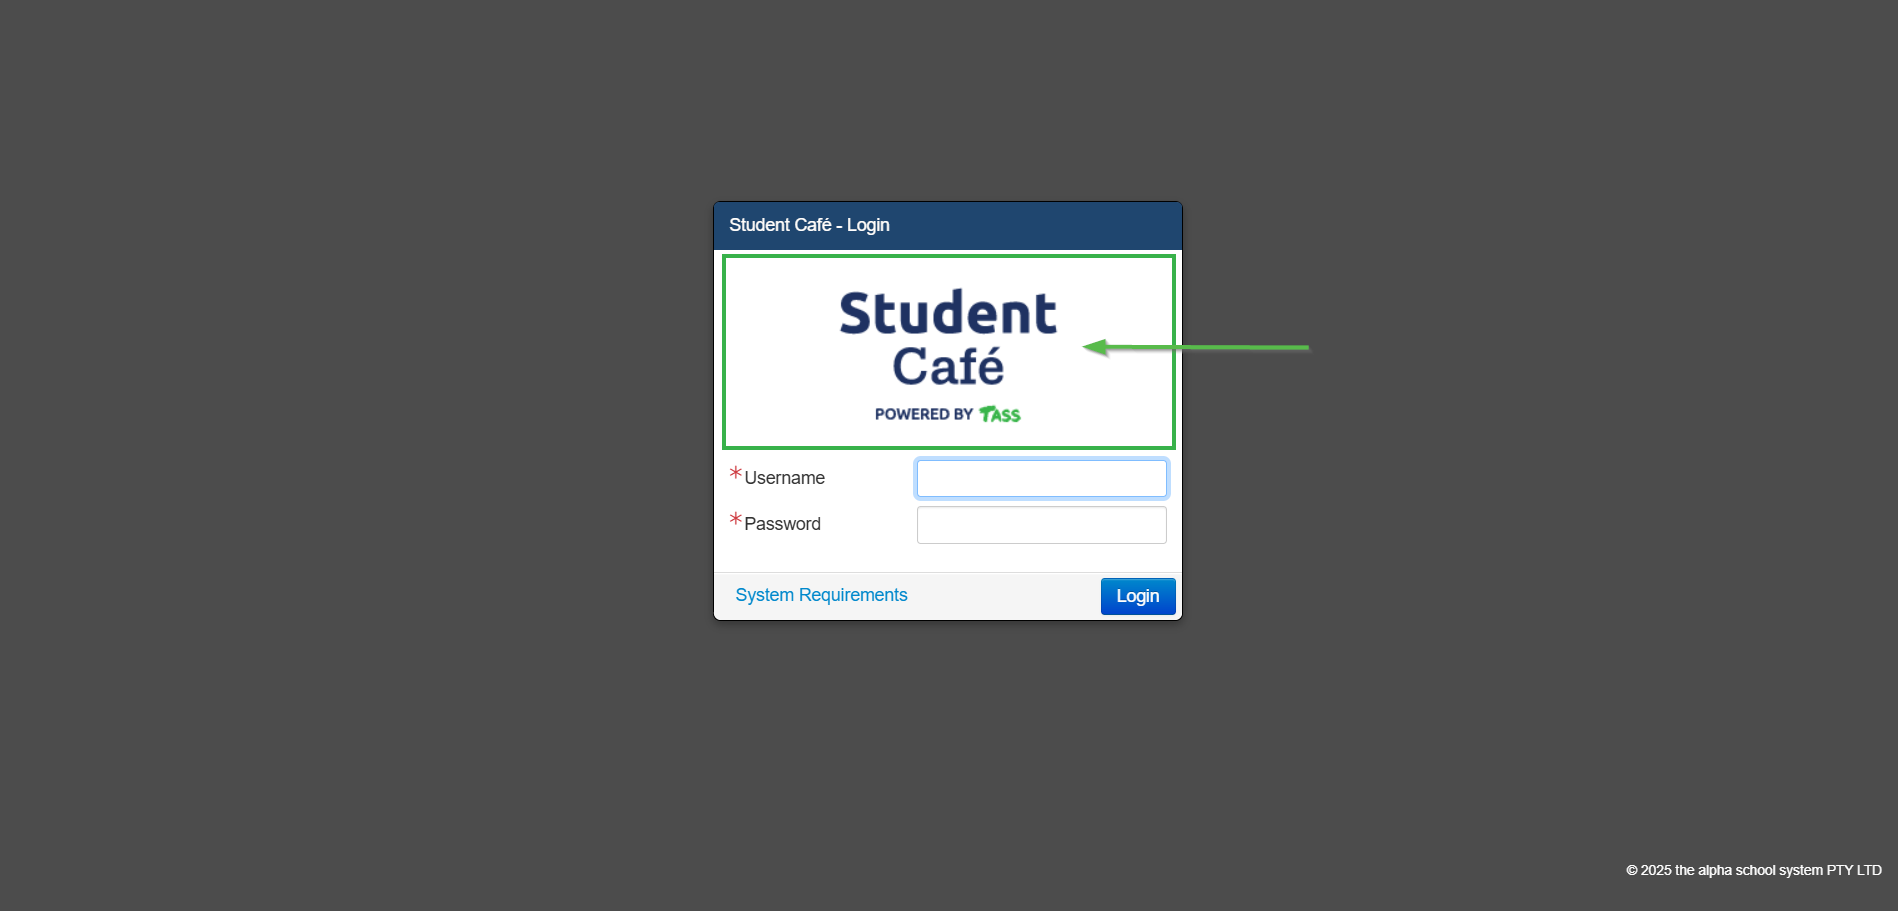
An example of a login image in Student Café:
Step 4 : Add Your Banner
Click on the 'Images' tab and the 'Add Image' button.
Complete the following setups:
Product Image Details | |
* TASS / Portal | Student Café |
* Image Type | Banner |
* Image Number | This is a system-allocated sequential number that increments automatically. If you intend to change the banners for students regularly, you would create multiple image numbers. As an example, you may have a standard banner along with additional banners for holiday periods or specific school events. |
Enabled | This flag determines if this banner image is the current one displayed in Student Café. Use this to turn banner images on and off. |
* Image Upload | Use the 'Choose File' button to locate the file you want to attach as the banner image (as set up in Step 1). Acceptable file formats are JPEG, GIF or PNG. When using the ‘Logo Only’ option, you must use the ‘transparent banner’ from Step 1 to override the default TASS banner. |
Image Styles | |
* Background Colour | Use the colour picker or enter a hexadecimal code. To make the transition from the banner to the background less obvious, set this colour to the same hexadecimal code that you have in your banner image background. |
Background Colour 2 (For Gradient) | You can pick a second colour, and the banner background section will graduate from the colour above to this one. This option is not relevant when you have chosen the ‘Banner Only' option. |
Transparent | If your banner image has any transparent area, the 'Background Colour' above will be displayed. |
* Repeat Image | If your banner image is relatively small, you can elect to have it repeat across the top section of the Student Café screen. |
* Horizontal Position | You can choose to have the banner positioned on the left, centred, on the right, or at a specific screen coordinate. |
* Vertical Position | You can choose to have the banner positioned at the top, in the middle, on the bottom, or at a specific screen coordinate within the banner panel area. |
Click the 'Save' button to commit your changes to the database.
Step 5 : Add Your Logo
Click on the 'Images' tab and the 'Add Image' button.
Complete the following setups:
Product Image Details | |
* TASS / Portal | Student Café |
* Image Type | Logo |
* Image Number | This is an automatically allocated sequential number. It would be unlikely to have more than one logo image. |
Enabled | This flag determines if this logo image is the current one displayed in Student Café. |
* Image Upload | Use the 'Choose File' button to locate the file you want to attach as the logo image (as set up in Step 2). Acceptable file formats are JPEG, GIF or PNG. |
Image Styles | |
* Background Colour | This field is only relevant when you choose the 'Logo Only' option. The colour you nominate here will be displayed instead of having a banner. |
Transparent | If your logo image includes any transparent area, the 'Background Colour' above will be displayed when this checkbox is selected. |
* Repeat Image | Use this option to repeat the image across the top section of the Student Café screen. |
* Horizontal Position | You can choose to have the logo positioned on the left, centred, right, or at a specific screen coordinate within the banner panel area. |
* Vertical Position | You can choose to have the logo positioned at the top, in the middle, on the bottom, or at a specific screen coordinate within the banner panel area. |
Click the 'Save' button to commit your changes to the database.
Step 6 : Add Your Login Image
Click the 'Images' tab and the 'Add Image' button.
Complete the following setups:
Product Image Details | |
* TASS / Portal | Student Café |
* Image Type | Login |
Image Number | This is an automatically allocated sequential number. It would be unlikely to have more than one login image. |
Enabled | This flag determines if this login image is the current one displayed in Student Café. |
* Image Upload | Use the 'Choose File' button to locate the file you want to attach as the login image, as created in Step 3. Acceptable file formats are JPEG, GIF or PNG. |
Image Styles | |
Horizontal Position | You can choose to have the login image positioned on the left, centred, right, or at a specific screen coordinate within the banner panel area. |
Click the 'Save' button to commit your changes to the database.
Step 7 : Add Your Styles
Click the 'Styles' tab and the 'Add Product' button.
Choose 'Student Café' from the dropdown list and click the 'Next' button.
Set your ‘Theme Options’, ‘Toolbar’ and ‘UI Elements’ colour schemes by following the instructions below.
Theme Options
The 'Theme Options' panel allows you to set the colour scheme for the menus in your school's Student Café.
There are two options: ‘Auto Adjust Theme’ mode or ‘Manual Adjust Theme’ mode.
The ‘Auto Adjust Theme' option is recommended for setting up Student Café colours. It enables the automatic adjustment of Styles based on ‘Theme Colours’ and primary 'Background’ colours.
The recommended method is the ‘Auto Adjust Theme’ mode.
The ‘Manual Adjust Theme’ mode is still available for schools that had this feature before TASS introduced the ‘Auto Adjust Theme’ mode.
Auto Adjust Theme Mode | ||||
|
This is the recommended way to set up Student Café colour themes. Leave the 'Auto Adjust Theme' ticked. In the 'Theme Options' panel to choose colours (using the colour picker or enter a hexadecimal code) for:
Examples An example of the ‘Theme Options’ in TASS.web: 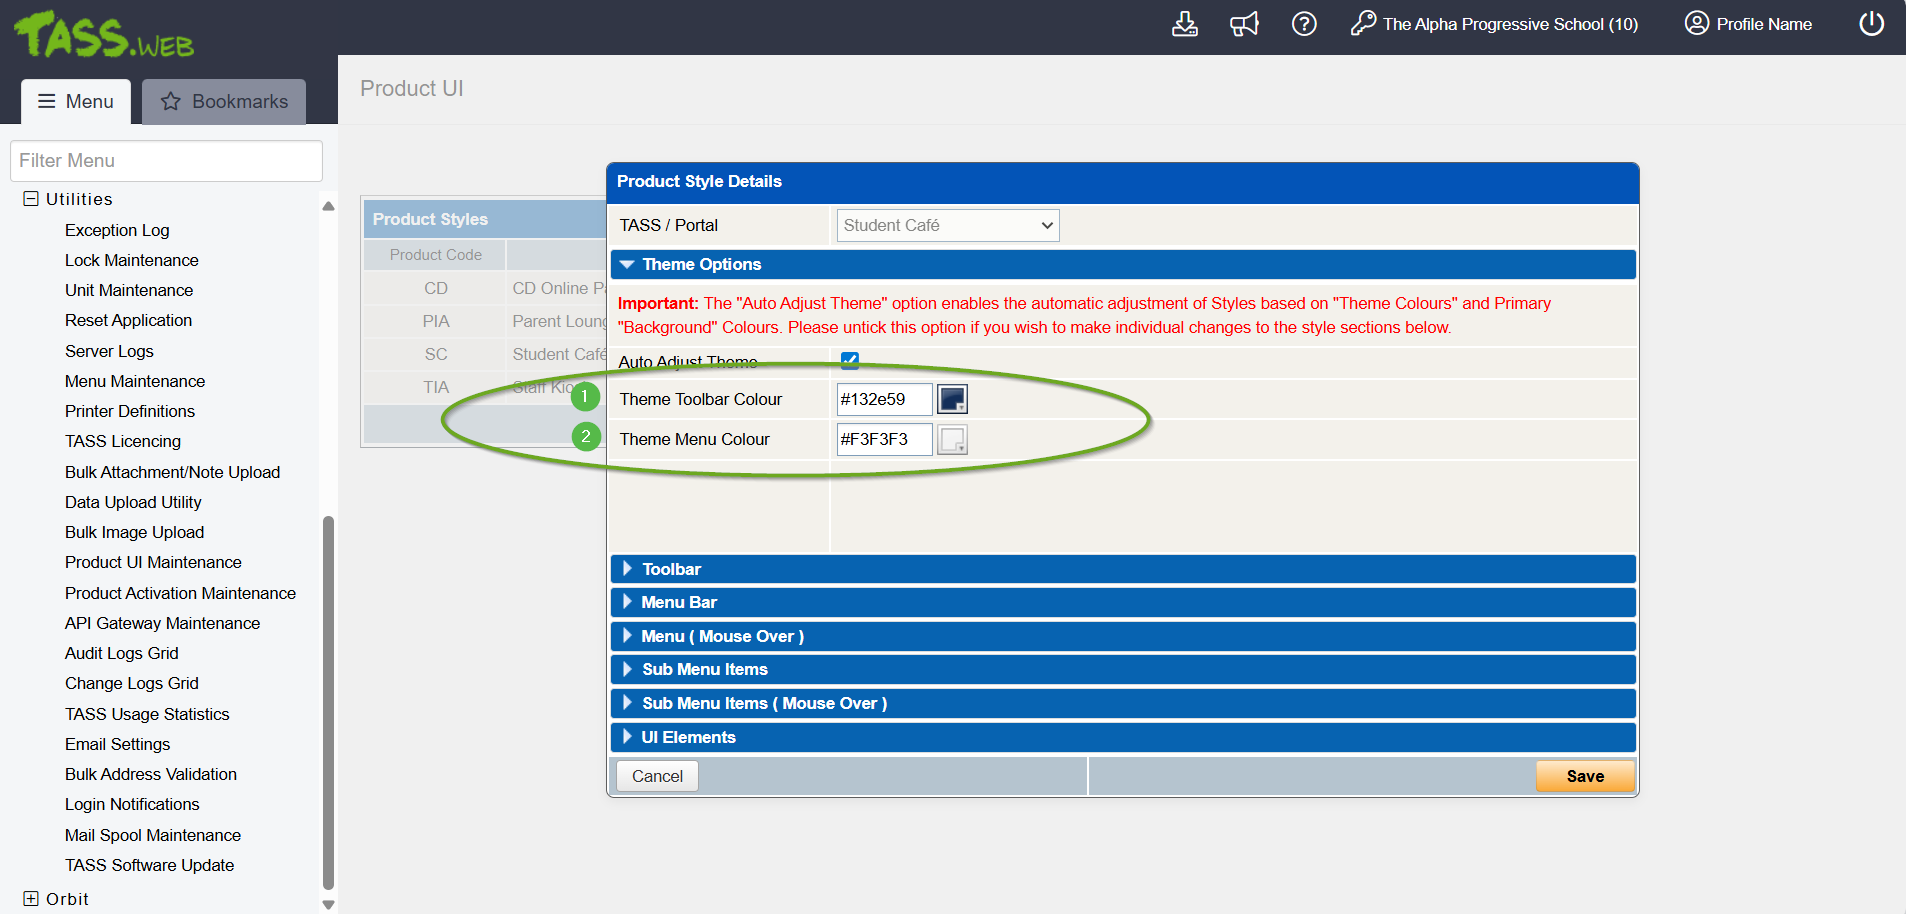 An example of the applied colours in Student Café: 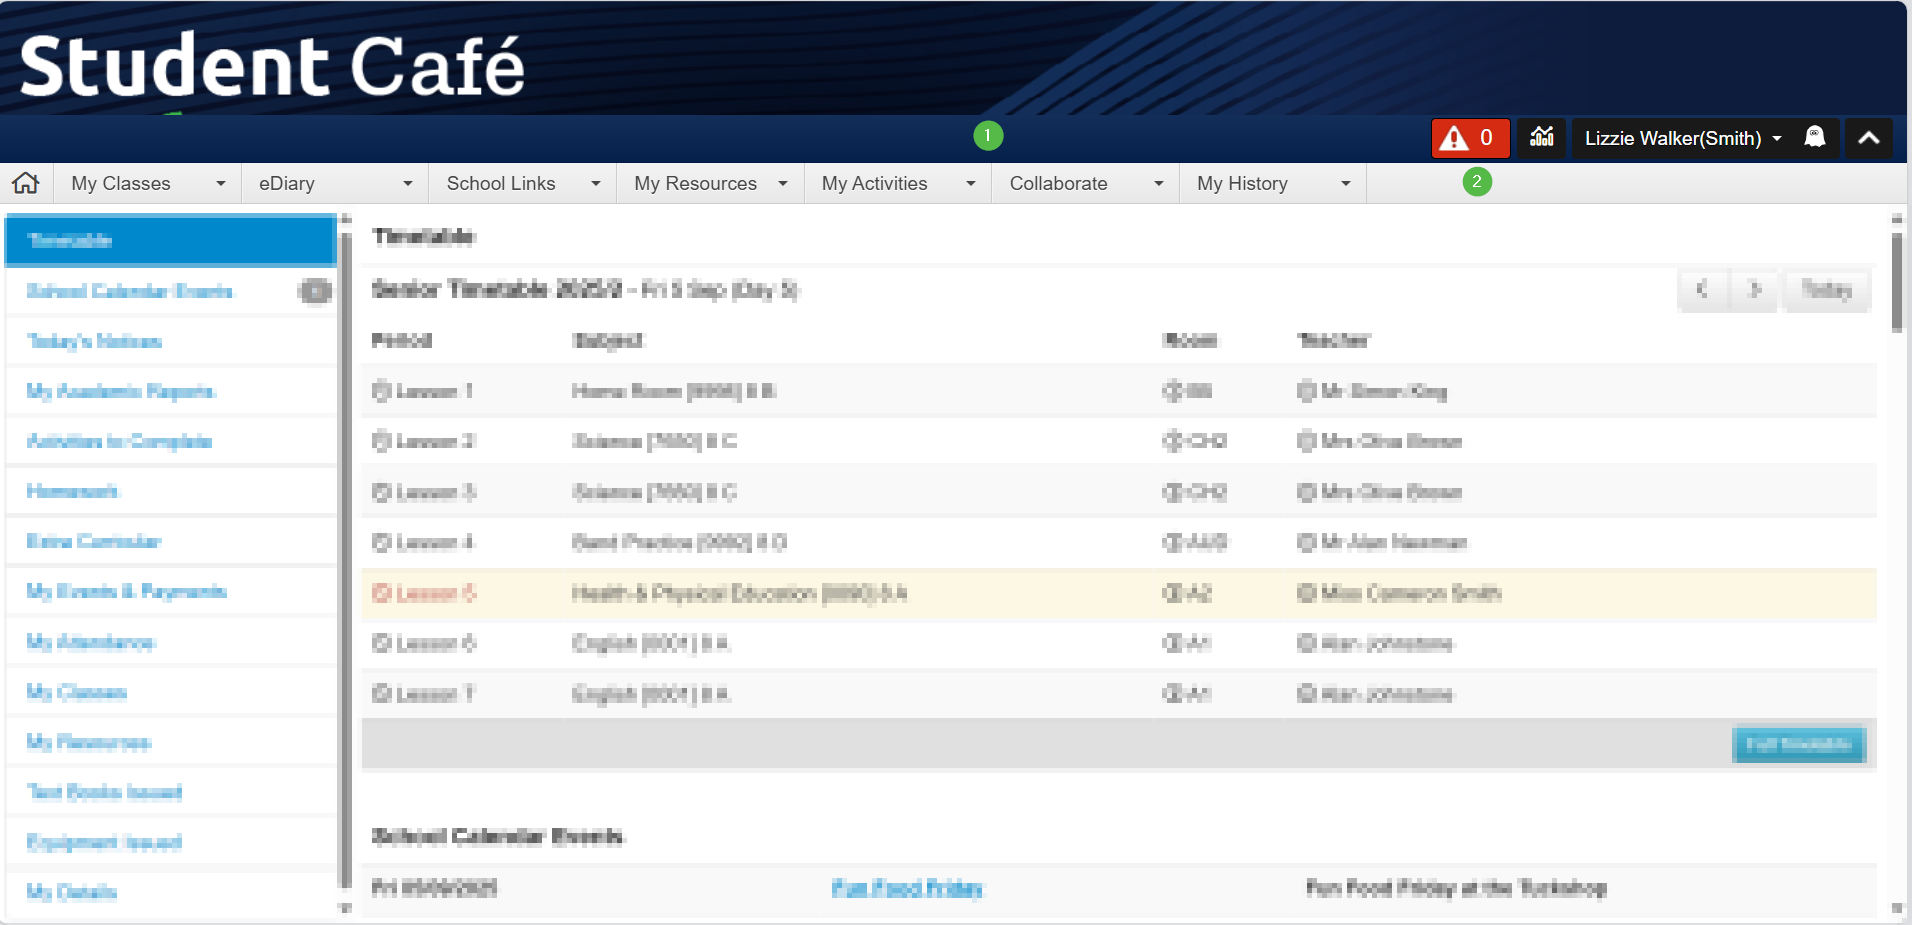 |
Manual Adjust Theme Mode |
This mode can be used to change individual attributes in the Toolbar, Menu Bar, Menu (Mouse Over), Sub Menu Items, and Sub Menu Items (Mouse Over) panels. The recommended method is the ‘Auto Adjust Theme’ mode. The ‘Manual Adjust Theme’ mode is still available for schools that had this feature before TASS introduced the ‘Auto Adjust Theme’ mode. You should start by selecting base colours in the 'Theme Toolbar Colour' field and 'Theme Menu Colour' field in the 'Theme Options' panel. Next, untick the 'Auto Adjust Theme' box to adjust attributes manually. Once you elect to turn ‘Auto Adjust Theme’ mode off, you cannot turn it back on. If you mess up your colours, you will need to delete this product from the 'Styles' tab, recreate it, and start again. You can now adjust attribute colours on the Toolbar, Menu Bar, Menu (Mouse Over), Sub Menu Items and Sub Menu Items (Mouse Over) panels. Click the 'Save' button to commit your changes to the database. |
Toolbar
If you choose Option A in Step 1, make the Student Café toolbar transparent by opening the 'Toolbar' panel and checking the 'Transparent' box.
If you chose Option B in Step 1, the 'Auto Adjust Theme Mode' will set your toolbar colour based on your selected 'Theme Menu Colour'. For 'Manual Adjust Theme Mode', select your preferred toolbar colour.
Click the 'Save' button to commit your changes to the database.
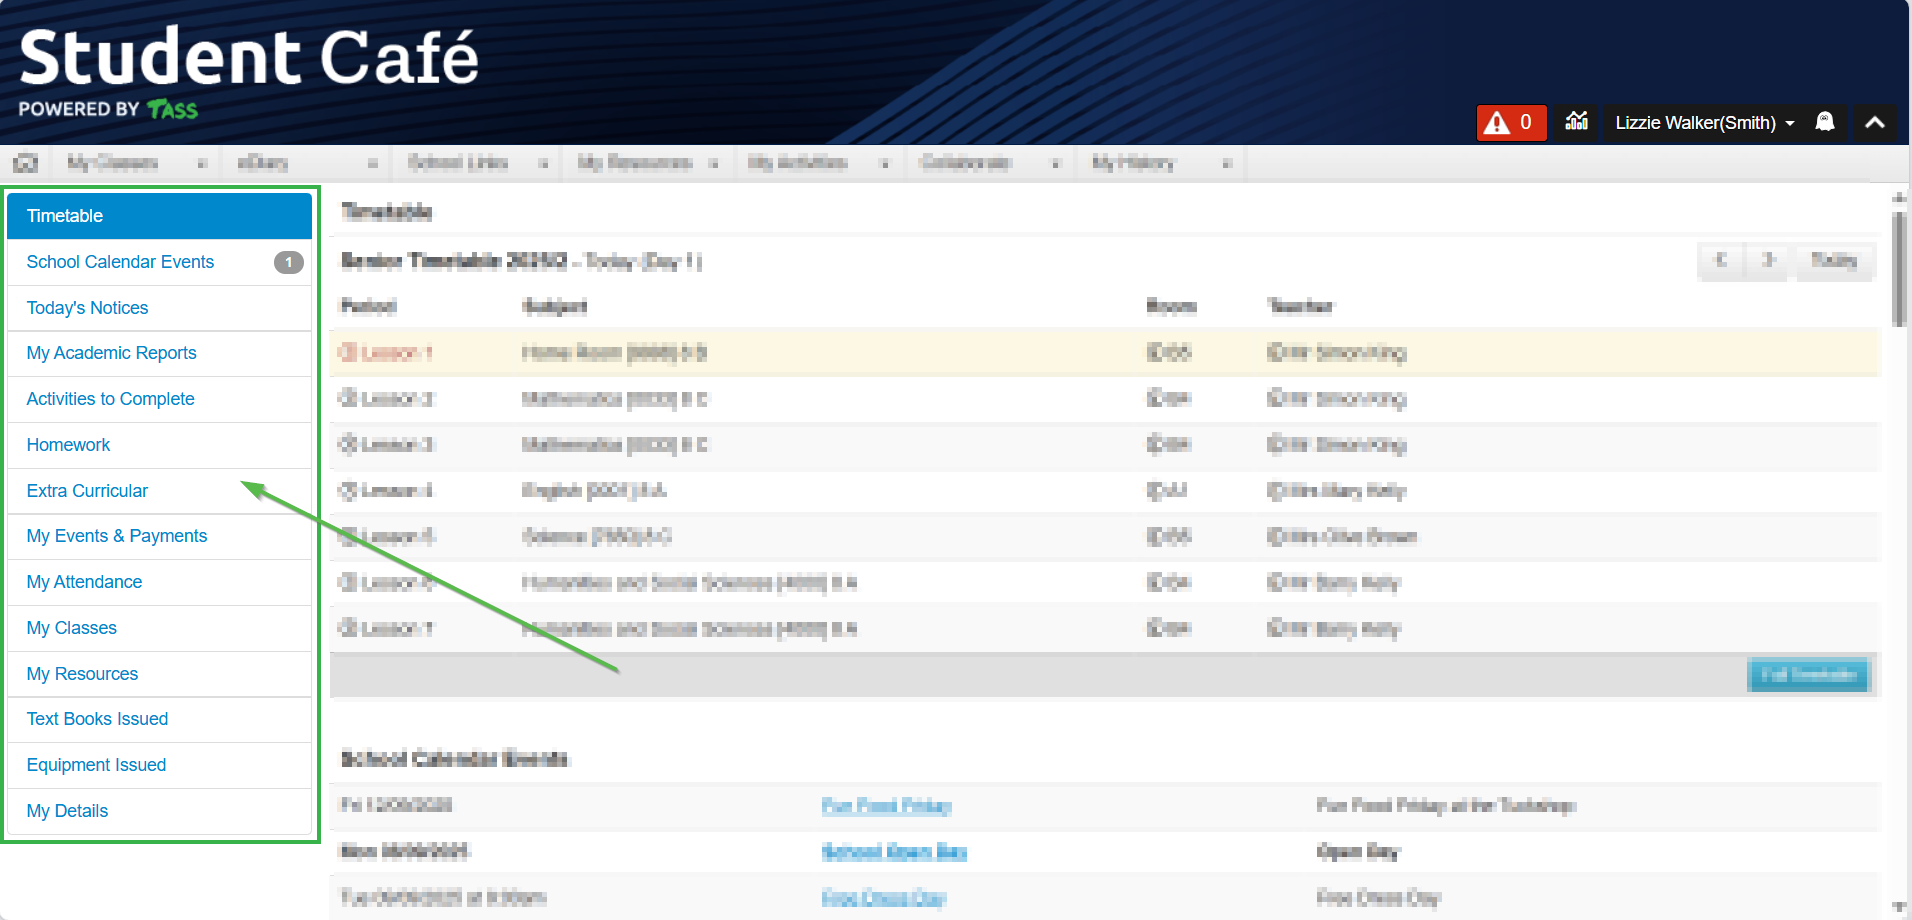
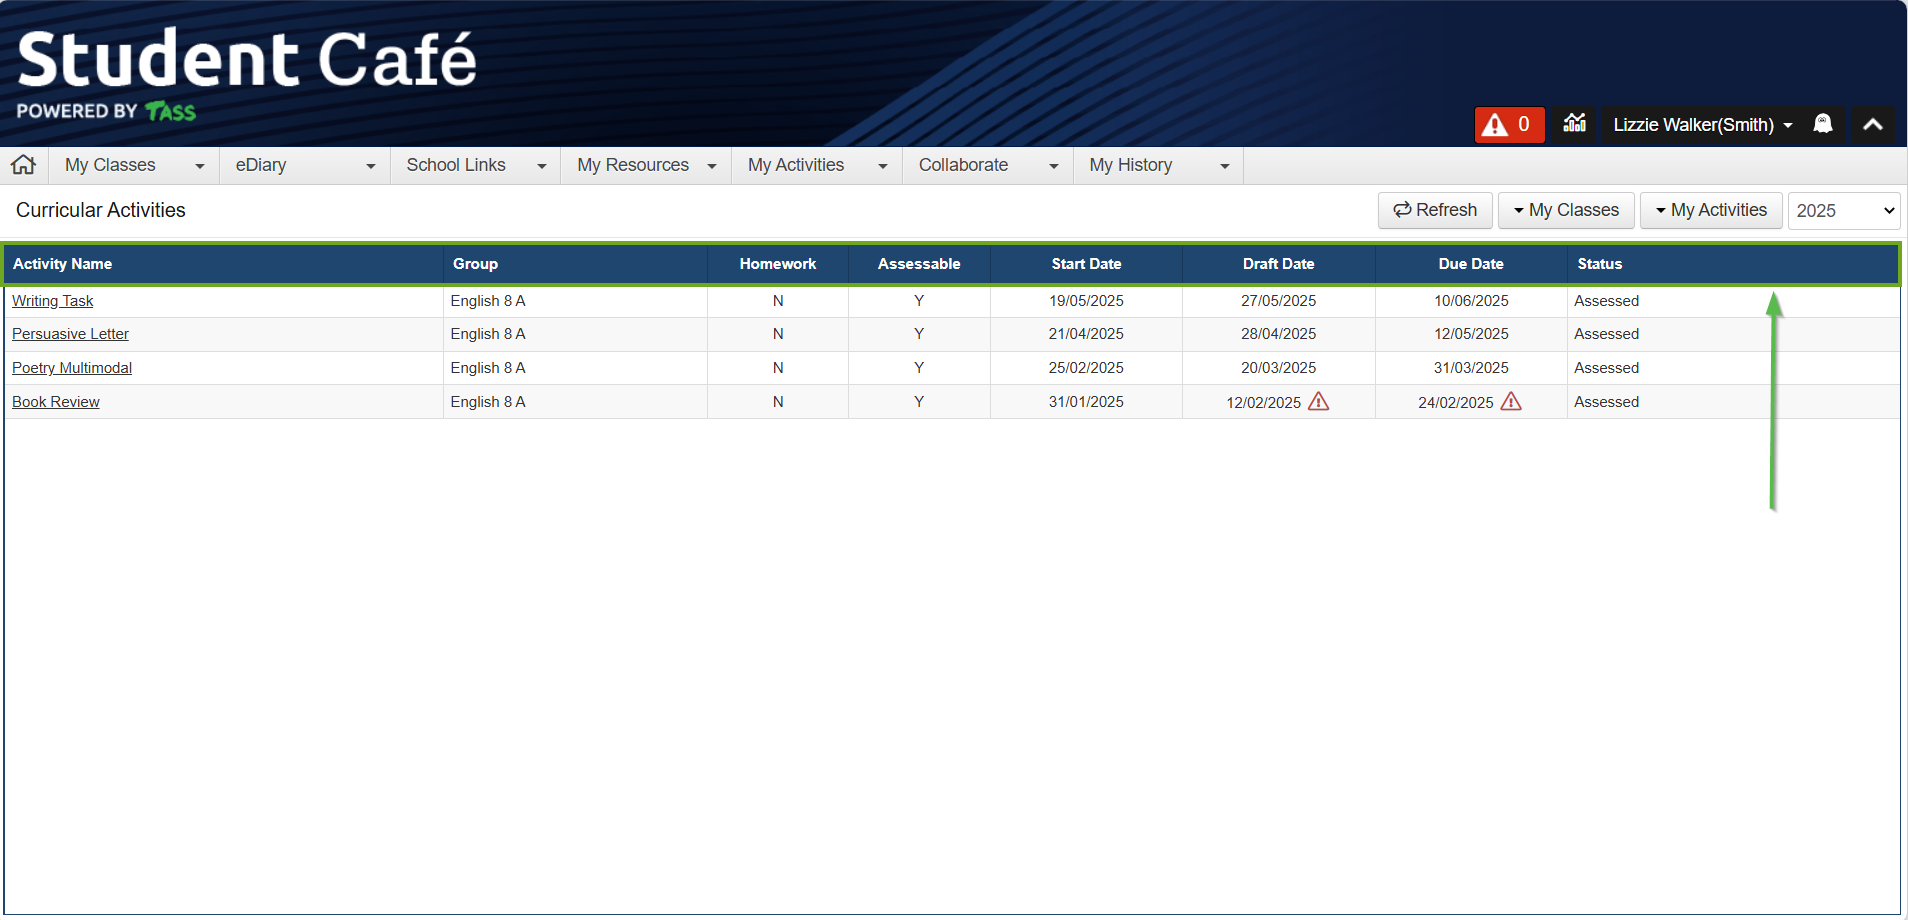
UI Elements
Use the 'UI Elements' panel to set:
Panel Header Background
Panel Header Text Colour.
Click the 'Save' button to commit your changes to the database.
This controls elements in the Student Café user interface, except menus.
Refer to the Student Café examples below to see where these attributes are used.
Example 1
An example of the ‘Panel Header Background’ and ‘Panel Header Text Colour’ on the Student Café Homepage.
These colours are used in various list screens:
Example 2
An example of the ‘Panel Header Background’ and ‘Panel Header Text Colour’ on the Student Café My Activities > Curricular Activities screen:
They are also used in some modal windows:
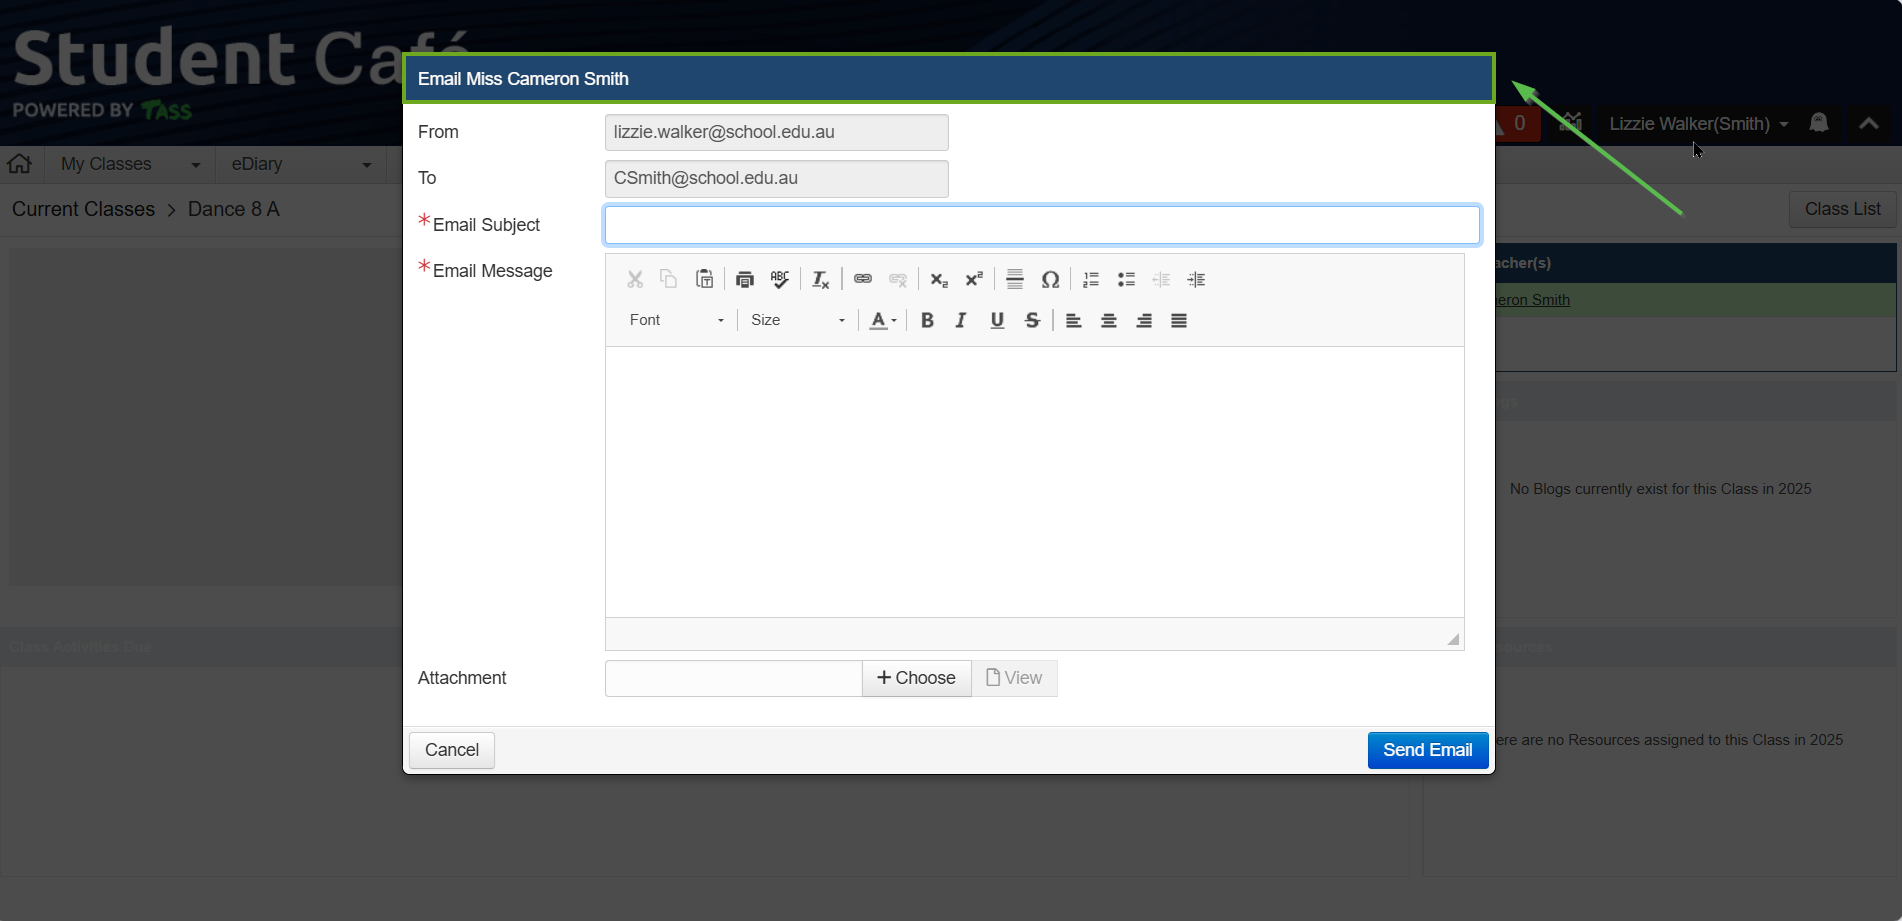
Example 3
An example of the ‘Panel Header Background’ and ‘Panel Header Text Colour’ on the Student Café ‘Email Teacher’ modal screen:
Step 8 : Preview Student Café
Log in to the Student Café as a student via the ‘Ghost Logon’ link in TASS.web Student Admin > Student Records > Student Information > Students on the ‘General’ tab.
Preview your Logo, Banner and/or Styles.
You may need to clear your web browser cache for the page:
On PC, press ‘Ctrl + F5’.
On Mac, press ‘Command + Option + E’.
Select ‘Logout’ from the Profile Name menu in the Toolbar to preview the Student Café login image.