
How to Create a Custom Roll Report in Staff Orbit
Creating a Custom Roll Report in Staff Orbit
Below is a guide for creating a custom roll report in the Staff Orbit app.
Screenshots last updated: 10/03/2026
Step | Instructions | Screenshot | ✅ |
1 | On the homepage, you will see a series of tabs down the bottom of the screen. Tap ‘Students’. | 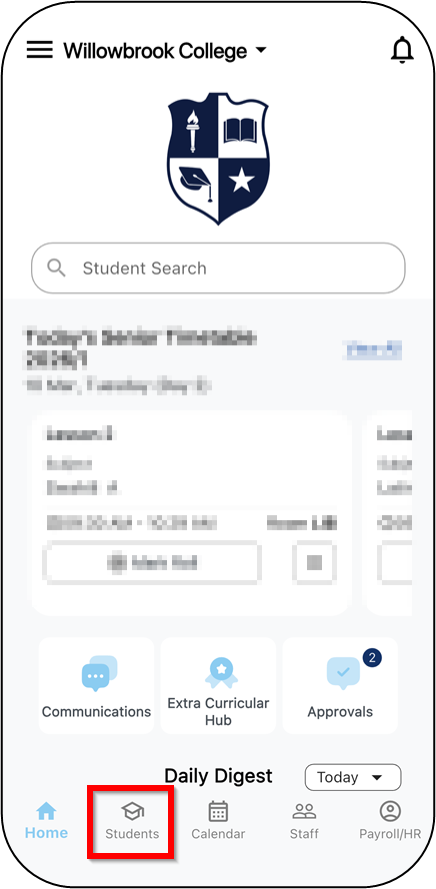 | 🔲 |
2 | On the Students tab, you will see tiles relating to students. Tap ‘Custom Rolls’. | 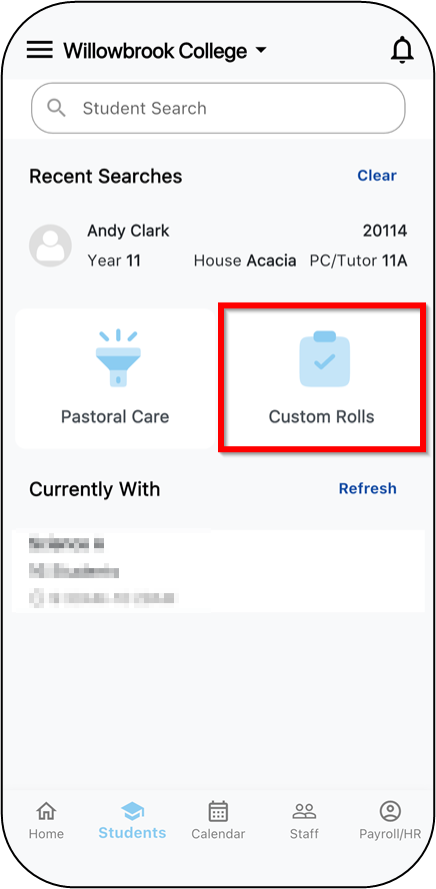 | 🔲 |
3 | On the Custom Rolls screen, you will see three icons in the top right corner. Tap the ‘Save' icon. | 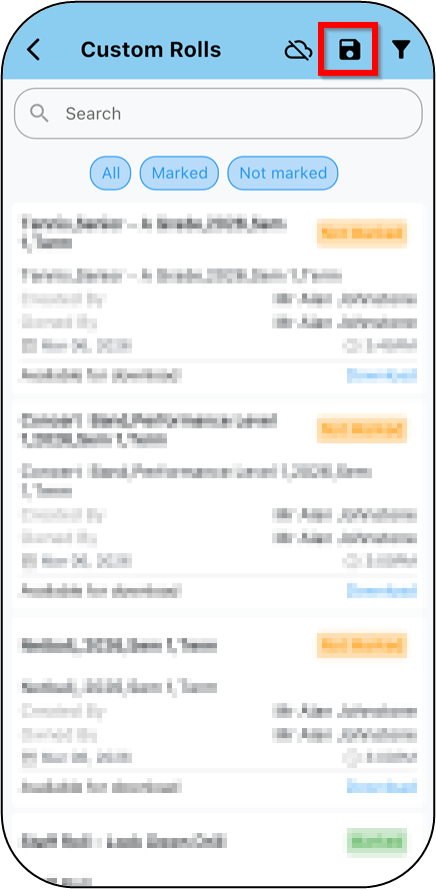 | 🔲 |
4 | To generate a custom roll report, you will need to select a date range for the report. Tap the date at the top of the screen to select a date range. | 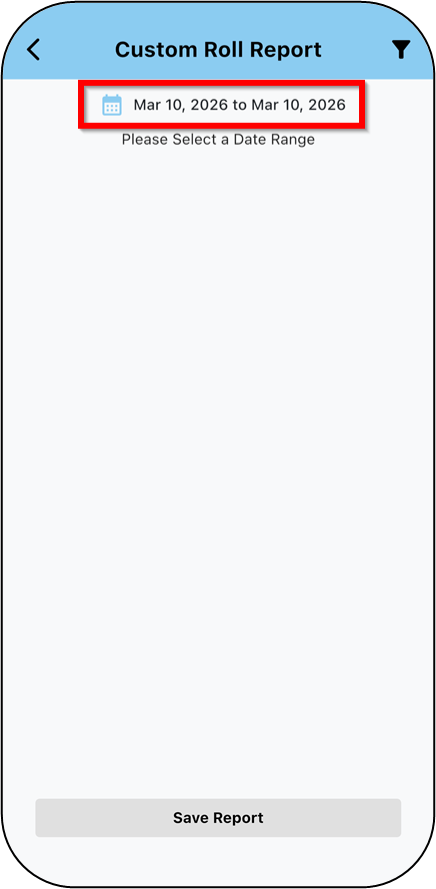 | 🔲 |
5 | Select the date range from the calendar screen or tap the ‘pencil’ icon to type in your chosen date range. Once you’ve selected your date range, tap ‘Done’. In our example, we are selecting 17 Nov - 30 Nov 2025. |  | 🔲 |
6 | Select the group or groups you would like to generate the custom roll report based on, by ticking the checkboxes. Tap ‘Save Report’. In our example, we are selecting Sailing Training. Generated reports will group multiple sessions of the same type together to display attendance statistics. | 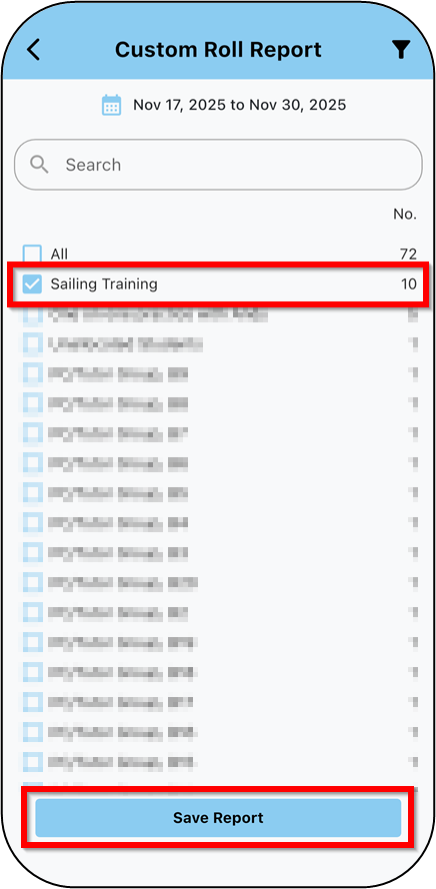 | 🔲 |
7 | You will then be able to choose the file format you would like to save the report as. Tap either ‘PDF’ or ‘CSV’. | 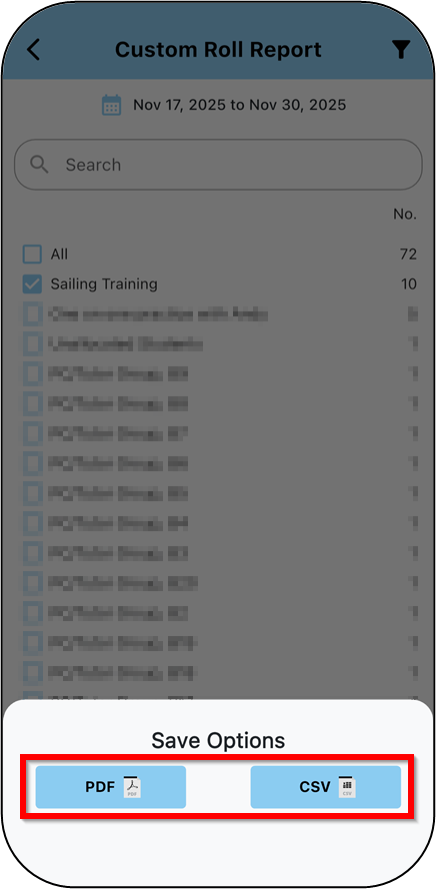 | 🔲 |
8 | You will see the generated report. | 🔲 |